Splice plate bolt nut washer display face – Daktronics Rear-Ventilated GalaxyPro GP3 Series User Manual
Page 13
Advertising
8
Section Splicing
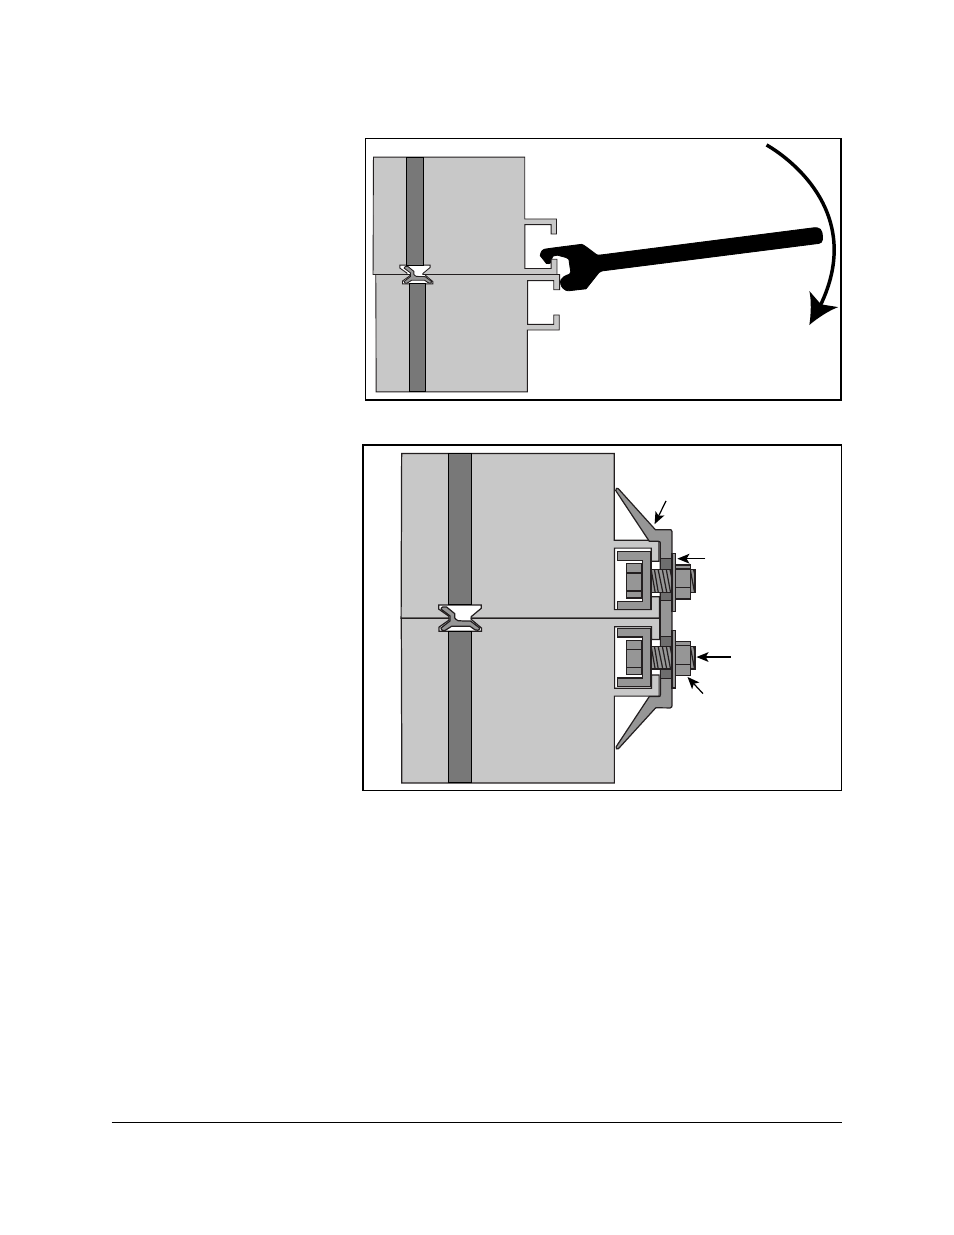
5. Slowly lower the top section until it rests on the bottom section with the splice key engaged.
6. Starting at one end of
the display, use the
splice tool to draw the
top section into the
bottom until the splice
key is fully engaged, as
7. Ensure display
sections are aligned
and that LEDs are also
in alignment.
8. Attach the splice plates
and splice T-clips
along the section
splice, as shown in
Figure 8. Use an
11
/
16
”impact wrench or
ratchet to tighten all
nuts on the splice
plates and splice
T-clips.
Top
Section
Bottom
Section
Figure 7: Pull Display Sections Flush
Splice
Plate
Bolt
Nut
Washer
Display Face
Top
Section
Bottom
Section
Figure 8: Attach Splice Plates and T-clips.
Advertising
This manual is related to the following products: