ELICA GRACE User Manual
Page 19
19
connected to the earth of the domestic electrical plant.
Fig. 4
ATTENTION! Be particularly careful about positioning
the excess cable. Failure to observe this indication could
cause grave damage to the apparatus and/or an electric
shock to the user or the installer. For further details see Fig.
6-17
Warining! Changing the interconnection cable must be
carried out by the authorised technical assistance service.
Mounting
Expansion wall plugs are provided to secure the hood to most
types of walls/ceilings. However, a qualified technician must
verify suitability of the materials in accordance with the type of
wall/ceiling. The wall/ceiling must be strong enough to take
the weight of the hood. Do not tile, grout or silicone this
appliance to the wall. Surface mounting only.
Description of the hood
Fig. 1
H. Interconnection
cable
K. Control
lever
Attention! The control lever is already supplied. It is to
be installed last, before connecting the hood to the
mains.
Insert the control lever into the apposite housing (see
drawings on the first pages of this booklet - triggered
connection, compulsory direction.
L. Halogen bulb
M. Lateral filter holder frame
N. Active carbon filter
O. Metal anti-fat filter
P. Anti-fat and carbon filters holder frame
Q. Filter holder frame releases
Operation
Use the high suction speed in cases of concentrated kitchen
vapours. It is recommended that the cooker hood suction is
switched on for 5 minutes prior to cooking and to leave in
operation during cooking and for another 15 minutes
approximately after terminating cooking.
The hood is equipped with a “TOUCH” device to control the
lights and speed.
For the correct use please carefully read the intructions below.
The cooker hood can be controlled through a remote control
available as accessory kit (see the paragraph relating to the
functioning of the remote control).
Automatic start-up function
The hood is equipped with a temperature sensor which
activates the motor to the first suction speed (power) in the
event that the room temperature in the surrounding area is
higher than 70°C.
The user may switch off or modify the suction speed (power)
(see paragraph “suction speed (power) control”).
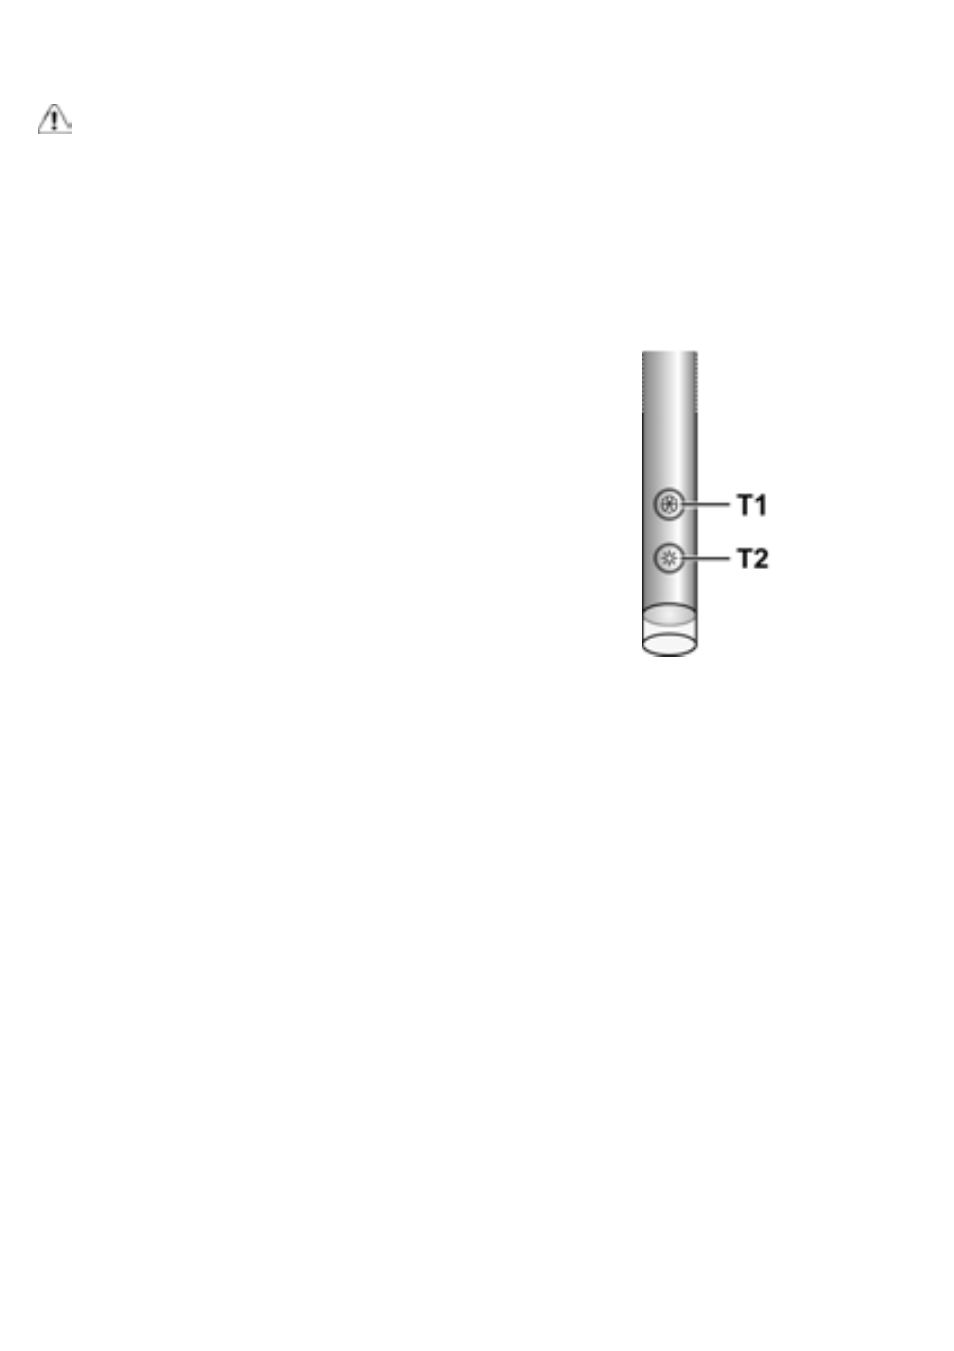
Suction speed (power) control
The suction speed (power) is cyclical depending on the speed
sequence “stand-by – 1-2-3-4- Stand by -1-2-...” therefore
every time the T1 button is pressed on the control panel, the
suction speed (power) is increased by one level, in order to
switch off (stand-by) if the button is pressed again when the
hood is in suction speed (power) 4.
The hood may be switched off (stand-by) while the hood is set
on any speed by holding down the T1 button on the control
panel for a bit longer (more than 3 seconds).
The hood's suction speed (power) may be determined as the
control panel is equipped with a LED light that changes colors
as follows, depending on the suction speed (power):
Hood in stand-by: LED LIGHT SWITCHED OFF
1st suction speed (power) -GREEN LED LIGHT
2nd suction speed (power) – ORANGE LED LIGHT (amber)
3rd suction speed (power) - RED LED LIGHT
4th suction speed (power) - RED LED LIGHT (FLASHING)