EM Acoustics i-1 ultra-compact satellite loudspeaker User Manual
Page 9
9
i-Series User Manual
www.emacoustics.co.uk
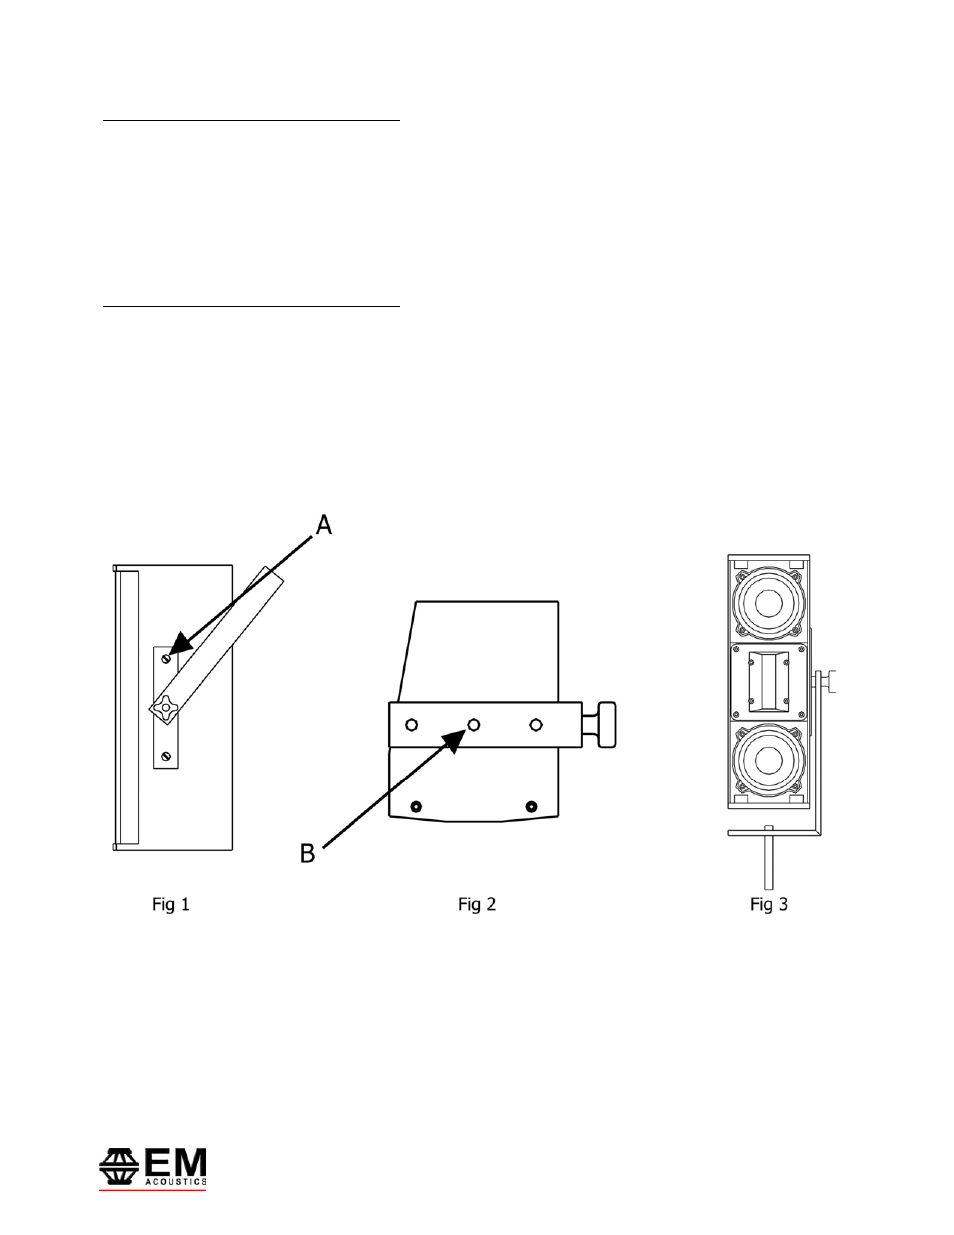
Attachment and Adjustment of the YK-i1 yoke
The i-1 ships with the YK-i1 yoke attached in the normal operating plane. Should you wish to rotate the yoke (for
example to utilise the trapezoidal enclosure shape to fit the i-1 closer into a corner), remove the two countersunk
M5 machine screws in the enclosure, and remove the M5 socket-head bolts holding the yoke in place. The yoke
can then be rotated and the bolts reinstated in the alternative points. Ensure to reinstate the countersunk bolts
into the unused holes, otherwise the enclosure will leak.
Attachment of the YK-i2 vertical hanging yoke
Using a flat-blade screwdriver, remove the two M8 countersunk bolts on the flat side of the enclosure (marked “A”
in Fig 1). Position the YK-i2 mounting plate over the two holes, reinstate the bolts and tighten securely. There are
three hole positions for an attachment device in the top of the yoke (marked “B” in Fig 2). For permanent
installation, these can be used to fix the YK-i2 directly to a surface. For temporary installation, a standard hook
clamp is recommended. Attach this clamp or other suitable device using an M10 bolt, nut and washer set. The i-2
can now be securely suspended and oriented as required. By rotating the YK-i2 through 180 degrees, it can be
used to allow down-tilt or up-tilt when using a microphone stand (Fig 3).