Introduction, Basics & installation – ESI SW10K eXperience User Manual
Page 4
ESI SW10K
eXperience
4
1. Introduction
Congratulations on your purchase of the ESI SW10K eXperience.
A subwoofer is an essential ingredient for many monitoring setups. Although many studio monitors
such as our nEar04, nEar06, nEar05 eXperience or nEar08 eXperience provide sufficient bass
frequency response, adding a SW10K eXperience subwoofer will help you to provide a better
picture of the low frequencies in your mix. Wheather you are producing classical 2.1 sound or 5.1 /
7.1 surround sound productions, SW10K eXperience will easily become an important part of your
monitoring setup.
2. Basics & Installation
For optimal performance of SW10K eXperience, read the instructions in this manual thoroughly
and carefully before you are using the speakers.
Unpacking / Handling
To remove the monitor from the carton its best to turn the package carefully upside down on the
floor or on a table and then lift the carton vertically up slowly to leave the monitors resting in the
packaging foam. Make sure that you don’t grab the speaker driver unit on the front to avoid
damage. Now check the monitor for signs of damage that might have occurred in shipping. In the
unlikely event of this, please contact the reseller of the product immediately. Be careful when you
remove the packaging foam. Please keep all packing materials.
Connection
High quality balanced or unbalanced audio cables are recommended for input connection. The
monitors typically connect to the line level output of a mixing console, to a computer audio card or
a professional bass management amplifier. Make sure the power of the monitor is switched off
before you connect any audio cables. Also turn down the volume initially.
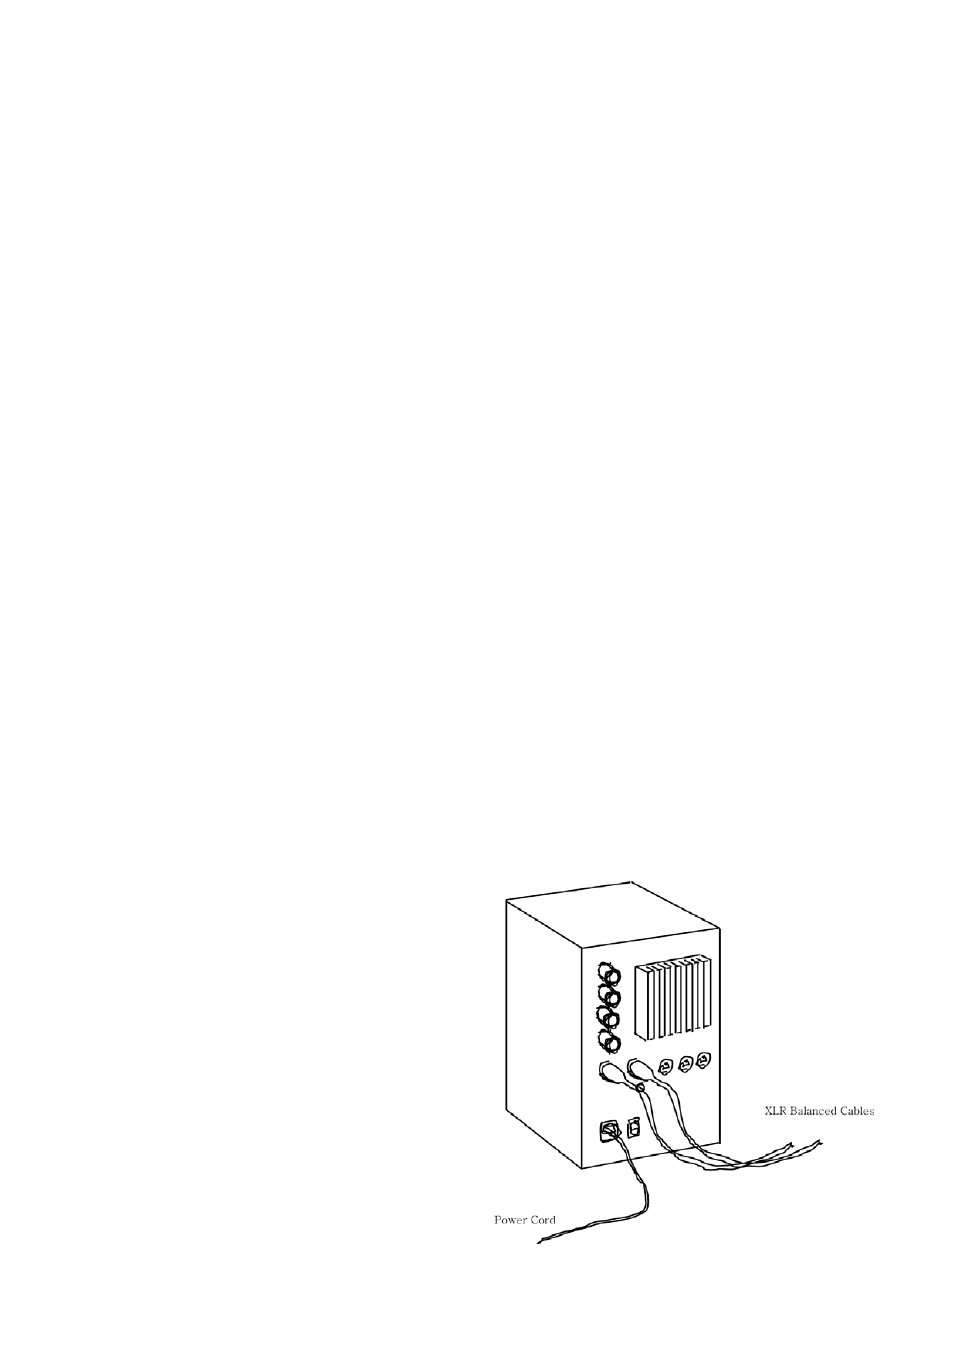
XLR balanced connection
Connect male side of XLR balanced cables to the
balanced inputs of SW10K eXperience – as show
on the picture on the right. Make sure the power
cable is connected as well.