Keypad slide-in labels, Button layout and default configurations, Configurable push buttons – GAI-Tronics 727-001 Desktop Access Panel User Manual
Page 6
Pub. 42004-690L2C
Model 727-001 Desk Set Access Panel
Page 6 of 10
f:\standard ioms - current release\42004 instr. manuals\42004-690l2c.doc
03/13
Keypad Slide-In Labels
To install the keypad slide-in labels, proceed as
follows:
1. Separate the slide-in labels along the perforated
lines on the sheet.
2. Fold the tab at the end of the slide-in label so
that it is perpendicular to the reset of the label.
3. Slide the label into the appropriate slot opening
located at the top of each of the button columns.
4. Repeat the above steps for the remaining labels.
To replace the keypad slide-in labels, proceed as
follows:
1. Locate the tab at the top of the label and pull it
out from behind.
2. Slide label out using the tab that has been
exposed.
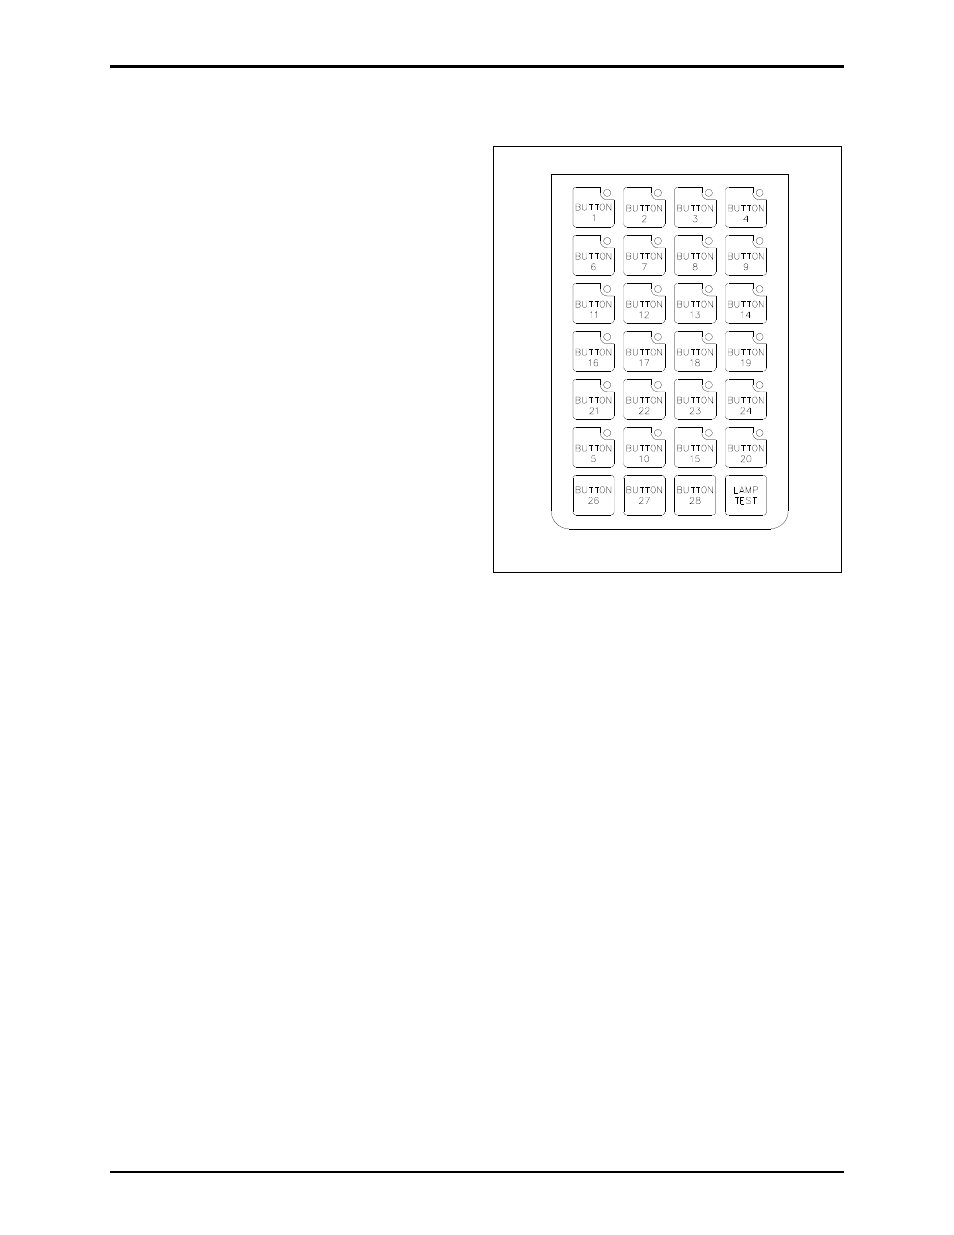
Button Layout and Default Configurations
For units to be used without a docking station, all buttons and 24 LEDs are available for use.
For units being used with a docking station:
ACK/NEXT button should be configured as button #26 and LED #20.
PREV button should be configured as button #27.
N
OTE
: LED #20 on the desk-set keypad will flash when the ACK/NEXT button on the docking station is
flashing, unless it is disabled.
Configurable Push Buttons
The 27 configurable push buttons can be configured for the following functions:
Initiating voice pages and alarms
Selecting zones
Routing voice pages and alarms
Selecting and resetting alarm and fault condition messages
Acknowledging system status
Selecting party lines
Activating relay groups
Figure 4. Button Layout