Install the casters, Install the compactor, Optional) – Gladiator GACP15XXMG Garage Compactor User Manual
Page 6
6
Install the Casters
(optional)
IMPORTANT:
■
Do not grasp control panel to move compactor.
■
Slide compactor onto cardboard or hardboard before moving
compactor across floor to prevent damaging floor covering.
■
Do not allow the rear frame of the compactor to touch the floor
covering when lifting or moving compactor.
Assemble Caster Frame
1.
Locate included caster frame. Set it on the floor with the lip
facing down.
2.
Install the (2) swivel casters to the back (closed end) of the frame
assembly with (4) bolts and nuts.
3.
Install the (2) fixed casters to the front (open end) of the frame
assembly with (4) bolts and nuts.
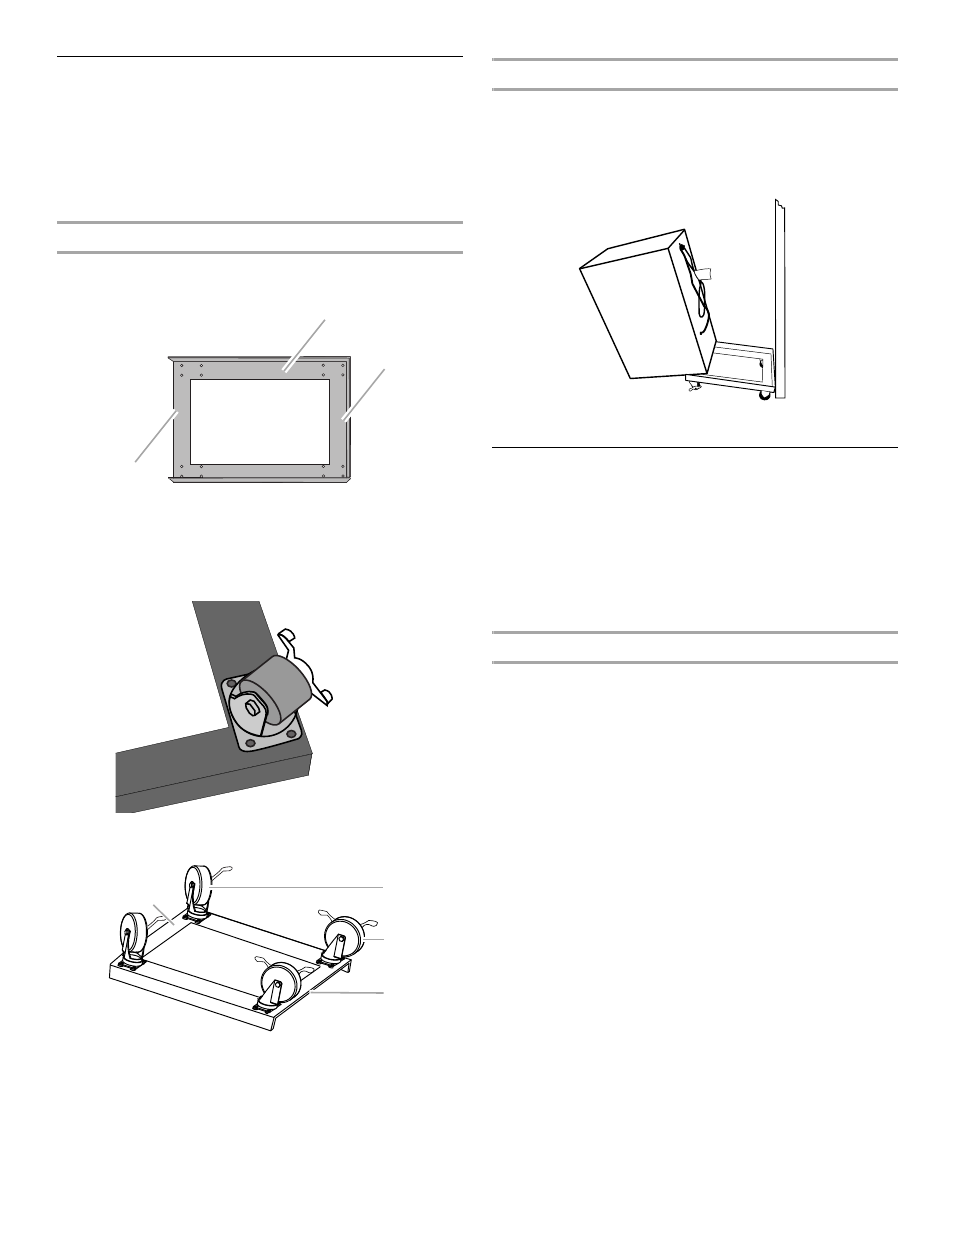
Install Compactor On Caster Frame
1.
To keep the caster frame from moving during the initial
installation, block the wheels or place frame against a wall.
2.
Lock the back casters in place by pushing the locks down.
3.
Tilt the back of the compactor forward and push the compactor
up onto the caster frame assembly over the open end of the
frame.
4.
Slide the compactor all the way back until it touches the back lip
of the caster frame assembly.
Install the Compactor
IMPORTANT: Do not grasp control panel to move compactor.
1.
Move the compactor to its final position.
2.
Grasp sides of compactor drawer and place bottom of drawer
into tracks.
3.
Lift at the handle so drawer will go over drawer stops.
4.
Close the drawer.
5.
Check that drawer opens freely. If the toe plate rubs against floor,
see “Adjusting the Toe Plate” for further instructions.
6.
Plug into a grounded 3 prong outlet.
Adjusting the Toe Plate
If the toe plate rubs the floor covering, the toe plate clearance may
be changed as follows:
1.
Mark on each side of the toe plate the amount of toe plate that
rubs the floor covering.
2.
Remove the drawer from the unit. See Step 3 in the “Unpacking”
section.
3.
Use a ruler and a pencil or chalk to draw a line between the
marks on each side of toe plate.
4.
Use scissors or utility knife to cut toe plate along line.
5.
Replace drawer. If toe plate still rubs floor covering, repeat steps
1 through 4.
A. Caster frame
B. Closed end of caster frame (with lip)
C. Open end of caster frame (without lip)
A. Swivel casters
B. Fixed casters
C. Open end of frame assembly
D. Closed end of frame assembly
A
B
C
A
C
D
B
Wall