HOT GRIPS 123 (3 Wire grip) User Manual
HOT GRIPS Hardware
3-16-2015
Installation Instructions for Model #123 -Only for Snowmobiles or ATVs
This model has three (3) wires for each grip. They can be used as a direct replacement on any Ski-Doo,
Polaris, or Arctic Cat machine that originally came fitted with a 3-wire 12 volt heated grip, although wire
colors may NOT match, we explain later.
NOT for Yamaha snowmobiles
because they use 18v for heated
grips but can be used on Yamaha ATVs if they offer 12 volts. Can be used on any ATV brand with 7/8" bars
and a thumb-throttle.
HOT GRIPS® Manufactured under one or more of the following Patents: USA: 4,471,209 4,937,429 4,990,753 and
Canada 1,299,621 additional Patent Pending.
Read through entire instructions before starting installation. If you can NOT comfortably
install this product, hire a professional mechanic to do it.
Hot Grips® model # 123 can be installed on
any snowmobile with 7/8" handlebars and a 12 volt electrical system capable of powering a headlight. It must have a
thumb-throttle, NOT a twist throttle. Some electrical systems can NOT handle the power requirements of heated grips
and the headlights at the same time.
Twist throttle: If you have modified your sled's thumb-throttle to a motorcycle twist- throttle, then
you must use one of our motorcycle HOT GRIPS® kits instead. The difference with the motorcycle
kits is that the twist throttle grip's inside diameter is 1.000" diameter instead of .875" and the shape
of the grips inboard end is different, adding more inboard rubber cushioning for your hand, a
characteristic typical of motorcycles.
Each grip is 100% (NOT lot sample tested) pre-tested at the factory for correct resistance in ohms, but you
can pretest the grips too, using a volt-ohm-meter .
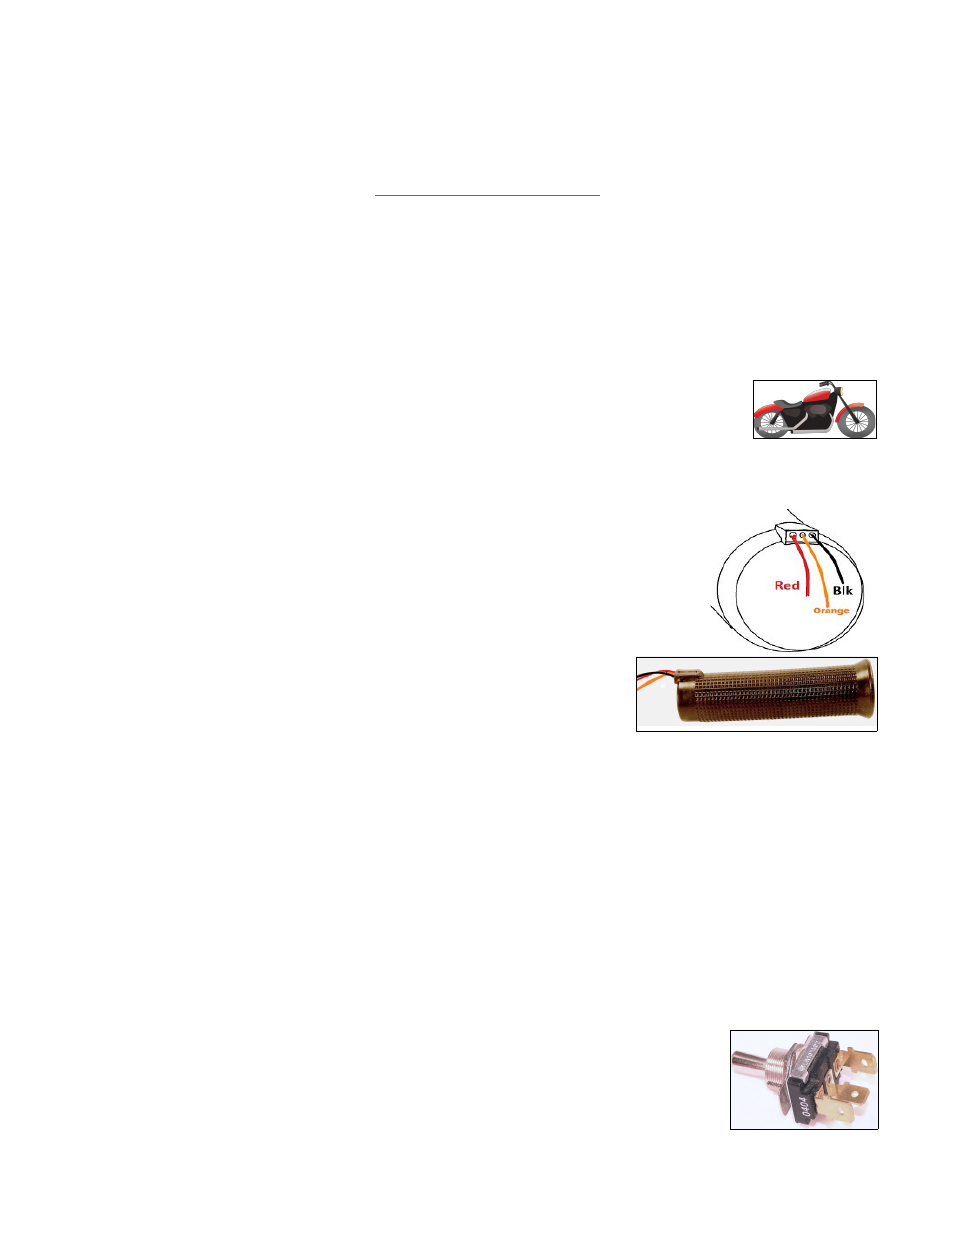
IDENTIFYING GRIP WIRES: With a grip’s wires aiming at you and at 12 o'clock, the right
wire is Black and is your common GROUND. The middle wire is
Orange
LOW, left wire is
Red
HIGH
You can measure their resistance in ohms:
Black
= ground common wire
Orange
= low heat. Orange to black = approx. 14.5 to 15 ohms.
Red
= high heat. Red to black = approx. 9 to 10 ohms
You may temporarily wire the grips and briefly test on a 12 volt car battery. Do
NOT leave them unattended, and do NOT heat them up for more than a few
minutes, because without the heat sink effect from the metal handlebars, they
may be damaged.
PREPARATION: Remove old grips & factory adhesive residue on bars with solvent or with edge of a coarse metal
file. Roughening the last 5 inches of your handlebars with coarse sandpaper or the edge of a steel file, will improve
epoxy bonding.
Check grip slides on with little or no force. It is designed to be a loose fit, to have the gap filled with the epoxy. If it is
NOT a loose fit, do NOT force the grip on or you may break it. If force is required then your handlebar diameter isn't
7/8" (.875") and must be filed or abrasively ground down until the grip fits on without force. Some metric handlebars
we have seen are up to .020" diameter oversize. If needed now drill the center-end of one of the grips with any size
small drill bit, to allow the air in the handlebars to escape as the 2
nd
grip is installed.
Test fit the grip first on the handlebar without epoxy to ensure that the positioning of it does NOT interfere with the
machine’s controls or thumb-throttle. A full length pencil is helpful as a tool to spread well-mixed epoxy inside the grip
interior, and on the handlebar. Use a very light coat, and push the grip on 75% and remove, then redistribute the
epoxy with the pencil and remove excess. Then install grip 100%, and again remove any excess epoxy on the
inboard end. Again be sure the grips do NOT interfere with any of the handlebar controls or the thumb-throttle lever.
Allow to fully cure per the epoxy's instructions, OR BETTER YET quicken the cure by
temporarily wiring thru-out it's movement.
Orange
= low heat.
This is a better technique
because then epoxy will cure in an “expanded state” improving the tight bond. Cure them on
“LOW” heat only. The epoxy will set up firm in 20-40 minutes. Allow grips to cool off, and test
epoxy for hardness at inboard edge where it oozed out. Do NOT twist the grip to test the epoxy
as it is curing, as this will compromise and weaken the epoxy bond.