Benchtop router table assembly instructions – Kreg PRS2100 Precision Benchtop Router Table User Manual
Page 5
Benchtop Router Table Assembly Instructions
4.
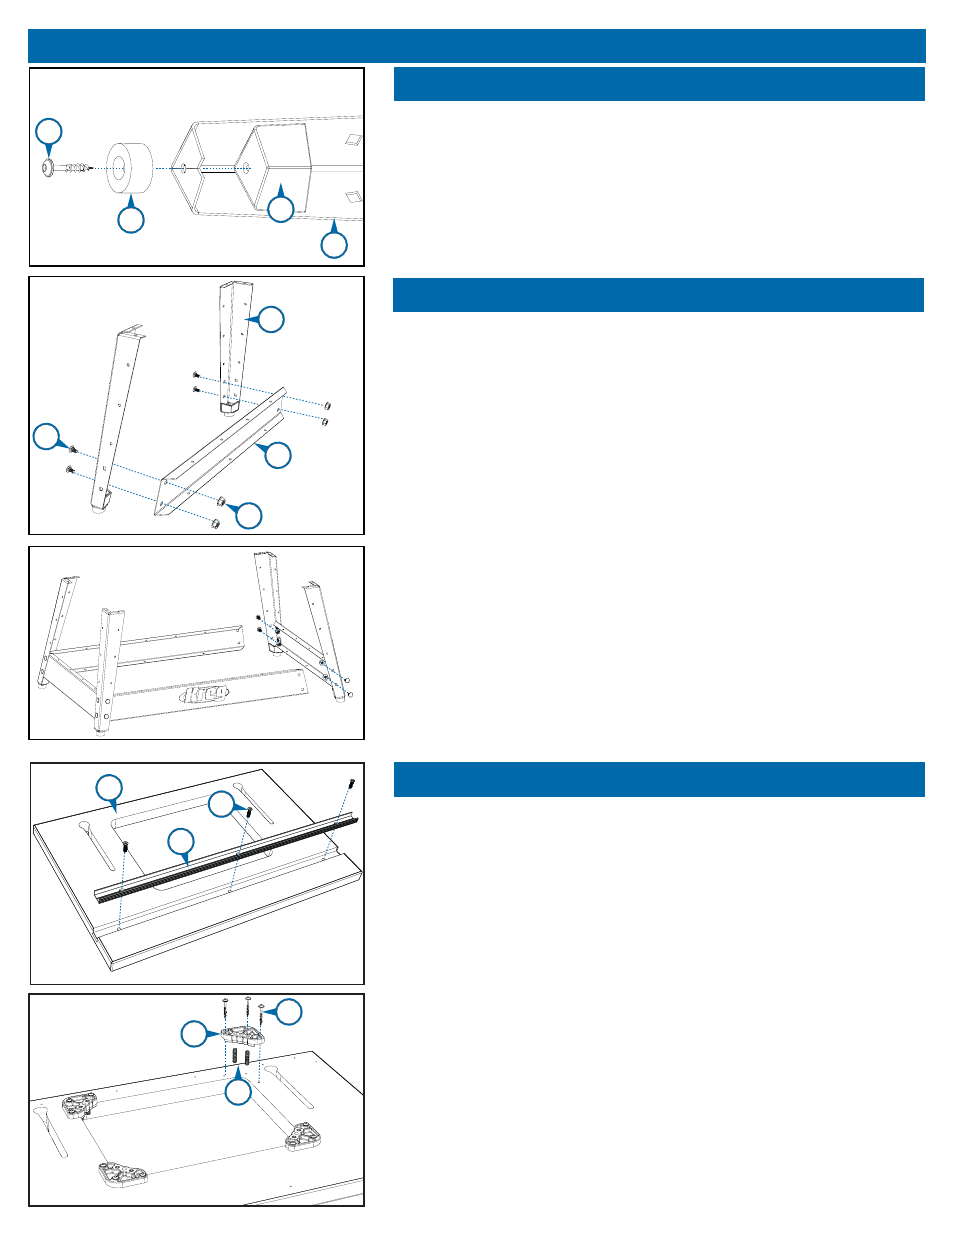
Step 1
Open inner-pack box RT10180-2 and remove the legs (#1) and hardware
pack. On each leg, insert a 1" coarse-thread screw (#2) through a rubber
foot (#3), through the hole in the bottom of each leg, and then drive the
screw into the foot support (#4) pilot hole. Be careful not to strip out the foot-
support pilot holes by over-tightening the screws.
Step 2
Open inner-pack box RT10180-1 and remove the short rails (#5), long rails
(#6)
, and braces (#7). Bolt a short rail to each pair of legs (#1) using four
¼-20 x ½" fl athead carriage bolts (#8) and four ¼" fl ange hex nuts (#9) per
rail. At this time, only fi nger-tighten the nuts.
Now join the leg/short rail assemblies by bolting the long rails to the legs.
Again, only fi nger-tighten the nuts.
Step 3
The table top (#10) is shipped with the miter track (#11) in place, but not
fastened. Secure the miter track with three 5mm fl athead screws (#12),
driving them into the pre-drilled holes in the table top.
Place the table top upside down on your work bench and position an insert-
plate leveler (#13) in each corner of the opening in the table top, mating
the curve on the raised portion of the leveler with the radius corner of the
opening. The holes in the leveler align with pilot holes in the table-top.
Fasten each leveler to the tabletop with three 1¼" coarse-thread screws
(#14)
.
Using the ⅛" hex wrench (#15), drive a ¼-20 x 1½" socket-head set screw
(#16)
into the outside holes in each leveler, threading them in from the
bottom until the tips are ⅜" below the table surface.
2
3
1
4
1
5
9
8
10
11
12
13
14
16