Kreg PRS1025 Precision Router Table Top User Manual
Page 6
Assembly
1
Place the insert plate (11) on your workbench with the front edge
facing you and the target pattern facing up. Center your router base
on the insert-plate target pattern. Adjust the router orientation to provide
easy access to the controls when the router and plate are installed in
your router table. Make an index mark on the router sub-base and the
insert plate.
Mount your router to the insert plate
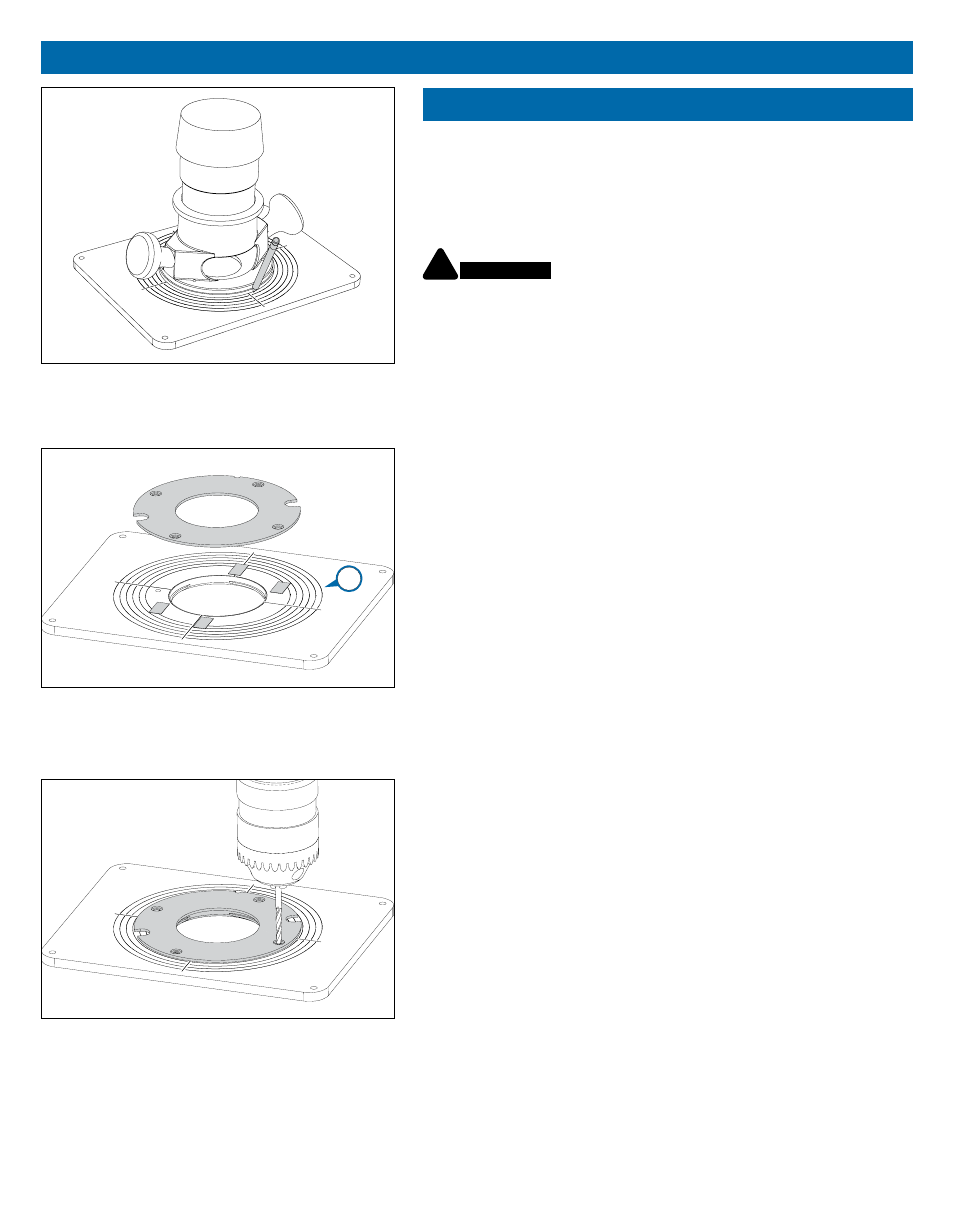
2
Remove the sub-base from your router and select a drill bit that fi ts
the mounting holes. For routers equipped with a built-in lift system,
also select a bit that fi ts the lift-access hole. Apply several small pieces of
double-faced tape to the insert plate. Center the sub-base on the plate,
using the target pattern as a guide and aligning the index marks. Make
sure that none of the sub-base holes interfere with the threaded hole for
the start pin. Press the sub-base fi rmly onto the insert plate.
3
Using the holes in the sub-base as guides, drill the holes in the
insert plate. For best results, use a drill press. Remove the sub-
base from the insert plate. Flip the plate over and countersink the
mounting holes.
4
Attach the router base to the insert plate, using the screws that
were used to attach the sub-base to the router base. Make certain
that the screws are long enough to fully thread into the router base.
Depending on the thickness of your router sub-base and the type of
screw head, it may be necessary to purchase different screws. For
fi xed-base routers, install the motor unit in the router base.
11
!
ATTENTION
To view a free video that shows you how to drill your
insert plate, go to www.kregtool.com. You also can have Kreg do the drilling
for a fee. For complete information, go to www.kregtool.com/plateprogram.