Kreg PRS1025 Precision Router Table Top User Manual
Page 7
Assembly
2
Thread the set screw (13) into the bottom of the starting pin (14)
and tighten the assembly with a screwdriver and the hex wrench (9).
When ready for use, thread the starting pin assembly into the threaded
hole in the insert plate.
!
ATTENTION
When using the Kreg Precision Router Table Fence
PRS1015 on your router table, store the starting pin in the threaded hole
at the rear of the clamp block.
1
Place the insert plate with attached router in the table-top opening,
resting it on the plate leveler set screws. Using the hex wrench
(9)
, adjust the set screws from under the table to align the plate and the
table surfaces. Make sure all eight set screws are in equal contact with
the insert plate. Fasten the insert plate to the levelers with the machine
screws (12). Some adjustment of the machine screws and set screws
may be necessary to fi ne-tune the plate alignment.
Install the insert plate
2
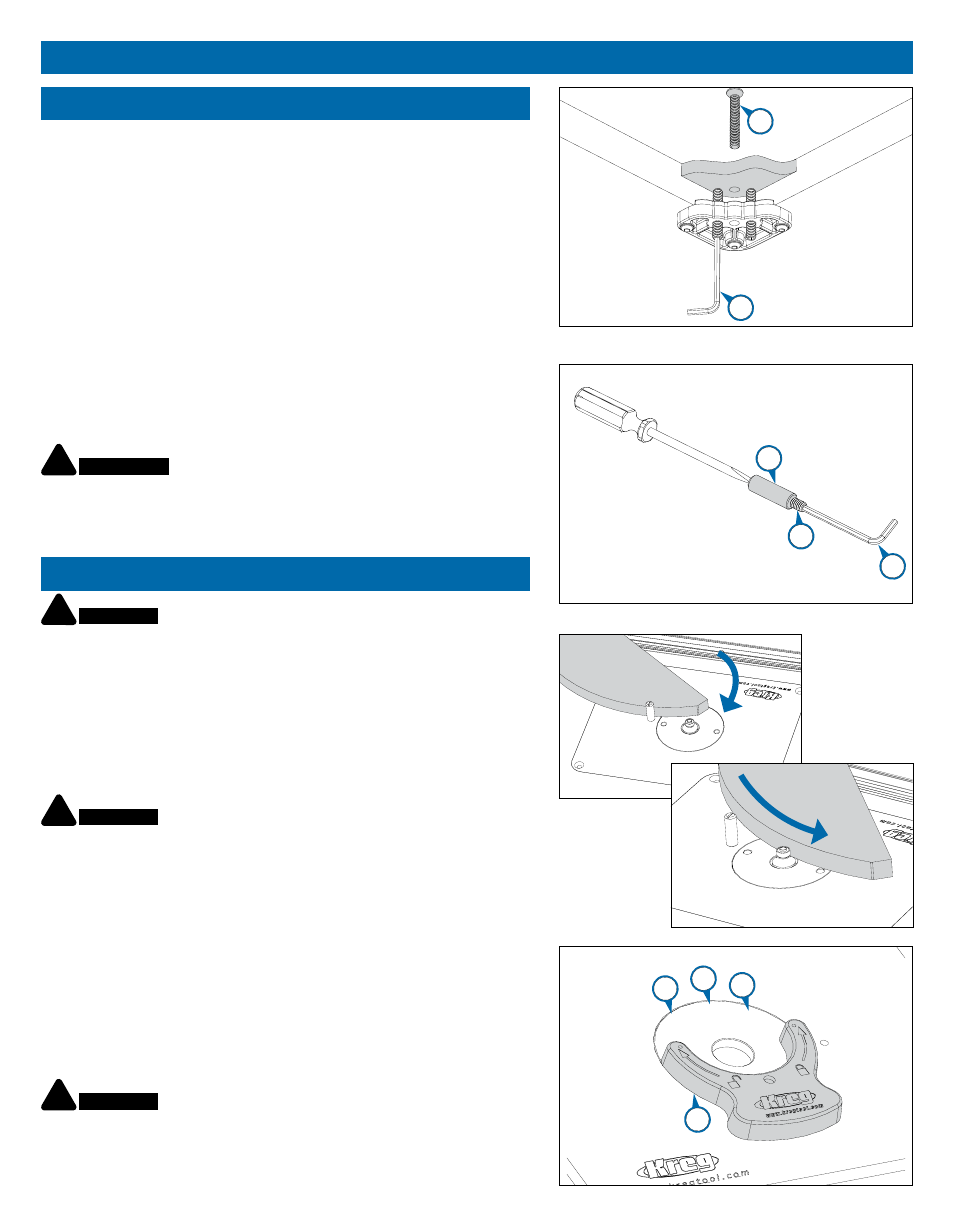
The reducing rings (15, 16, 17) provide fl exibility in matching the
size of the insert-plate opening to the diameter of the router bit in
use. The ring with the rabbeted opening accepts universal-style guide
bushings for use in pattern routing. To install a reducing ring, place it in
the insert-plate opening and turn it by hand until it drops fl ush with the
plate surface. Rotate the ring counterclockwise with the ring wrench (18)
to lock the ring in place.
1
To use the starting pin, begin with your workpiece touching the pin,
but not in contact with the router bit. Slowly pivot the workpiece
into the bit until the workpiece makes contact with the bit guide bearing.
Always feed the workpiece so the router bit rotates against (not with) the
feed direction. With the workpiece in solid contact with the guide bearing,
ease the workpiece off of the starting pin and feed the workpice along
the guide bearing.
Using Your Router Table Top
!
WARNING
Disconnect the router from power before making
adjustments, or installing or removing accessories.
!
WARNING
Use the starting pin when routing along curved edges
and only with router bits that have a guide bearing. When routing along
straight edges, always use the fence.
!
WARNING
Always use the reducing ring with the smallest
possible opening.
9
12
13
14
15
16
17
or
or
18
9