Measurement Computing DAQLog Quick Start User Manual
Daqlog quick start
Revision 2, April, 2012
DAQLog Quick Start
Install the software and hardware
Complete the following steps to install DAQLog and your LGR-5320 Series device.
1.
Install DAQLog from the DAQLog CD.
2.
Insert the blank SD card that came with your DAQLog device into the SD card slot on the device.
3.
Connect the external power supply to the power connector on the device, and connect the device to a
USB port.
4.
Connect channel 0 of the device to an analog signal source so the device acquires data in single-ended
mode.
5.
Remove any other SD, SDHC, or flash drives that are installed in your computer.
Run DAQLog and add the SD card
Complete the following steps to run DAQLog and add the SD card.
1.
Select
Start»All Programs»Measurement Computing»DAQLog»DAQLog
to run DAQLog.
2.
Click
Add SD card
on the toolbar.
3.
Click
Continue
in the first
SD Drive Selection
dialog box.
4.
Click
OK
in the next
SD Drive Selection
dialog box.
5.
The SD card displays in the
SD Drives
pane.
Configure a settings file
Complete the following steps to create a settings file on the SD card that configures a LGR-5320 Series
device to acquire analog data.
Make sure the SD card is selected in the
SD Drives
pane
1.
Click
New Settings File
on the toolbar to open the
Configuring Logging Session
dialog box.
2.
In the
Settings Target
list, select the device to configure.
3.
Enter
example
in the
Name
field, and click
Next>>
to open the
Configuring Analog Inputs
dialog
box.
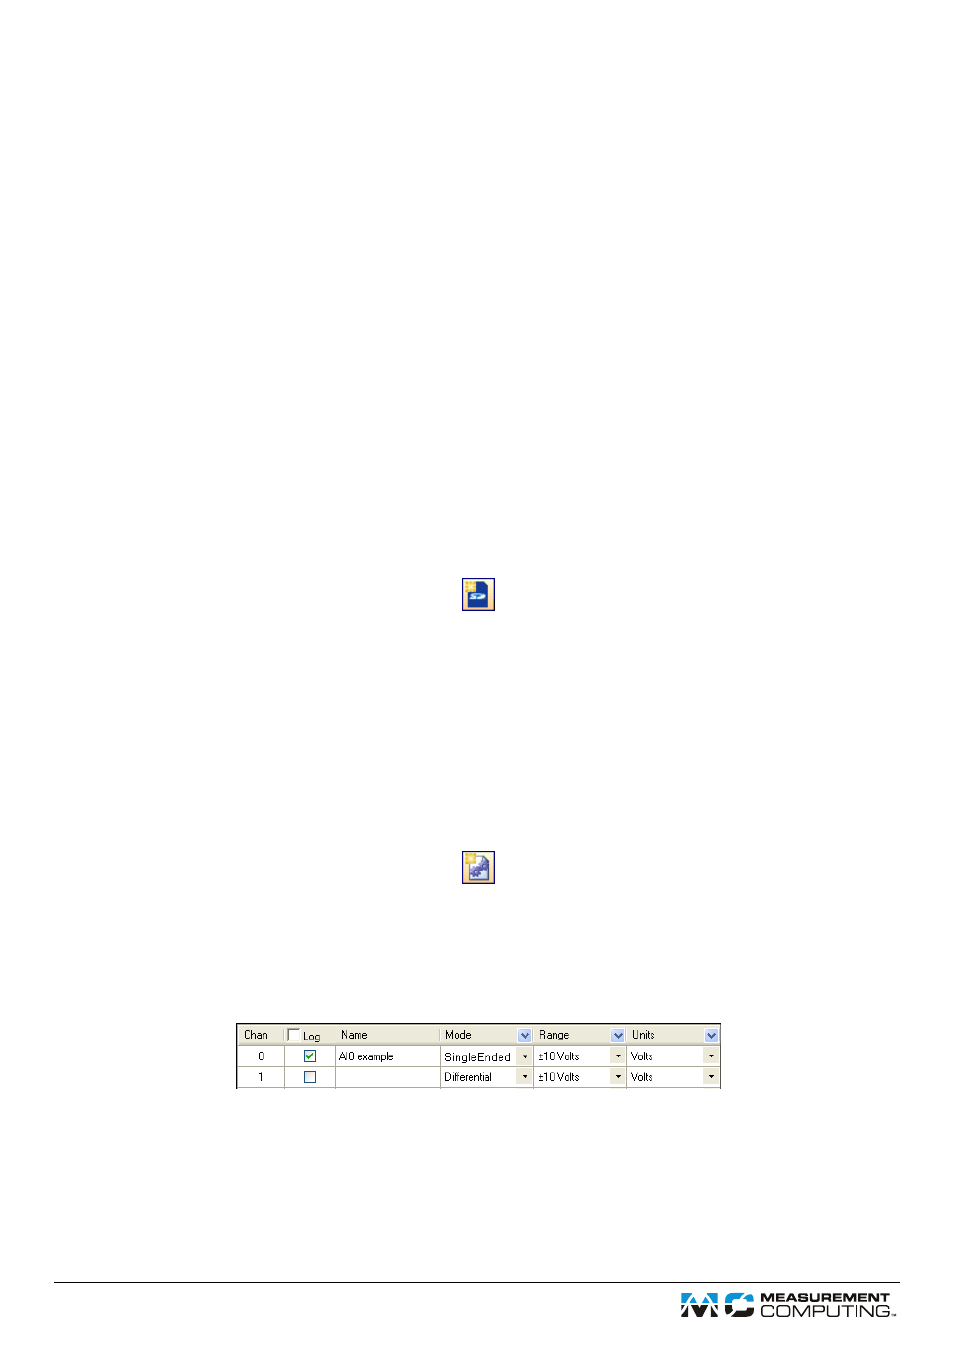
4.
Configure channel 0 as shown below, and clear all other
Log
checkboxes for the remaining analog
channels.
5.
Click
Next
on the next two dialog boxes to accept the default settings for counter and digital inputs and
to open the
Configuring Acquisition Startup, Timing, and Duration
dialog box (counter and digital
data is not logged in this example).
6.
In the
Post-Trigger
row, enter
500
in the
Scan Duration
textbox and
1,000.0
in the
Scan Rate
textbox and click
Next>>
to open the
Configuring Event Recording
dialog box.
7.
Clear all checkboxes in this dialog box and click
Finish
.