Measurement Computing WaveView User Manual
Page 38
WaveView, pg. 36
03-05-02
WaveView
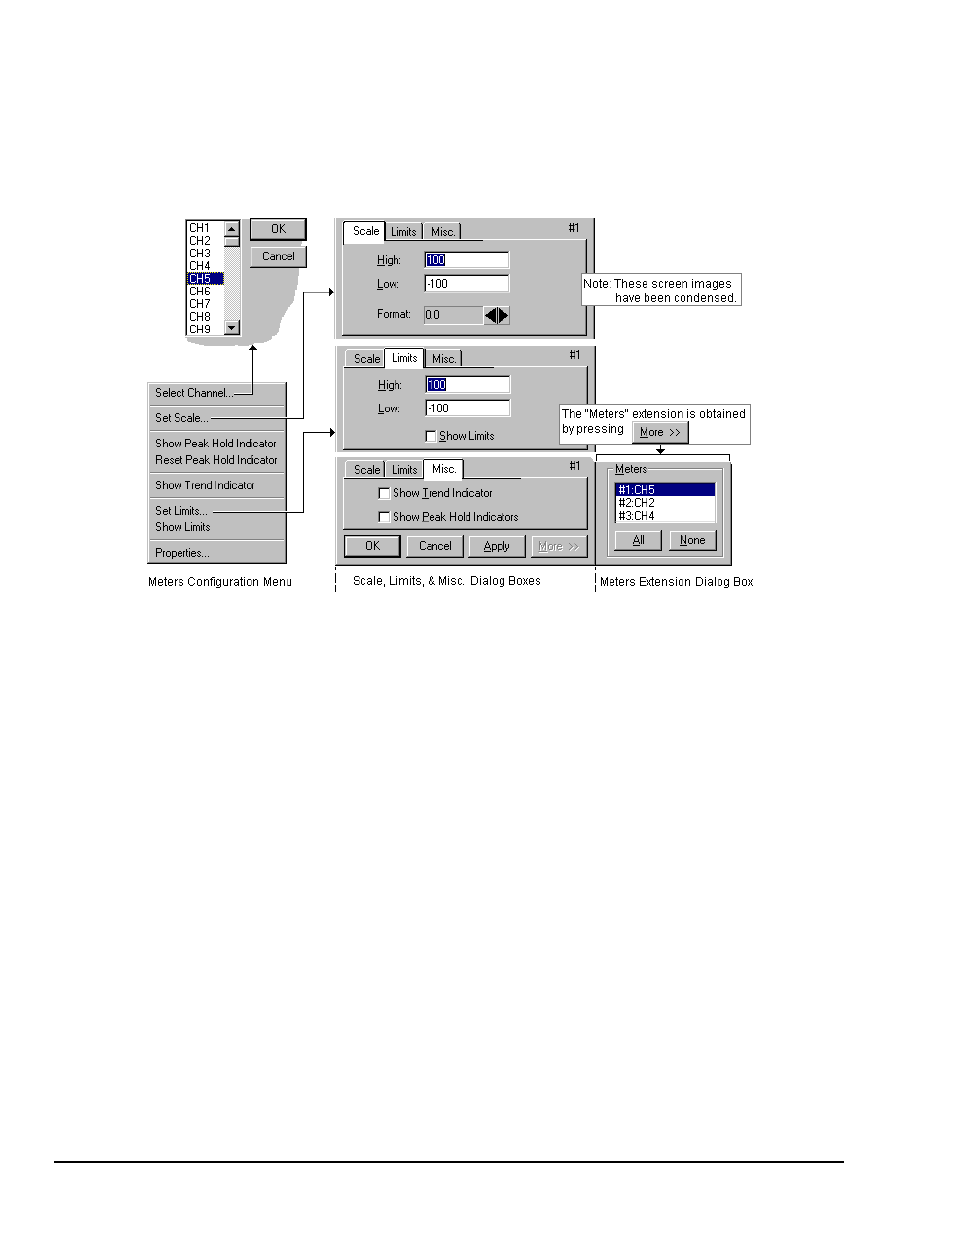
Meters Configuration Menu
A meters configuration menu (lower left corner of figure) will appear when you place the mouse pointer
over a meter and click the right-hand mouse button. The menu allows you to access various dialog boxes
for changing parameters for an individual meter, or simultaneously for a group of meters. The steps for
configuring a meter are detailed below.
Note: The Show Peak Hold Indicator / Reset Peak Hold Indicator selections are not an option for Digital
Meters and do not appear on the configuration window for digital meters.
Meter Configuration Menu and Related Dialog Boxes
Configuring a Meter
1.
Bring up the desired meter group (Bar Graph, Analog, or Digital).
2.
Place the mouse cursor over the meter you desire to reconfigure.
3.
Click on the right mouse button. A Meters Configuration Menu, similar to that in the above figure, will
appear.
Note: The Show Peak Hold Indicator / Reset Peak Hold Indicator selections are not an option for Digital
Meters and do not appear on the configuration window for digital meters.
4.
Select the desired option from the meter configuration menu.
5.
If a dialog box is required, for example, to change a limit, simply enter in the new value in the appropriate
parameter box and press “Apply” or “OK.” Pressing “Apply” implements your changes, but keeps the
dialog box open, allowing you to make additional changes. Pressing “OK” implements your changes and
closes the dialog box.
The following table and the preceding figure serve as a quick reference to meters configuration.