Software setup – Measurement Computing WaveBook rev.3.0 User Manual
Page 83
WaveBook User’s Manual,
ch03Dn 6-21-99
WBK Expansion Options 3-51
3. If connecting only one WBK61/62, connect the green banana plug/alligator clip lead (CN-111) from
the WBK61/62 earth ground connector to the local earth ground.
If connecting two or more WBK61/62s, connect the green banana plug/alligator clip lead (CN-111)
from the last WBK61/62 earth ground connector to the local earth ground. Refer also to step 2 and the
above figure.
4. Connect the input leads (CA-152) to the WBK61/62 Input HI and Input LO jacks.
5. Connect the test leads (CA-152) to the circuit under test. You may use alligator clips (CN-109) to
connect test leads.
If desired, set the applicable WaveBook channel(s) to the appropriate scale by setting the mx+b function in
the WaveView program as discussed in the following section Software Setup.
Software Setup
Depending on your application, you will need to set several software parameters so that WaveView will
organize data to your requirements. Of special importance is the correct setting of the scaling factor. This
is done using the mx + b equation.
To configure units for WBK61 and WBK62, you must use the Configure Engineering Units dialog box to
ensure units are correctly scaled. This is done as follows:
1. Left-click on the Units column (in WaveView’s main window).
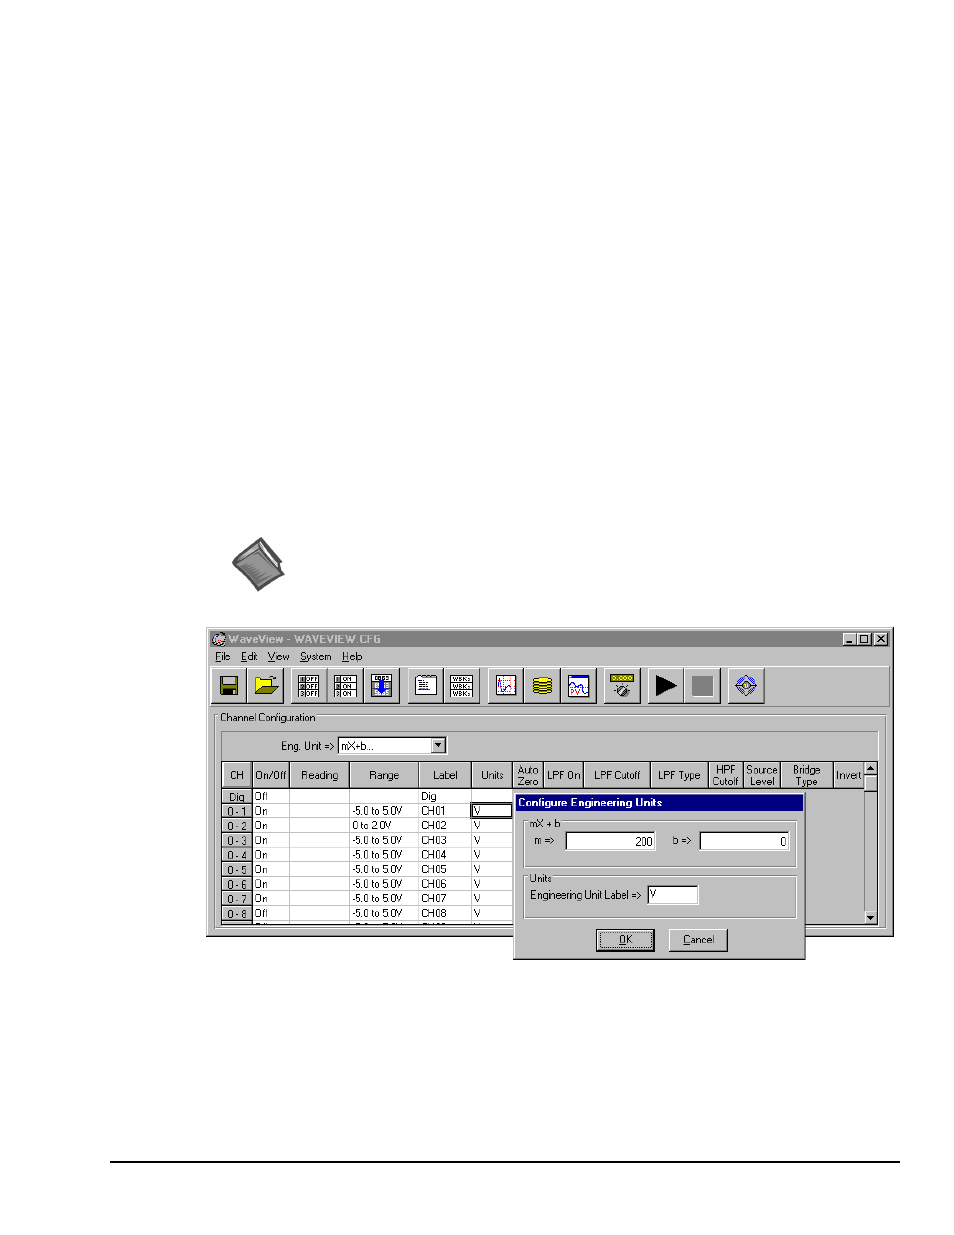
2. Select mx + b in the Units box. The Configure Engineering Units dialog box will appear.
3. For WBK61: set m to 200
For WBK62: set m to 20
Reference Note:
For detailed software setup information, refer to the “Software Setup” in chapter 2.
For detailed WaveView information, refer to chapter 5.
WaveView Main Window, with Configure Engineering Units Dialog Box
Note: The Configuration Engineering Units dialog box (above figure) shows m set to 200.
This is the setting needed to ensure accurate scaling for WBK61 applications.
If using WBK62, m would be set to a value of 20.