Channel configuration, Acquisition configuration, 4a) channel configuration – Measurement Computing Personal Daq rev.6.0 Quick Start User Manual
Page 9: 4b) acquisition configuration
Personal Daq Quick Start
878495
p/n
491-0940,
Rev
6.0 7
(4a) Channel Configuration
The Channel Configuration Window first opens with the Analog Input screen selected. You can change
from one configuration screen to another by selecting the appropriate tab. More information regarding
Personal DaqView appears in chapter 4 of the user’s manual. You can configure channels from the three
configuration screens as indicated in the following table.
Channel Type
(Selected by Tab)
User Configurable Parameters
Analog Input
User Label, On, Range, Units, Single-Ended/Differential, Measurement Duration, Scale,
Offset
Frequency/Pulse Input
User Label, On, Type, Units, Edge, Debounce, Min. Value, Max. Value, Resolution
(Settling Time), Scale, Offset.
Frequency/Pulse Input does not apply to Personal Daq/54.
Digital Input/Output
User Label, On, Input/Output, Output State, Power-Up State.
Digital I/O does not apply to Personal Daq/54.
Note: With the mouse cursor positioned in the desired spreadsheet cell, you can:
“Single-click” with the left mouse button to open an associated pull-down list for the applicable cell, from which
a selection can be made. This pull-down list appears just below the toolbar.
“Double-click” with the left mouse button to cycle through listed selections or write-enable a cell, as applicable.
If the cell has a given parameter list (such as those in the On, Range, and Measurement Duration columns)
the parameter will change with each double-click, allowing you to cycle through all possible selections. Note
that these selections are repetitive; in other words, you will eventually advance to the same selection you
started with. “Type-in” cells (such as User Label, Scale, and Offset) can be selected on double-click for easy
editing.
“Single-click” left, then “single-click” right to write-enable a cell. Completing this action with the mouse buttons
(while having the cursor on a cell such as Scale or Offset) allows you to use you PC’s keypad to type the
desired value into the field.
“Single-click” left, “single-click” right, then “single-click” left again to open an associated pull-down list for the
applicable cell, from which a selection can be made. This pull-down list appears in the selected cell’s row.
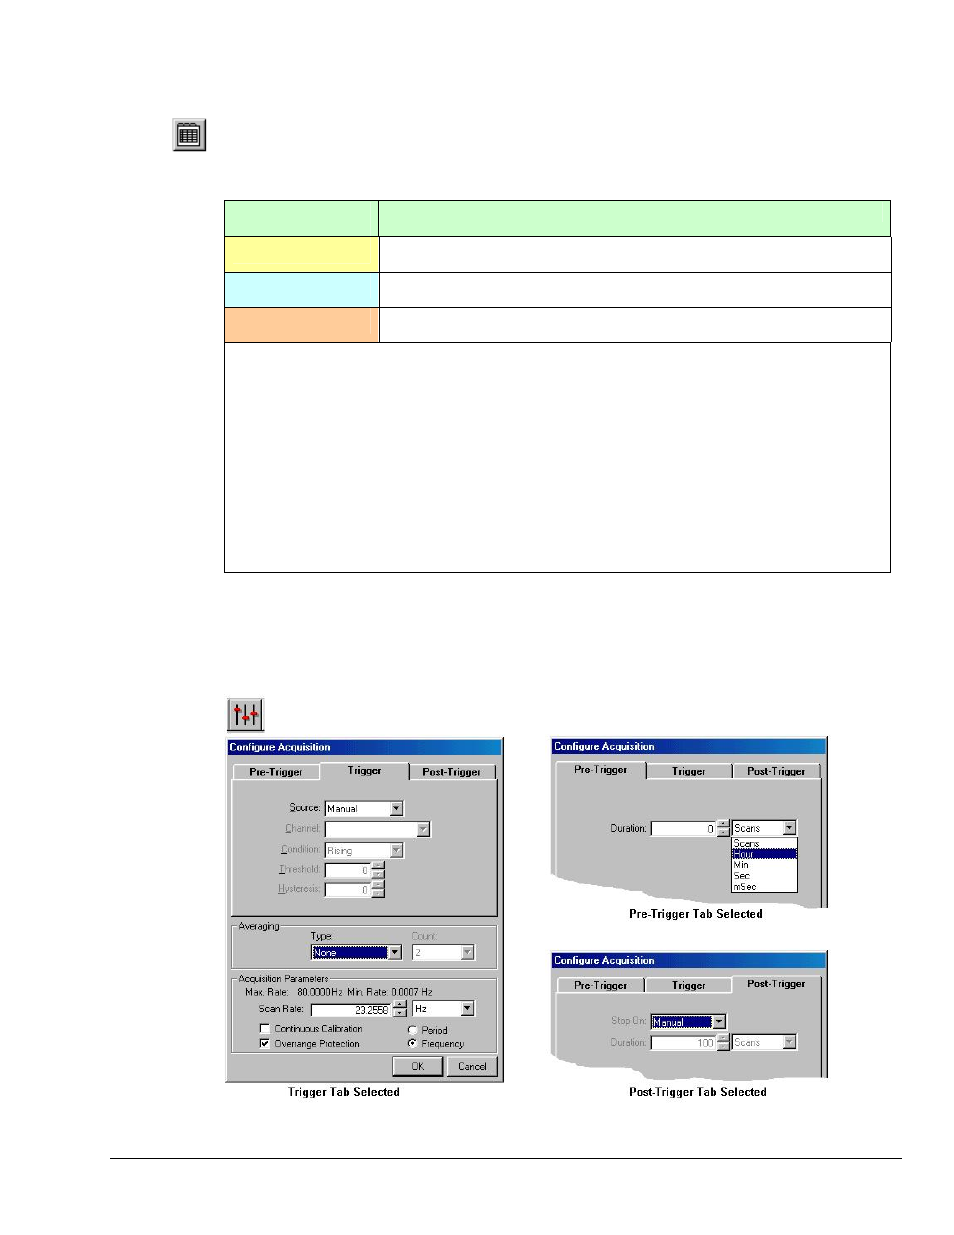
(4b) Acquisition Configuration
To configure acquisition parameters, activate the Configure Acquisition Window by using the Configure
Acquisition button (8).
Configure Acquisition Window