Installation – Montigo HFK50R User Manual
Page 2
Installation
Page 2
XT0015 - 092214
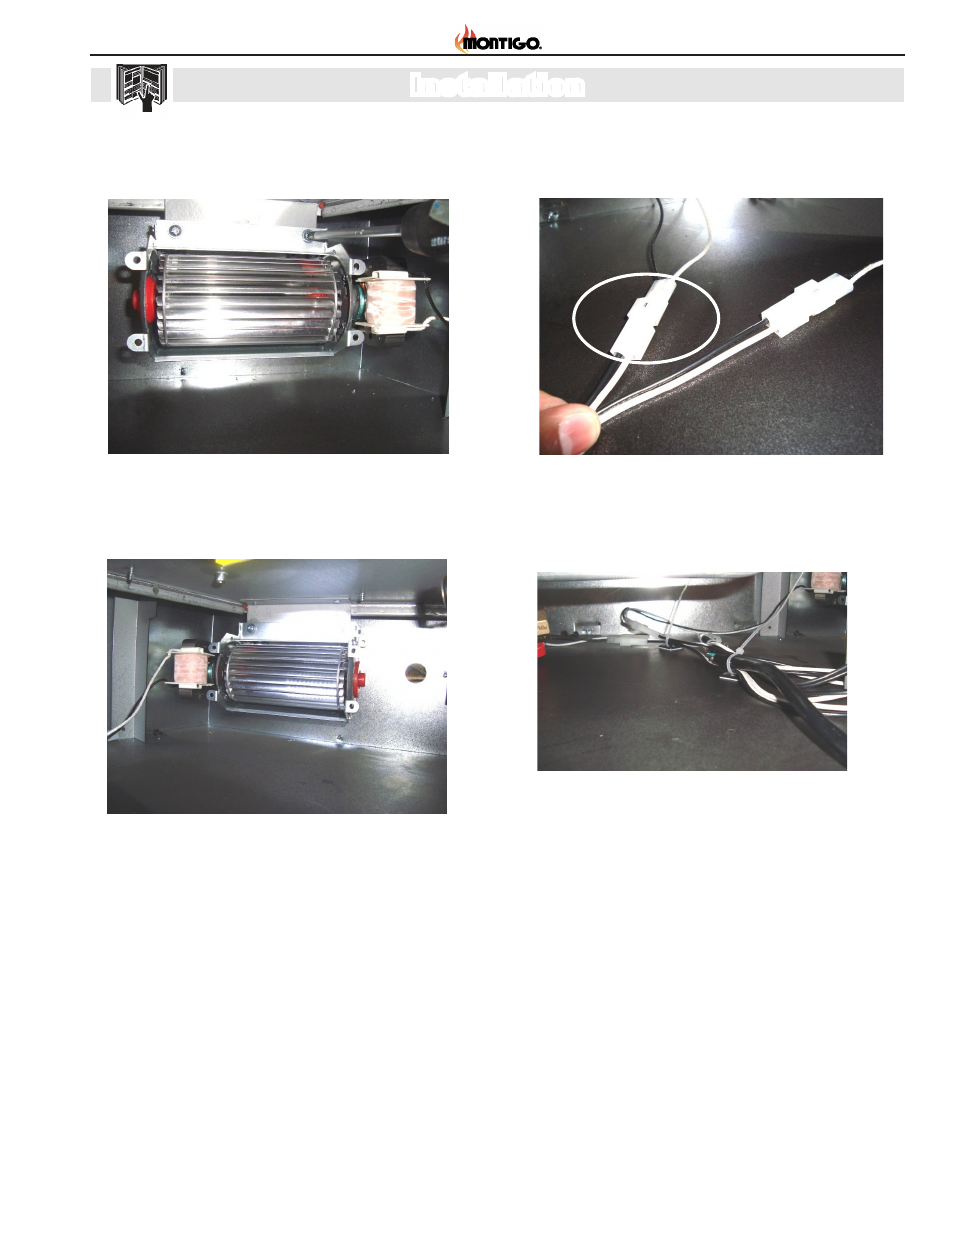
3. Install the right fan as shown in Figure 5 to the bracket underneath
the firebox using the screws supplied (motor should be oriented
towards the back side of the fireplace).
Figure 5
Install right fan to bracket
4. Plug in the 4-pin green connector from fan harness to X10 of the
control box.
5. Plug the 2-pin molex connectors on the other end of the harness
to the connectors from both fans. Note: the left or right fan can be
plugged into either plug.
Figure 6
6. Using the supplied cable ties and self-adhesive cable tie mounts,
secure the fan harness to the bottom of the firebox. Make sure to
keep the wires away from fan blades and door buckles.
Figure 7
Figure 4
Install left fan to bracket
2. Install the left fan as shown in Figure 4 to the bracket underneath
the firebox using the screws supplied (motor should be oriented
towards the back side of the fireplace).
7. Reinstall the burner tray (if removed). See Figure 2 or Figure 3 for
examples
8. Complete the installation as per the fireplace installation manual.
Program the remote transmitter to the control box as per the
supplied "Proflame2 Operation and Maintenance Manual-
XG0677" and start-up your fireplace. Turn the fans on using the
remote control.
9. Use the remote control to adjust the fan speed to the desired set-
ting.
The fans only operate when the unit is running. You may
turn the fans off completely using the remote control.