Niveo Professional NNAS-R4 Quick Installation Guide User Manual
Niveo Professional Equipment
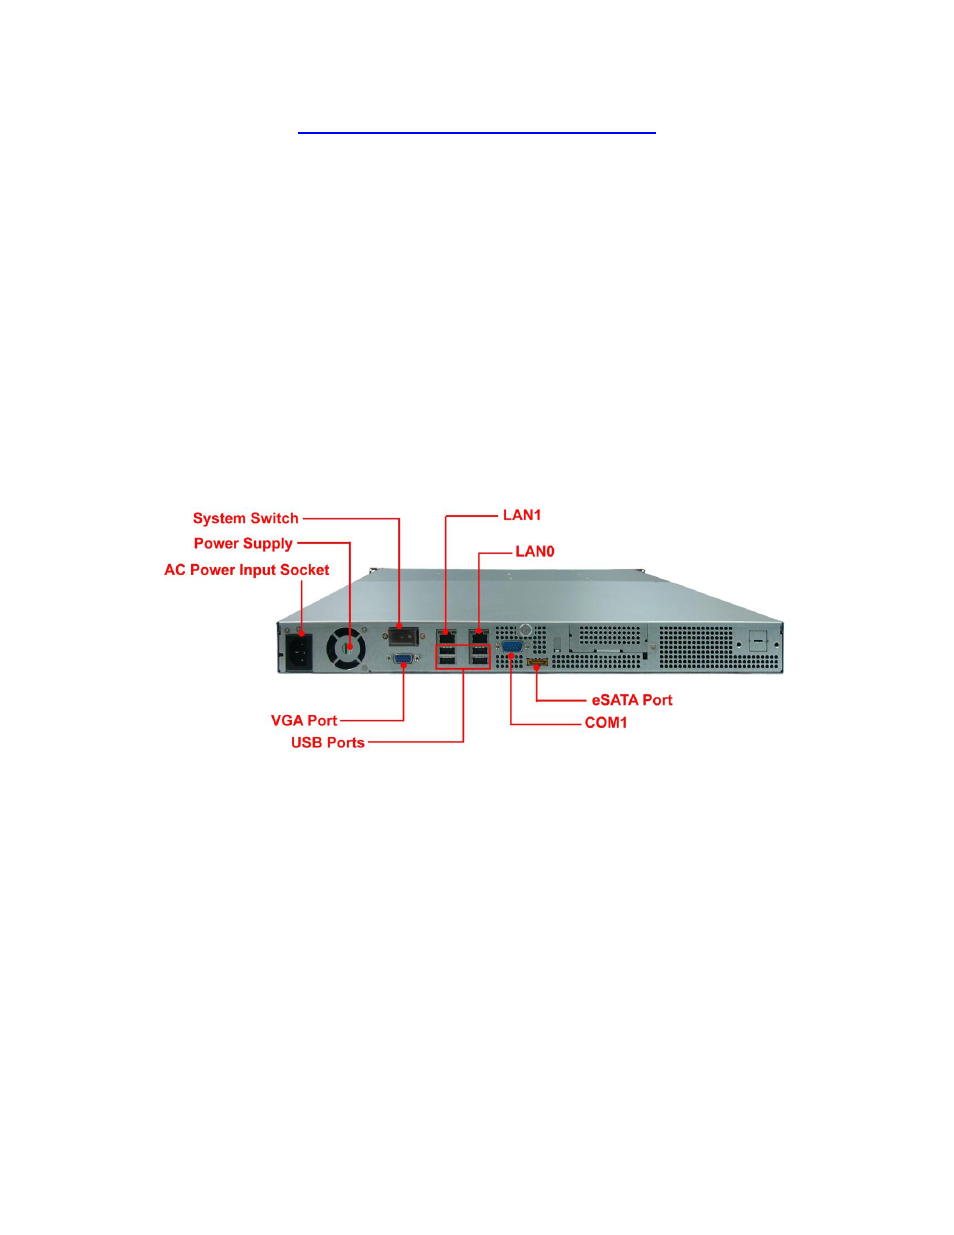
- 1 -
NNAS-R4 Quick Installation Guide
NOTE: By default, LAN0 (eth0) is set to DHCP. If a DHCP server is available or
detected, LAN0 will be assigned a DHCP IP address.
If a DHCP server is not available, LAN0 will use the default IP address
172.16.0.1 subnet mask 255.255.0.0, and LAN0 need to be reconfigured
via LCD front panel to a suitable network setting applicable to your
network environment. Or configure a client computer to be able to connect
to IP address 172.16.0.1.
Part 1: Preparing the NAS
1. Connect the power cord to the AC Power Input Socket.
2. Connect network cable to LAN0 port.
3. Press the Power On/Off Switch at the front panel to power on the NAS. Wait for at
least 3 minutes for the system to start up.
4. Install the disk drives in the disk trays. Insert the disk trays in the NAS.
5. The current IP address of LAN0 (eth0) is displayed in the LCD display panel. If a
DHCP server is available, a DHCP IP will be assigned to eth0. If not, eth0 will use the
default IP address 172.16.0.1 subnet mask 255.255.0.0.
NOTE: If a DHCP server is available, skip the steps below and proceed to
Part 2.
NOTE: If a client computer is able to connect to LAN0 (eth0) IP address
172.16.0.1 (after making necessary changes in network setting of client
computer), skip the steps below and proceed to Part 2.