Remko mxd, Condensate drain – REMKO MXD 200 v.1 User Manual
Page 20
The units are factory filled with
dry nitrogen to check for leaks.
The pressurised nitrogen is
released when the union nuts
are loosened.
!
CAUTION
Condensate drain
If the temperature falls below the
dew point, condensation will form
on the cooling fins during cooling
mode.
A collection tray together with
a condensation pump and float
switch are fitted as standard below
the cooling fins. Should the float
switch trip a protective shutdown
due to inadequate removal of the
condensation, the pump will switch
on immediately and run on for ap-
prox. three minutes.
■
The condensation pipe should
have a fall of min. 2 %. This is the
responsibility of the customer.
If necessary, fit vapour diffusion
proof insulation.
■
If the level of the condensation
pipe on the unit is above that of
the outlet, route the pipe verti-
cally upwards (max. see P. 21)
and then with a fall to the drain.
■
Lead the condensation line
freely to the run-off line. If the
condensation runs directly into
a sewer pipe, fit a trap to prevent
any unpleasant odours.
■
When operating the unit at
outdoor temperatures below
4 °C, ensure the condensation
pipe is laid to protect it against
frost.
If necessary, fit supplementary
pipe heating.
■
Once the pipe has been
laid, check the condensation
drains off and
permanently seal it.
Connecting the
refrigerant lines
The refrigerant lines on the MXD
200-520 should be connected by
the customer to the centre of the
long side.
It may be necessary to fit a reduc-
ing or extending adapter to the
indoor units. These fittings are
included with the indoor unit as an
accessory kit. Once installed, the
connections should be sealed to
prevent vapour diffusion.
5 Hooking in the unit
Structural component
2. Fit the indoor unit onto the
threaded rods and use the
lower nuts to level the unit
(Figure 5)
.
3. Ensure a clearance of 35 mm
from the ceiling. Connect the
refrigerant pipes, electrical
cables and condensation pipe
to the indoor unit as described
below.
4. Check that the unit is level.
5. The final task is to tighten the
counternuts and attach the
cover.
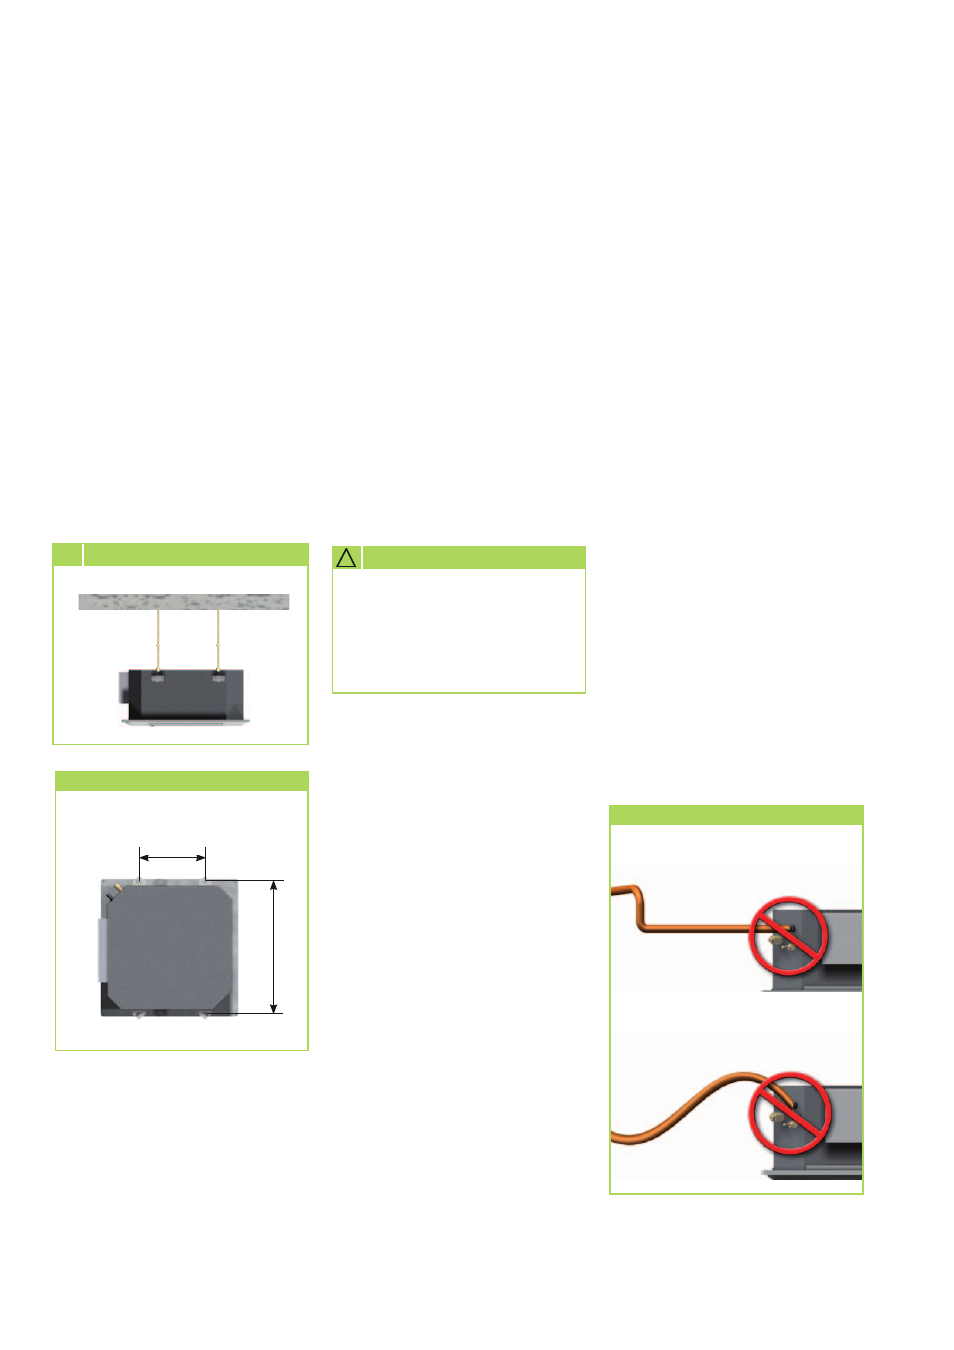
Riser pipe too far away
No fall
Condensation connection - Wrong!
615
280
MXD 200-520
Unit attachment
REMKO MXD
20