Caution, Belt or brushroll: removal & replacement – Royal Vacuums CH53000 User Manual
Page 8
8
install new BaG
4.3 Install the paper
bag into the outer cloth
bag. Be sure paper bag
is fully extended inside
the cloth bag.
4.4 Push collar of
paper bag onto the dirt
tube past the raised
tabs on the sides of the
dirt tube to ensure bag
is securely in place.
4.5 Completely zip up
the soft outer cloth bag.
raised
locking tabs
4.3
4.4
4.5
what to Buy: Filter Bag
Use only genuine Hoover
®
bags with your vacuum. When purchasing a new bag,
ask for Hoover
®
Type B bags.
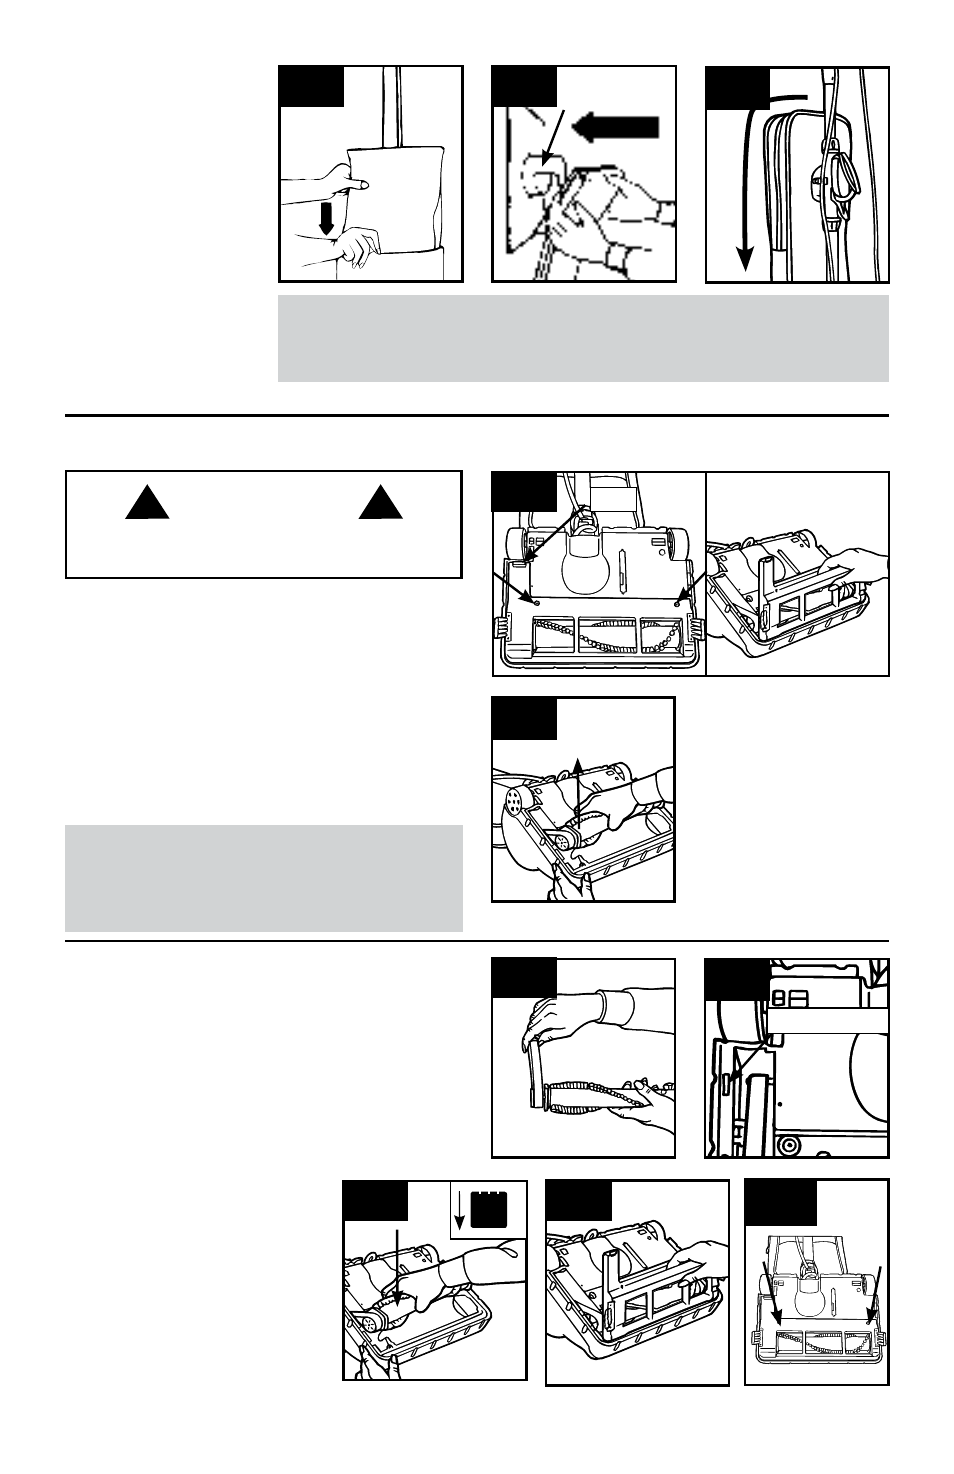
4.6A Turn cleaner over. Base should lay flat and
face up. To remove nozzle guard, remove two (2)
screws near rollers.
4.6B Release the nozzle guard by pulling tab
toward the front of the cleaner and rotate/pivot the
nozzle guard up to lift off.
4.7 Be sure belt is off motor shaft. Lift and remove
brushroll. Dispose of old belt.
remoVe old Belt
tAB
Belt oR BRusHRoll: ReMoVal & RePlaCeMent
Caution
!
!
To reduce the risk of injury from moving parts
- Unplug cleaner before servicing.
4.6
A
B
4.7
4.8 Slip brushroll through belt. Place belt in area of
brushroll without bristles.
4.9 Loop belt around motor shaft.
4.10 With new belt in place, pull and slide brushroll
into nozzle making sure that the brushroll end caps
are in the correct orientation (see inset). Rotate
brushroll manually to make sure belt is properly
aligned.
to rePlAce neW Belt
motor sHAFt
4.8
4.9
4.10
4.11 To reassemble the nozzle
guard, align the three (3) tabs on
the front of the nozzle guard with
the slots in the base. Rotate/
pivot the nozzle guard back into
position making sure that the tab
is fully engaged back by the rear
wheel.
4.12 Replace the two (2) screws
to secure nozzle guard.
4.11
4.12
what to Buy: Belt
Use only genuine Hoover
®
balt with your vacuum.
When purchasing a new bag, ask for Hoover
®
Belt Style 18.