Smart box wall preparation – SP Controls SmartBox+ Installation User Manual
Page 3
9/13/200
SP Controls, Inc.
SmartBox Mounting (PRELIMINARY)
Page 3 of 5
(877) 367-8444
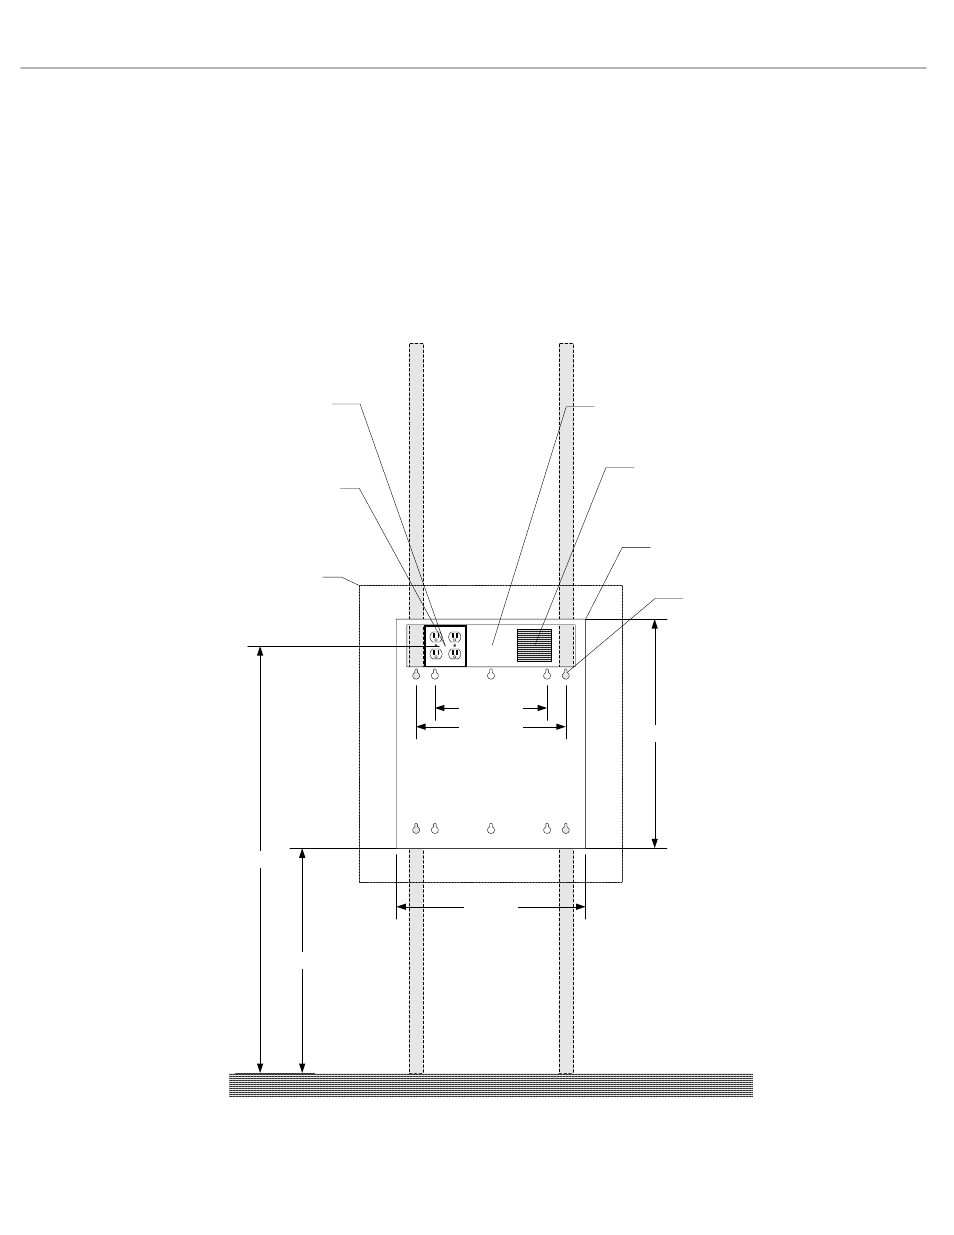
20.250in.
24.500in.
smart box back plate
24in.
12" centers
16" centers
Have electrician place center of
outlet at 46" to achieve proper height
(see following page)
4-PLEX for power.
Smart box can be
mounted over finished
outlet with cover plate.
j-box or hole for
low voltage wiring
(size and place
as needed)
18"x4.5" clear
hole thru back of
SmartBox to wall
46in.
optional backing board
The SmartBox can be mounted to masonry, wood, or sheet rock walls. It will come with mounting screws for each type. It is designed to be
mounted over a finished electrical receptacle box. The back plate of the box has a hole for access to the power receptacles and low voltage
wiring. Under no circumstances is high voltage wiring to be exposed inside the enclosure.
The SmartBox can mount on studs at 16" and 12" centers. The SmartBox can also be mounted to one center stud if no other options are
available. A backing board should be specified in new construction if studs are at 24" centers.
The location of the power receptacle will determine the height of the final box. We recommend that the finished receptacle be mounted at 46"
height. This will achieve the dimensions shown in Figure 2.
keyhole screw
mounting
locations (10
places)
Smart Box Wall Preparation
Figure 1:
Smart Box wall Infrastructure