Verify the lane configuration, Viewing lane data, Viewing interval data – Wavetronix SmartSensor 105 (SS-105) - Quick-reference Guide (User) User Manual
Page 3
6
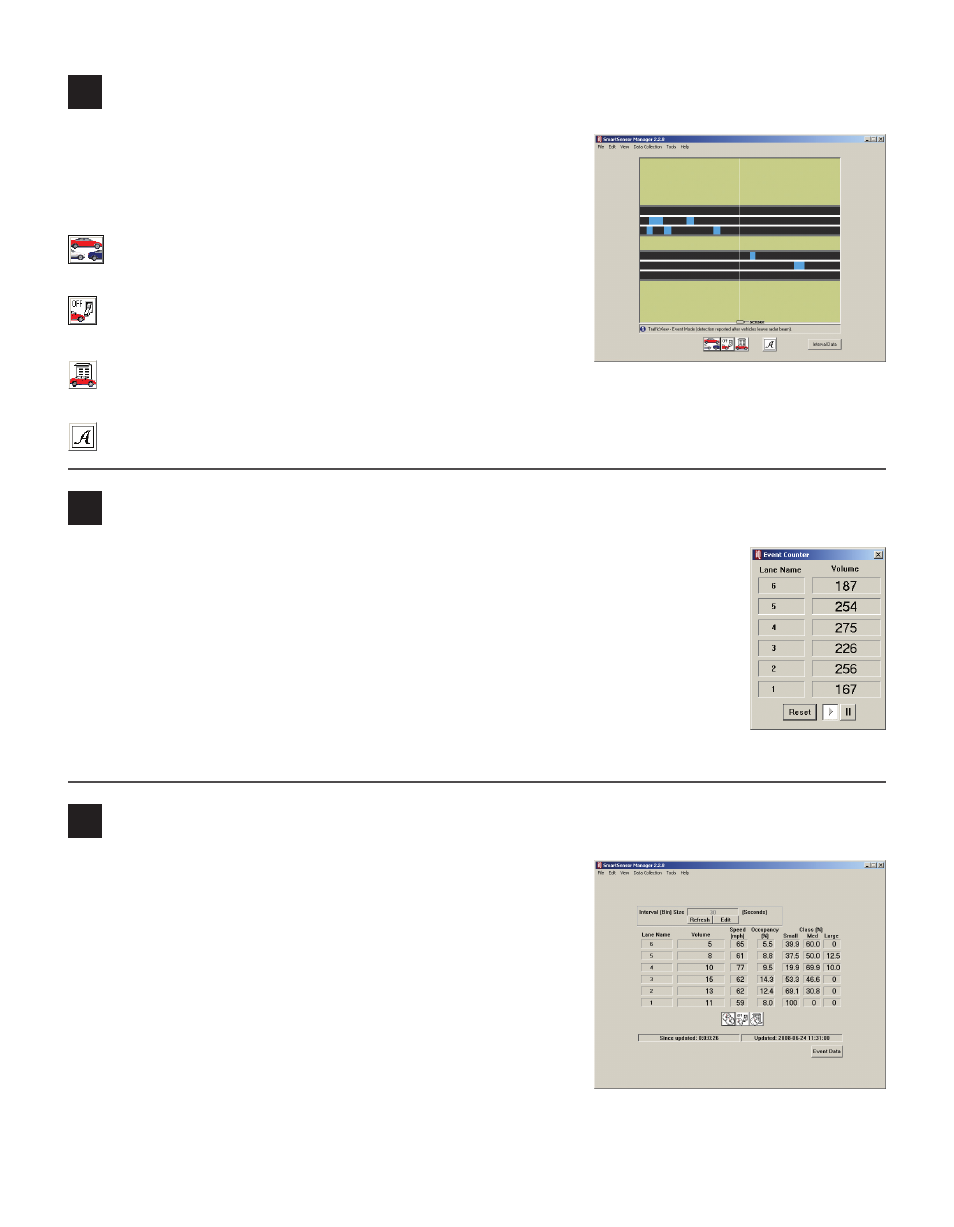
Verify the lane configuration
1 Click Finished on the Lane Configuration page and the
View Traffic (Event Data) page will appear.
2 Compare the traffic on the road to the event information
shown in SmartSensor Manager.
View Event Counter – Allows you to verify real-time
volume counter lane by lane.
Event Log On/Off – Allows you to log the current infor
mation.
View Event Log – Allows you to open the current event
log file in a text editor.
Actuation/Event Toggle – Allows you to change between Actuation and Event modes.
7
Viewing lane data
Clicking on the View Event Counter button will bring up a real-time volume counter.
Each time a vehicle enters or leaves the radar detection zone, the volume for the cor-
responding lane will increment accordingly.
˽
Click the Pause button to pause the lane data counter.
˽
Click the Play button to resume counting.
˽
Click the Reset button to clear the volume count and begin a new count.
Any vehicles that were detected by the SmartSensor while the event counter was
paused will not be shown in Volume.
8
Viewing interval data
The Interval Data screen allows you to verify interval data accu-
racy.
1 Specify the interval length in the Interval (Bin) Size field by
clicking the Edit button.
2 Type the desired interval length in seconds.
3 Click Submit.
4 Synchronize the sensor time to your computer’s UTC time,
by clicking the synchronize button (the button with two
overlapping clocks). This will cause intervals to begin and end
at the expected time.
The other two buttons allow you to turn the interval data logging on/off and view the interval data log.