Airaid 300-259 User Manual
Installation instructions
Installation Instructions
For Part Numbers:
300-259
700-469 Airaid Oiled Media Filter
301-259
701-469 SynthaMax Dry Media Filter - Red
302-259
702-469 SynthaMax Dry Media Filter - Black
303-259
703-469 SynthaMax Dry Media Filter - Blue
2003-07 Dodge Ram 2500/3500
5.9L I6 Cummins Diesel
Component Identification
1.
Airaid Premium Filter
1
2.
Airaid Intake Tube
1
3.
Cool Air Box
1
4.
Filter Adapter
1
5.
Urethane Hump Hose
1
6.
Weather Strip 22”
1
7.
8/32 x 1/2” Button Head Screw
2
8.
#8 Flat Washer
2
9.
1/4-20 Button Head Bolt
3
10.
¼” Flat Washer
4
11.
5/16-18 x 3/4” Hex Head Bolt
1
12.
5/16” Flat Washer
2
13.
5/16” Flange Nut
1
14.
M8 x 1.25 x 30mm Hex Bolt
1
15.
M6 x 1 x 25mm Hex Bolt
1
16.
3/8-16 Well Nut
1
18.
3/8” Flat Washer
1
19.
#72 Hose Clamp
2
20.
#259 L-Bracket
1
21.
T20 Torx Bit
1
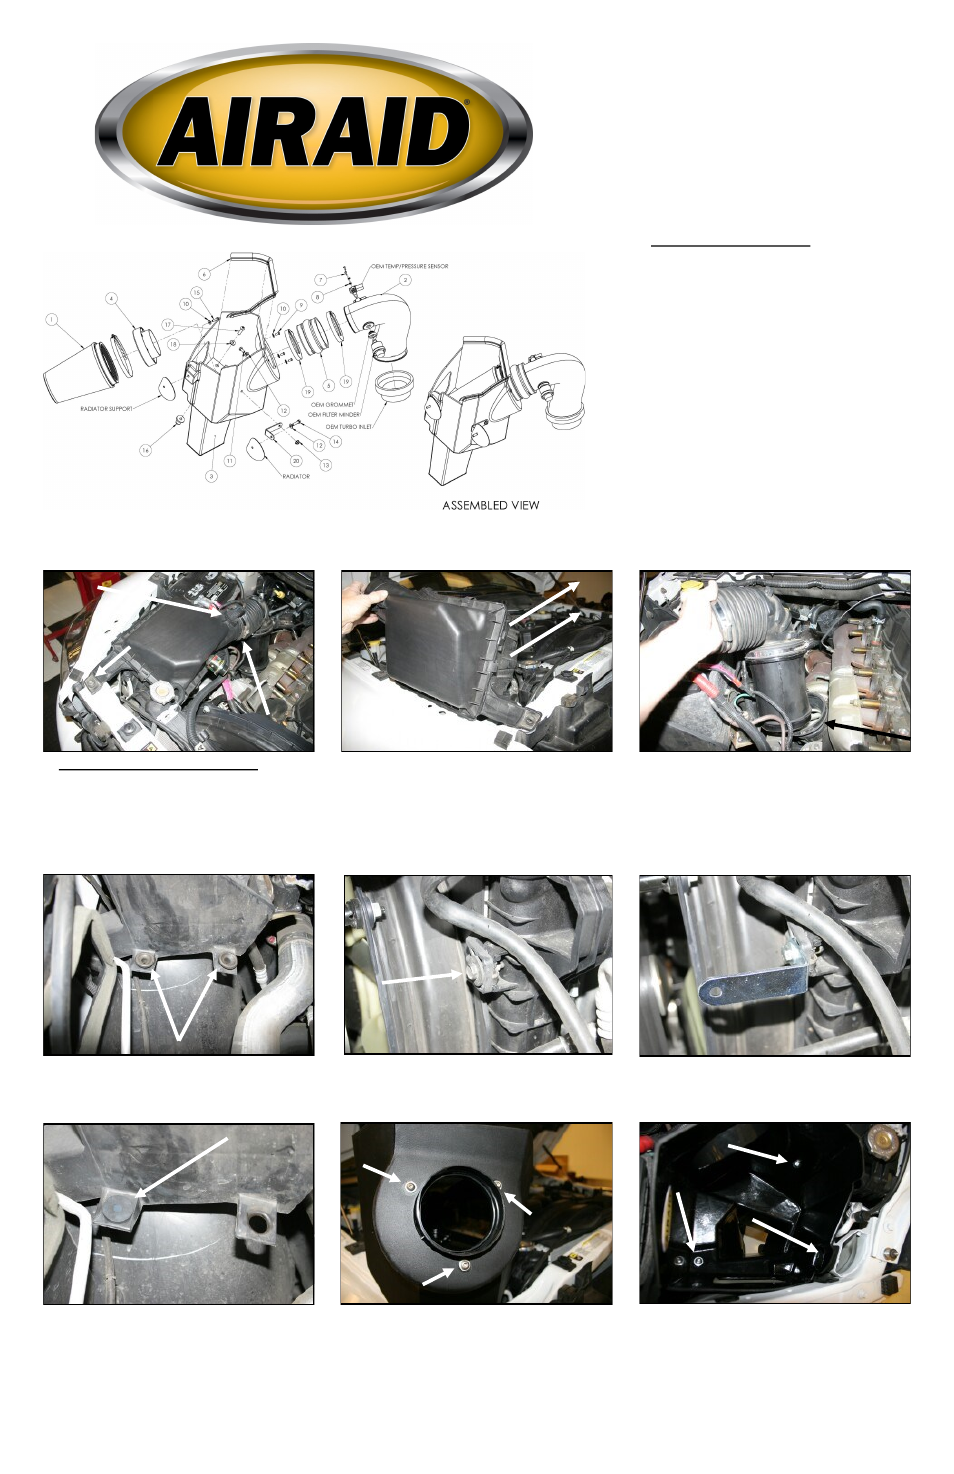
1. Disconnect the negative battery cables.
A.) Using the pr ovided T-20 torx bit, remove the two
temperature sensor mounting bolts and the sensor
from the factory intake tube (set aside for reuse).
B.) Loosen the hose clamp wher e the flexible tube
connects to the factory airbox lid.
C.) Using a 10mm socket, r emove the nut that se-
cures the factory airbox to the radiator mount.
2. Slide the flexible intake tube off of the factory air-
box lid and then rock the factory airbox assembly side
to side to release it from the mounting grommets, and
remove it from the vehicle.
3. Loosen the hose clamp that secures the factory
intake tube assembly to the rubber elbow on the turbo
inlet, and remove the assembly from the vehicle.
7. Install the supplied well nut (#16) into the factory
airbox mounting hole closest to the fender as shown.
6. Install the L-bracket (#20) onto the radiator shroud
using one M8 x 30mm bolt (#14) and one flat washer
(#12) as shown. Leave the bolt slightly loose for now.
8. Install the filter adapter (#4) into the Cool Air Box
(#3) using three 1/4” Button Head bolts (#9) and flat
washers (#10) as shown.
A.
B.
C.
4. Remove the two grommets that held the factory
airbox in position.
5. Using a 13mm socket remove one bolt that secures
the fan shroud to the radiator on the passenger side of
the vehicle.
9. Install the CAB into the vehicle as shown. A.) In-
stall the 3/8” button head bolt (#17) and flat washer
(#18) thru the CAB and into the well nut. B.) Install
the 6mm x 25mm hex bolt (#15) and flat washer (#10)
thru the CAB and into the captured nut in the fender.
C.) Install the 5/16” bolt (#11) flat washer (#12),
and flange nut (#13) thru the CAB and L-bracket.
Tighten all mounting bolts at this time.
A.
B.
C.
Full color instructions can be viewed on our web site at Airaid.com. Use the Product Search function to find your part number, and click View Details.