Airaid 883-314 User Manual
Installation instructions
Installation Instructions
For Part Number:
883-314 Intake Kit
2011-1
5 Can Am Commander
1000cc
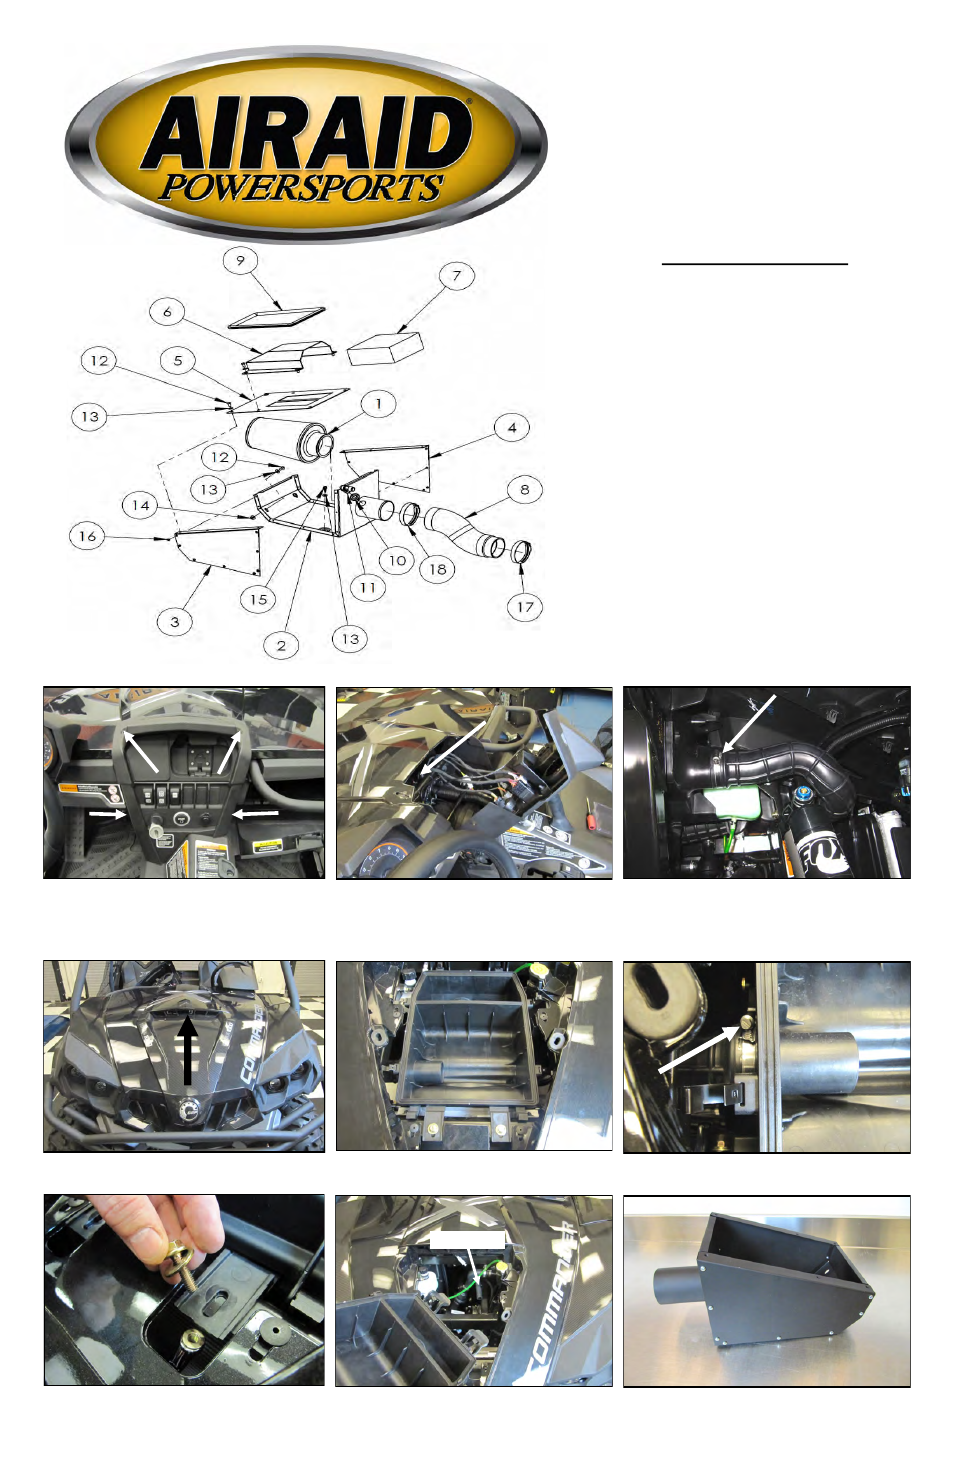
2. Pull the console back to gain access to the factory air
intake. Loosen the throttlebody clamp.
3. Loosen the firewall side clamp of the air inlet tube lo-
cated in the passenger side front wheel well.
4. Remove the center section of the hood to gain access
to the airbox assembly.
5. Remove the upper half of the airbox and the air fil-
ter.
6. Loosen the airbox side clamp the air inlet tube and
disconnect it. This tube will not be reused.
8. Disconnect the PCV Breather from the airbox lower
half and remove it from the vehicle.
7. Using a 10mm box end wrench and socket, remove
the two front airbox nuts and bolts in the core support.
9. Install the Left and Right Panels (# 3 and 4) onto the
Air Box Base (#2) using the #8-32 Thread Cutting
Screws (#16)
Disconnect The Negative Battery Terminal!
1. Remove the two T– 25 Torx screws from the top of
the center console and the two plastic rivets in the bot-
tom.
PCV Breather
Full color instructions can be viewed on our web site at Airaid.com. Use the Product Search function to find your part number, and click View Details.
Component Identification
1.
Airaid Premium Filter
1
2.
Air Box Base
1
3.
Left Panel
1
4.
Right Panel
1
5.
Foam Pre-Filter Tray
1
6.
Hood Scoop
1
7.
Foam Pre-Filter
1
8.
Silicone Coupler
1
9.
Rubber Edge Trim 33"
1
10.
5/8" Grommet
1
11.
5/8" Elbow
1
12.
¼-20 x 1/2” Button Head Screw
8
13.
1/4” Flat Washer
10
14.
¼-20 Serrated Flange Nut
2
15.
#12 x 3/4" Self Drilling Screw
2
16.
#8-32 Thread Cutting Screw
16
17.
#44 Hose Clamp
1
18.
#48 Hose Clamp
1
19.
Not Pictured 2" Cap
1
20.
Not Pictured #28 Hose Clamp
1
21.
Bubble Sticker
1