Airaid 883-315 User Manual
Page 2
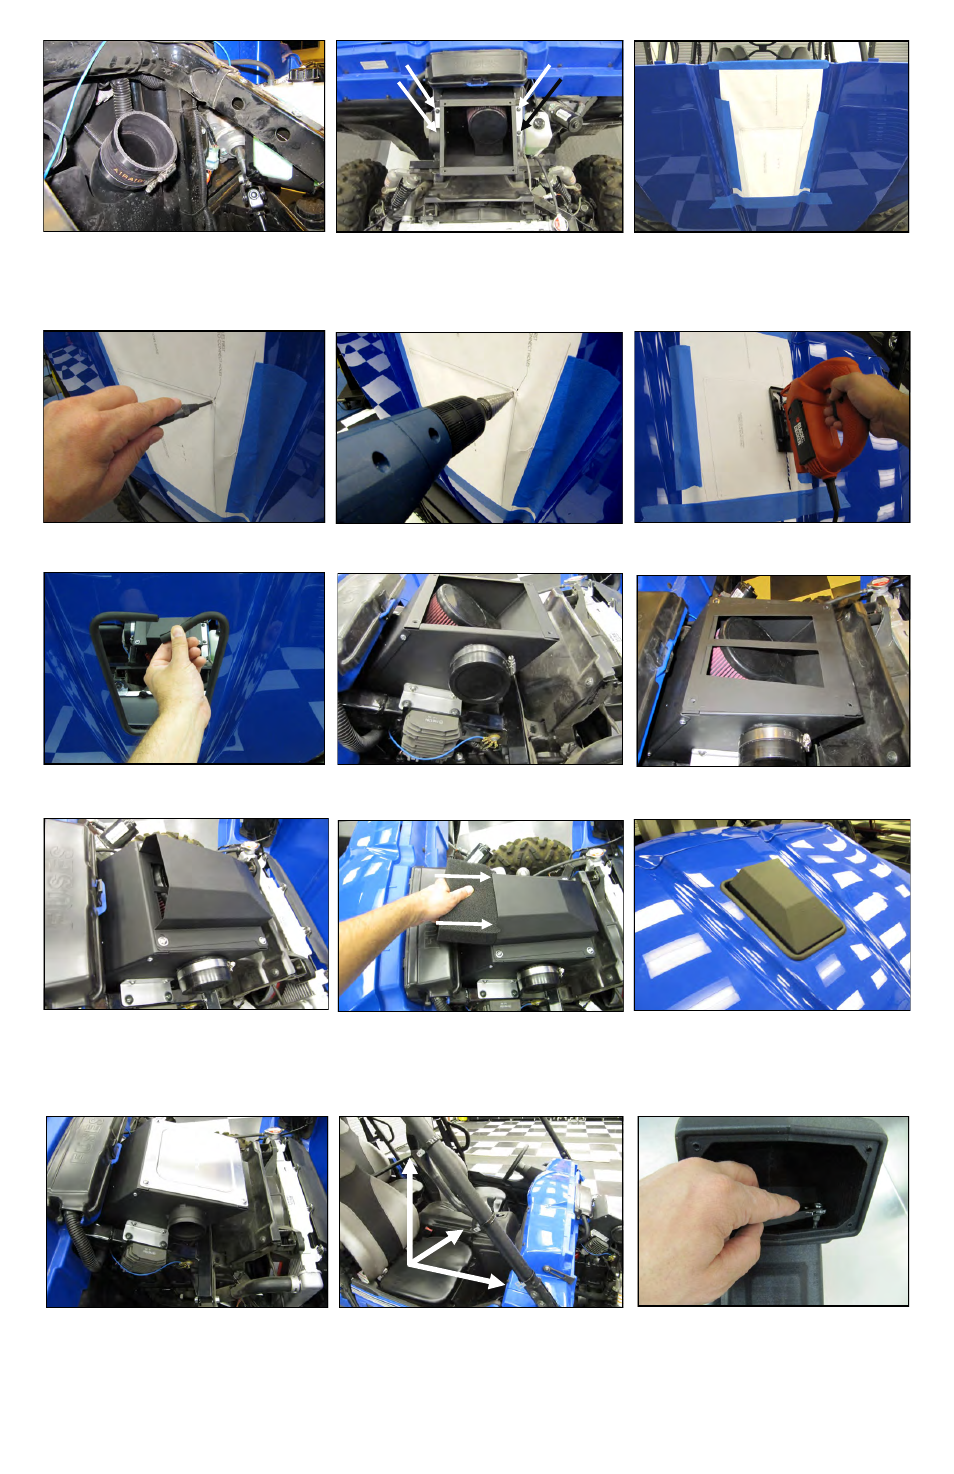
13. Mark the hole locations in each corner using a center
punch.
10. Install the Silicone Coupler (#8) and Two #48 Hose
Clamps (#18) onto the factory intake tube. Leave the
Clamps loose for now.
11. Insert the Airbox outlet into the Silicone coupler and
tighten the Clamps. Mount the Airbox to the vehicle by
reusing the factory hardware from step 1. STOP! If you
plan to install the Snorkel kit, proceed to step 22.
12. Cut out the Template and carefully position it onto
the vehicles hood. Tape the template in place.
18
.
Place the Filter Tray (#4) onto the Air Box as
shown.
14. Using a 1/8” bit , drill out the punched holes on the
hood. Finish the holes using a 1/2” bit or UniBit.
15. Using a jig saw, cut out the center section of the
hood.
16. Install the 36”Edge Trim (#21) onto the hood, trim
to fit.
17. Install the Urethane Cap (#9) onto the Airbox Inlet
tube and secure it using the third #48 Clamp.
19. Install the Hood Scoop onto the Airbox Assembly
using the four sets of 1/4-20 x 1/2’ Button Head Bolts
(#20) and 1/4” Flat Washers (#21). Leave the bolts loose
for now to allow for final adjustment.
21. Lower the hood down onto the vehicle and secure
it. Align the Hood Scoop from left to right inside of the
cut out . Raise the hood, secure the Bolts and re con-
nect the battery.
20. Insert the Foam Pre Filter (#6) into the Hood Scoop.
23. Side the three small Loop Clamps (#26) onto the roll
cage A pillar as shown.
24. Mount the Snorkel Inlet(#13) to the Snorkel Tube
(#12), using the four Torx screws (#33), Torx Bit #18
and a 90deg. Low Profile Ratcheting Screwdriver.
22. Install the Airbox Lid (#1) onto the Airaid perfor-
mance Airbox using The four 1/4-20 x 1/2” Button
Heads Bolts and 1/4” Flat Washers from the Airaid 883-
306 intake.
Page 2