Cable routing & connecting, Checking for leaks – Airmar SS200—No Fairing User Manual
Page 3
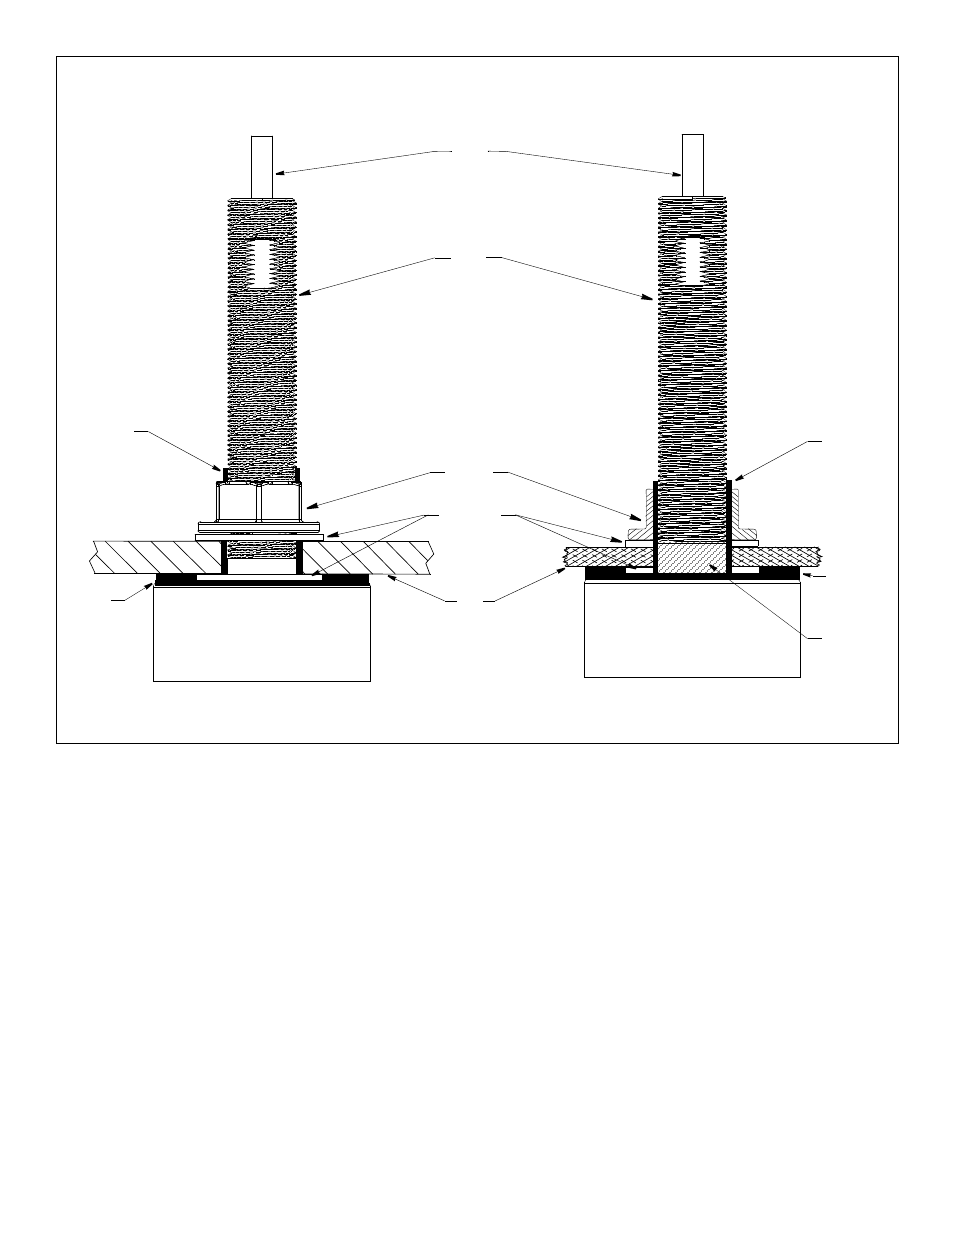
hull nut
Figure 3. Bedding and installing
(SS200/SS502 shown)
hull
stem
aft view
cable
Copyright © 2013 Airmar Technology Corp.
transducer
fiberglass or wood hull
aft view
metal hull
washer (2)
transducer
marine
sealant
marine
sealant
isolation
sleeve
marine
sealant
sealant
marine
Cable Routing & Connecting
CAUTION: If the sensor came with a connector, do not remove it
to ease cable routing. If the cable must be cut and spliced, use
Airmar’s splash-proof Junction Box No. 33-035 and follow the
instructions supplied. Removing the waterproof connector or
cutting the cable, except when using a water-tight junction box,
will void the sensor warranty.
1. Route the cable to the instrument being careful not to tear the
cable jacket when passing it through the bulkhead(s) and other
parts of the boat. Use grommets to prevent chafing. To reduce
electrical interference, separate the transducer cable from other
electrical wiring and the engine. Coil any excess cable and
secure it in place with cable ties to prevent damage.
2. Refer to the instrument owner’s manual to connect the
transducer to the instrument.
Checking for Leaks
When the boat is placed in the water, immediately check around
the transducer for leaks. Note that very small leaks may not be
readily observed. Do not leave the boat in the water for more than
3 hours before checking it again. If there is a small leak, there may
be considerable bilge water accumulation after 24 hours. If a leak
is observed, repeat “Bedding” and “Installing” immediately (see
page 2).
3