Standard work, Process description – Allmand Brothers NIGHT LITE PRO II V User Manual
Page 5
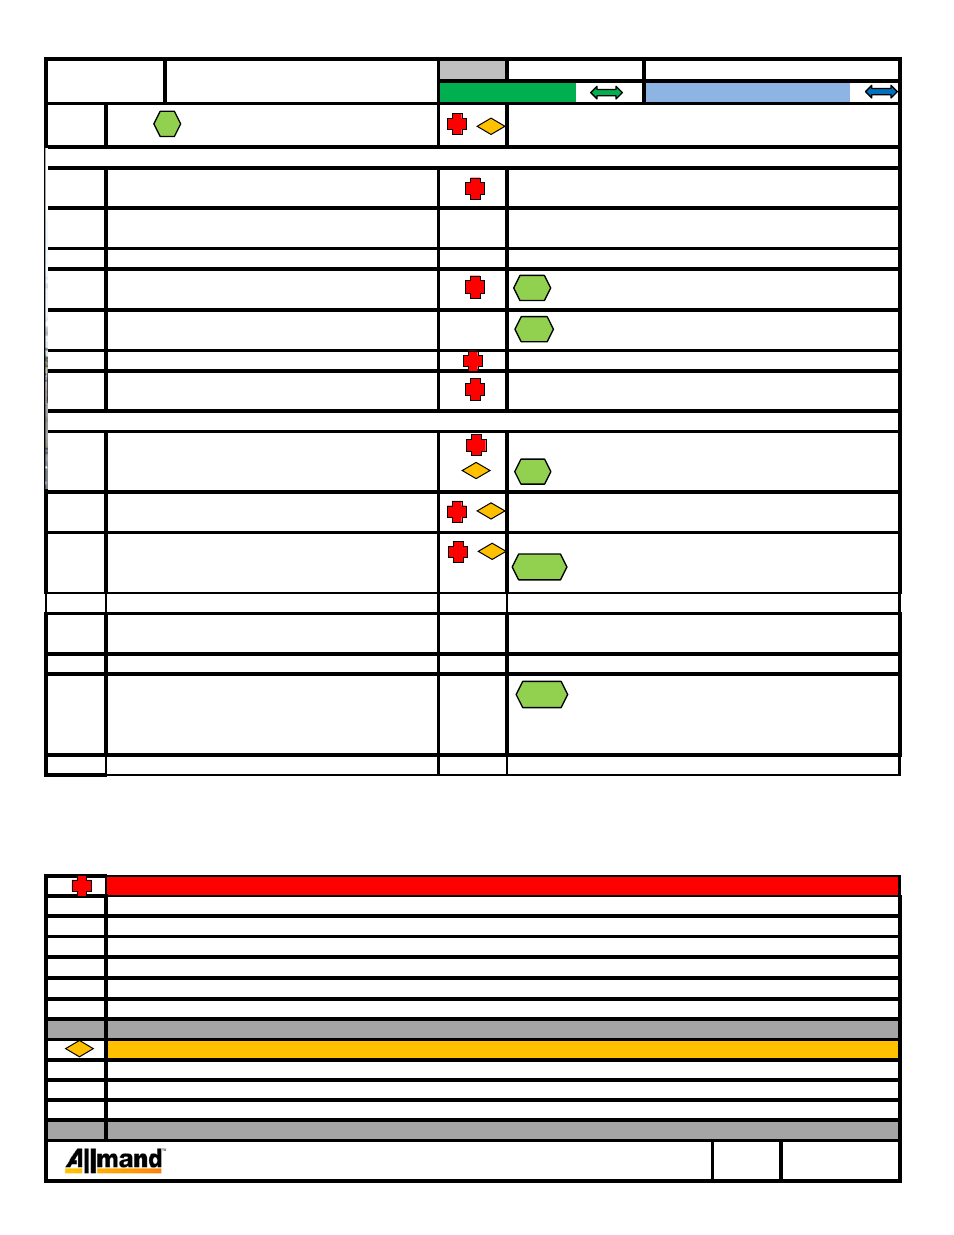
STANDARD WORK
1
2
3
4
5
6
7
8
9
10
11
12
13
14
15
1
4
6
7
8
8,9,10
8
9
10
Overhead obstructions such as power lines, etc. may cause property damage, serious injury, or death.
Lowering the unit with a person below the unit may result in serious injury or death.
Improper lifting heavy or awkward objects may result in serious injury.
QUALITY INSPECTIONS
Insure each nut has the proper torque (120 ft/lbs).
Failure to apply the proper torque may result in property damage, serious injury, or death.
WORKSTATION:
Follow all instructions and safety precautions.
Use of eye protection is REQUIRED.
Two people should be used to lift or move the axle to avoid injury.
NON STANDARD OPTION:
STANDARD OPTION:
Remove four mounting bolts from unit and shipping
Read and understand all process steps and safety
precautions before beginning.
Unit must be securely supported before proceeding.
Reference picture for location of mounting bolts.
Any
COMMENT
See Section 1 for hardware information
/
and for a list of included components.
Gather all required equipment.
This hardware is preinstalled on the unit.
followed by the washers and finally the keps nuts
and then tighten nuts.
Reference picture for location of forklift pockets.
on bottom side of unit.
Attach tongue (100022) to unit using two 1/2-13 X 5"
tail light wire harness and pull harness through.
Use care not to over tighten nuts as this will damage the fender.
Reference picture for location of hardware.
Fully insert forklift forks into fork pockets
Place jack so that it will support the tongue when the unit is lowered.
Torque shackle bolts and nuts to 120 ft/lbs then turn
the nut back 1 revolution.
Rack may need to be cut away from bottom unit.
Raise unit and move away from shipping rack.
Make sure area above units and rack is clear of any obstructions.
Set the unit at a working height to put the axle and
Attach wheels and tires to axle on unit using five
Remove forklift forks carefully to avoid damaging the unit.
TRAILER ASSEMBLY:
DO NOT allow any person under raised unit.
tongue on.
PRODUCT/PROCES
S DESCRIPTION
Finish Assembly of NLPro II Vertical
Tower
TO BEGIN:
Insure each nut has the proper torque (85 ft/lbs).
Insure each nut has the proper torque (85 ft/lbs).
SAFETY PRECAUTIONS
Failure to follow safety precautions may result in property damage, serious injury, or death.
Failure to securely support unit may result in property damage, serious injury, or death.
lug nuts (032048) for each wheel.
(047010) from bolts and then place fenders (650297) on
two 1/2-13 nylock nuts (044048). Insert tail light harness.
Attach jack (330008) to tongue with snap ring (330014).
Lower unit until the weight of the unit is supported by the
Attach axle (650100) with six 9/16-18 X 3" shackle
bolts (032043), four 3.25" shackle links(032046), and
NO.
PROCESS
Locate and sort all required components and hardware.
Remove 5/16-18 keps nuts (044031) and 5/16 washers
wheels and tongue jack.
six 9/16-18 shackle nuts (032044).
Feed a wire through the tongue and hook to the end of the
Torque lug nuts to 85 ft/lbs.
bolts (046230), four 1/2 flat washers (047025), and
rack. (Two bolts on each side)
Close hole with 1-3/4" Cap Plug (680878)
This information is continued on additional page(s).
AS1002
See "Section 3" for additional steps.
PROCESS DESCRIPTION
SW #
X
4
5
14
8
10
NLPROII V Container Shipment Assembly Instructions
Section 2
10/25/2011