Maintenance – Bestobell Steam Universal Trap User Manual
Page 2
Maintenance
The Universal Steam Trap can be readily overhauled by
replacing the Delta control element as a complete
assembly. Anew factory replacement control element and
gasket should always be used as this will be correctly
calibrated to restore your trap to its original efficiency.
The complete assembly including pipe connector must
be isolated from the steam supply before removal or
opening of the delta steam trap.
To repair the trap by replacing the control element:
1. Before removing the cover (16), the trap must be iso-
lated from live steam lines and condensate return lines,
and internal pressure in the trap should be relived via
venting to atmosphere or by cooking the trap to ambi-
ent temperature.
2. Loosen and remove the cover bolts (12) and cover (16).
3. Loosening the bimetal locknut enables insertion of
an open-end wrench under the bimetal (6) to free the
valve seat. Unscrew the valve seat from the body.
4. Before installing the new element / valve assembly (6),
clean the valve seating face on the body with a wire
brush. Inspect to ensure that all gasket seating sur-
faces are undamaged.
5. The replacement element assembly is factory preset.
It is vital that, during installation, the adjusting nut and
locknut on the spindle are not disturbed.
6. Unscrew the bimetal locknut to allow a wrench to
be placed between the bimetal and body for tighten-
ing of the seat into the body. Install the gasket (9) on
the base, and screw the valve seat into the body and
tighten to 20 ft-lbs using 7/8” wrench.
7. Line up the bimetal with the inlet and outlet ports
to ensure clearance once the cover is replaced, the
tighten the bimetal locknut.
8. Before replacing the cover, clean the cover gasket
faces thoroughly and insert replacement cover gasket
(2).
9. Replace the cover and bolts (12) with the bolt heads
on the cover side and hand-tighten the nuts. Torque
the cover bolts in two stages: initially to 50% and finally
to the full 35 ft-lbs. At each stage tighten in a diagonal
cross pattern.
To replace the Universal Trap mounted to the pipe
connector:
1. Remove the universal trap assembly by unbolting the
two connecting bolts (17).
2. Clean the face of the connector with a soft scraper
before attaching a replacement trap.
3. It is recommended that a new replacement inner and
outer spiral wound gaskets be used whenever mainte-
nance is done.
4. A suitable anti-seize compound should be applied to
the screw threads before tightening to 35 ft-lbs.
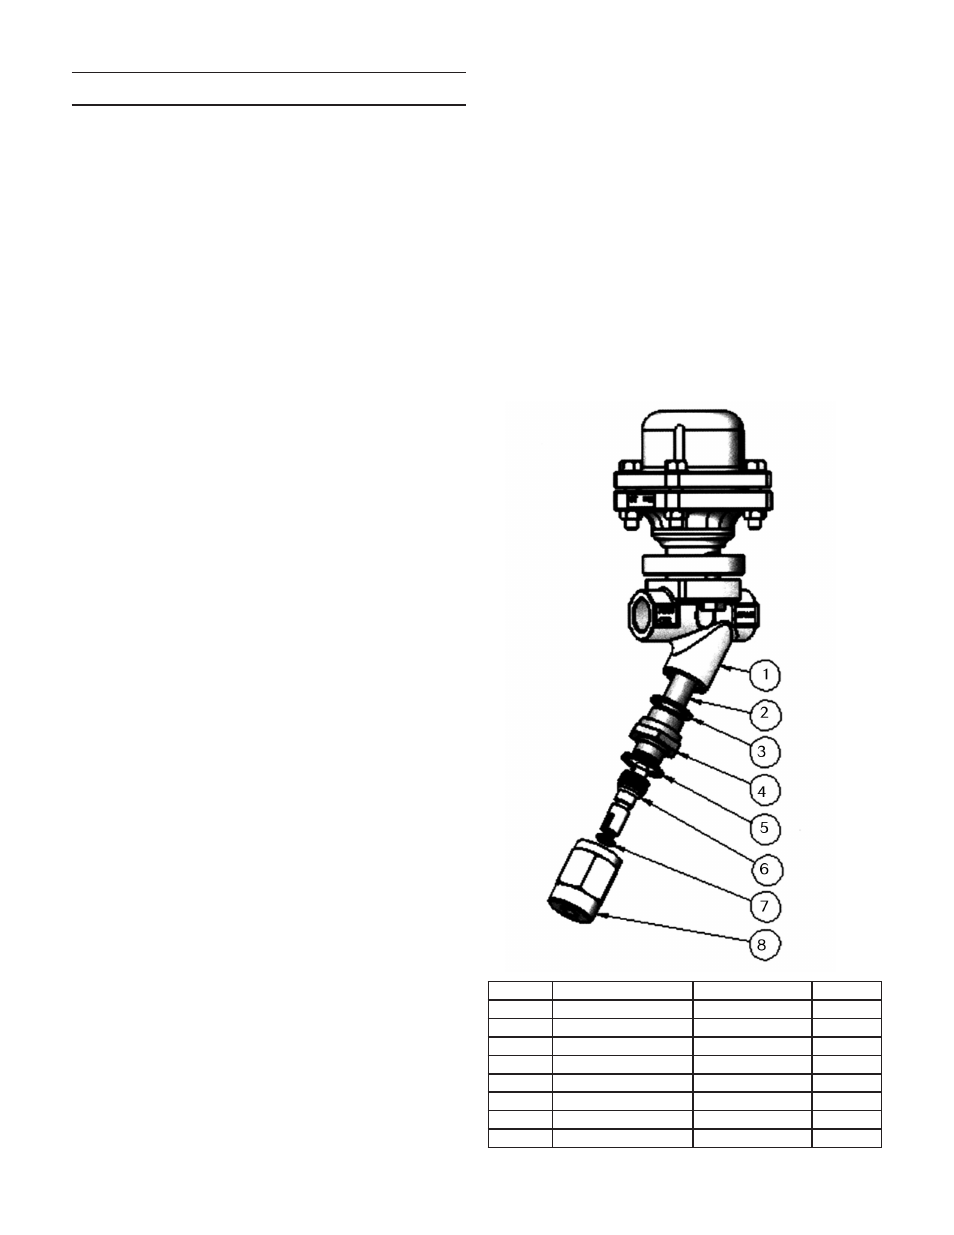
To clean or replace the strainer:
1. Remove the strainer cap (4) using a 1-1/4 wrench and
replace or clean strainer (2).
2. Clean the gasket faces and insert strainer (2) tapered
end first.
3. Replace the gasket (3) and tighten strainer cap (4) to
50 ft-lbs torque.
To repair the blowdown valve, see Integral Blowdown Valve
I & M.
Item
Part Name
Material
Qty
1
Connector
CF8 SST
1
2
Strainer
304 SST
1
3
Gasket
Grafoil
1
4
Strainer Cap
303 SST
1
5
Gasket
Grafoil
1
6
Stem
17-4 SST
1
7
O-Ring
EPDM
1
8
Bonnet
303 SST
1
Bulletin IM-UniversalTrap-0613