Part names, Installation instructions – Eneo HDB-2080M2810IR D User Manual
Page 17
17
EN
Part names
Sunshield bolt
Power cable
OSD setup control cover
Dual window
Front case
Rear case
Lock/unlock screw
Bracket
Easy bracket
Sunshield
Focus
Zoom
Torque wrench
Lock/Unlock screw
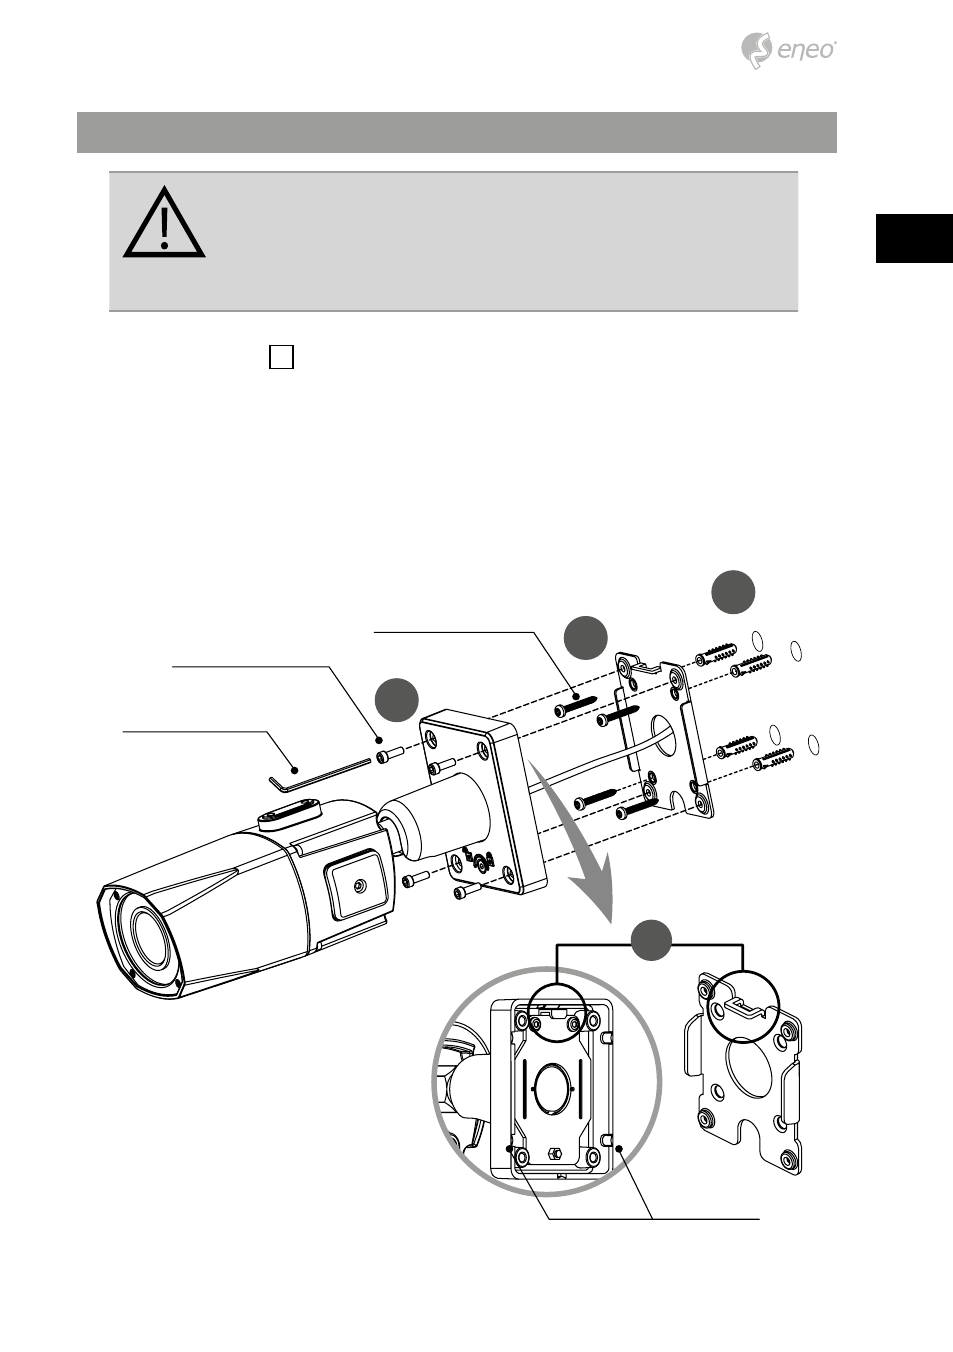
Installation instructions
CAUTION: The camera’s base should be attached to a structural
object, such as concrete, hard wood, wall stud or ceiling rafter
that supports the weight of the camera. If necessary use appro-
priate mounting material (e.g. anchors) instead of the material
enclosed with the camera.
1. Locate the mounting template at the installation position and drill the ceiling or
wall if needed.
i
The easy bracket can not be installed on the ceiling.
2. Place the easy bracket on pre-drilled position and fix it through using mounting
screws(4x30mm). Skip this step when an easy bracket is not installed.
3. Route the power cable to the connecting place. Hook up the camera bracket with
the easy bracket as illustrated below.
4. Fix the camera bracket through using assembly screws (4x14mm).
5. Set the camera’s viewing angle.
6. Put the sunshield to the camera unit and tighten the sunshield-bolts.
1
2
3
4
Assembly Screw: 4x14mm
Torque Wrench
Mounting Screw 1: 4x30mm
Cable exit