Eneo HDB-1080Z03IR B User Manual
Page 18
18
• Make sure the power is removed before the installation.
• Follow the order for applying power.
First, connect the low voltage (AC24V or DC12V), then plug the AC adapter to AC
outlets to avoid an improper reset from power jitter and a damage from the surge
voltage when no load. It is strongly required the polarity-matched connection for
12VDC supply, otherwise IR LEDs will not operate.
4a)
Easy Bracket: Connect hook
ⓘ to
peg
ⓚ.
5a)
Easy Bracket: Fix Bracket Foot
ⓓ to
EASY BRACKET by using wrench
bolts through Foot mount Hole (4x)
ⓔ.
4b)
Standard Bracket: Match Foot mount
Hole (4x)
ⓔ to the drilled position.
5b)
Standard Bracket: Fix the bracket by
using Wall fixing screws.
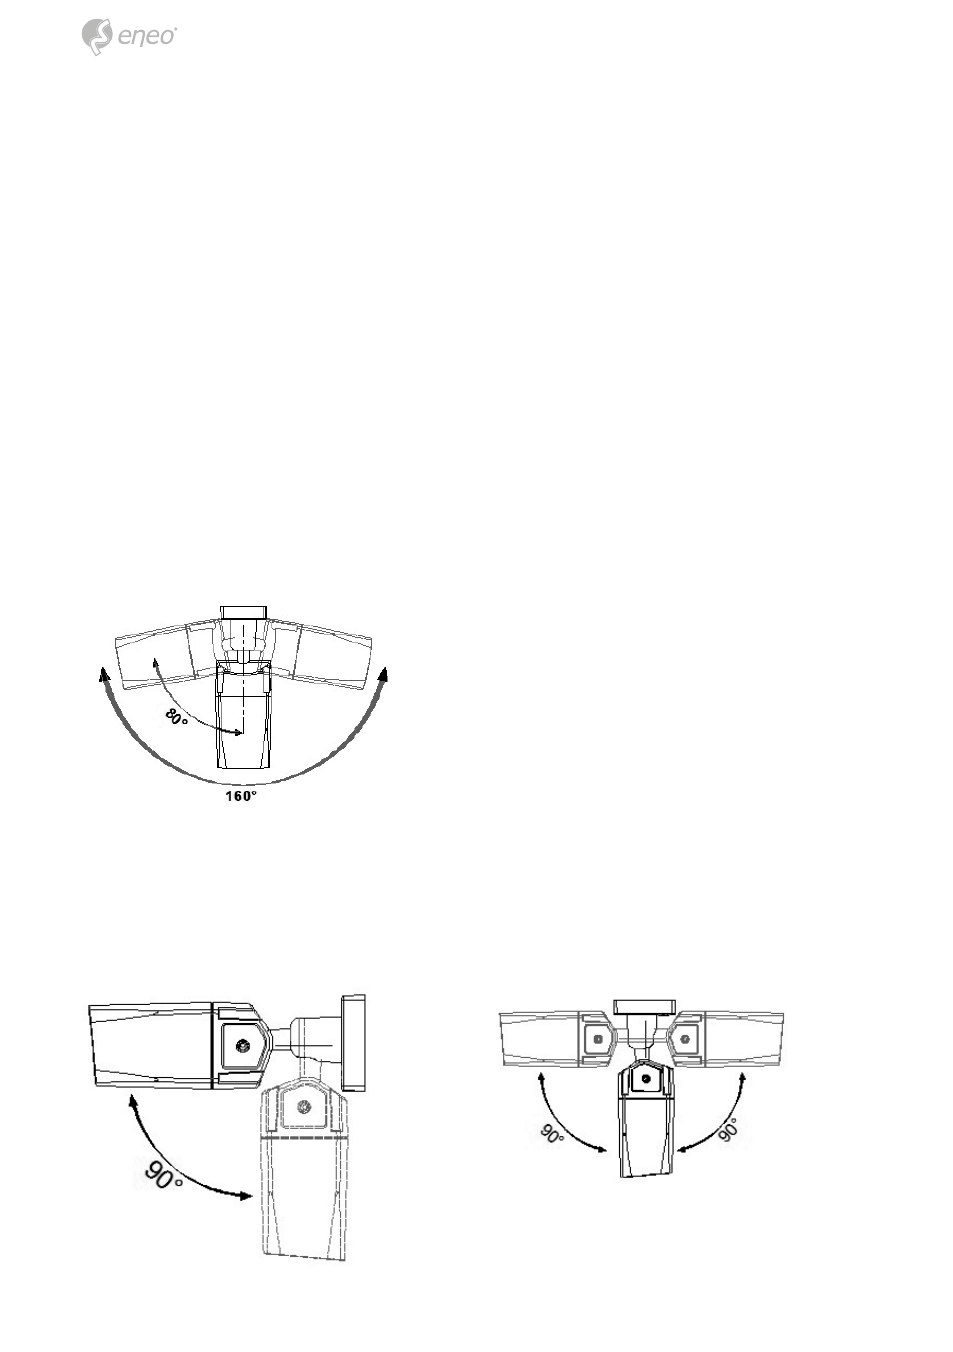
6. Set the camera’s angle (Pan, Tilt, inclination).
Pan is limited to +/- 80°.
Tilt is limited to 0°(2°) min ~ 90° max. for wall(ceiling) installation respectively with
reference to the ceiling when the inclination of camera module is 0°, that is, the
image is aligned horizontally.