Removing a power supply, Installing a power supply, Powering up the kaleido-x16 – Grass Valley Kaleido-X16 Installation v.7.70 User Manual
Page 20
8
Kaleido-X16 Installation
Power Supplies
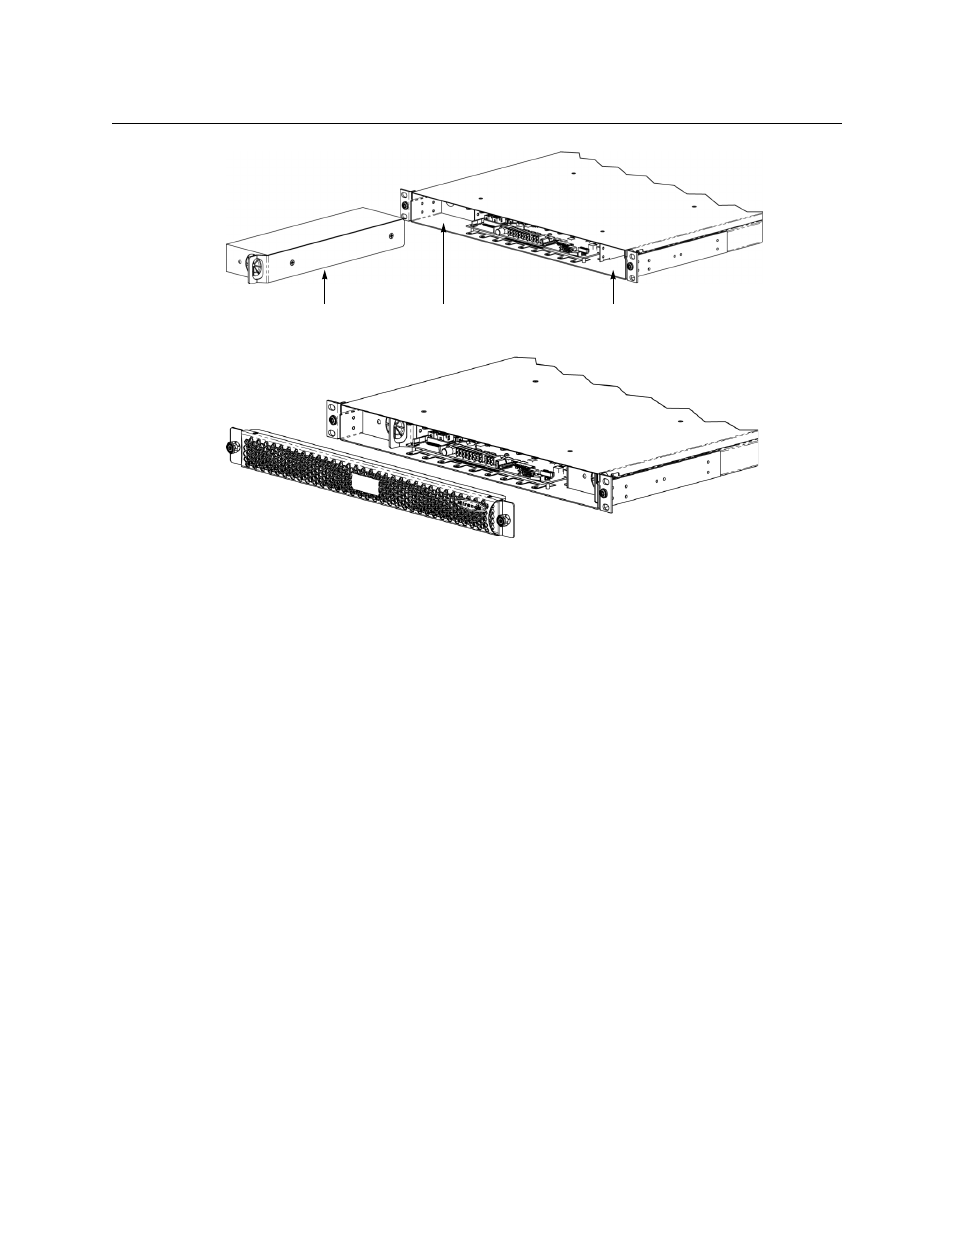
PSU slot locations
Two PSUs installed in a frame; front cover removed
Removing a Power Supply
To remove a power supply
1 Open the front cover of the frame and locate the power supply (PSU) you would like to
remove (either the left or the right side).
2 Pull on the handle on the right side of the PSU and pull the PSU out of the frame.
Installing a Power Supply
To install a power supply
1 Position the power supply (PSU) in front of an empty power supply slot in front of the
frame, with the connector end towards the frame and the PSU handle on the right side.
2 Slide the PSU into the empty slot, moving it gently until it contacts the sockets at the
rear of the slot.
3 Push firmly but gently on the PSU faceplate until the PSU’s connectors have mated with
the frame's sockets, and the PSU will go in no further.
Powering up the Kaleido-X16
Separate AC power sockets serve the two power supplies. On the rear of the frame, connect
both power sockets of the Kaleido-X16 to an appropriate power source using the supplied
power cords.
As seen from the rear of the frame:
• The left power socket is for PSU B.
• The right power socket is for PSU A.
Slot A
Slot B
PSU A removed from Slot A