Replacing the kxo-hdm on a kxo-dual3, Replacing the, Kxo-hdm on a kxo-dual3 – Grass Valley KXO-HDM Dec 20 2012 User Manual
Page 15
11
KXO-HDM
Installation Instructions
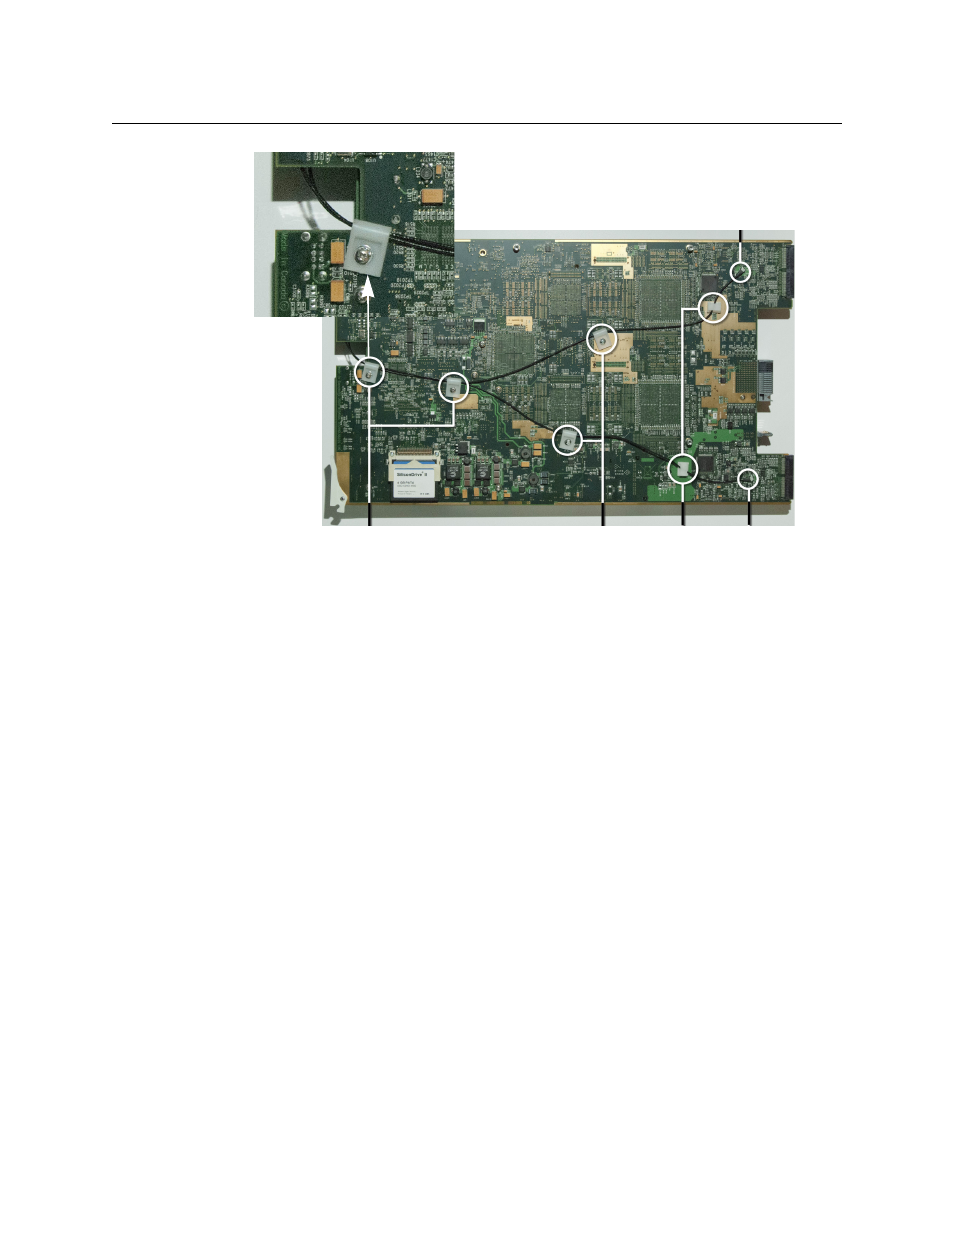
10 Secure the coaxial cables using the hardware described in the picture above.
The four washers E are inserted between lock washer and cable retainer. In most of the
mounting holes used, there are hexagonal supports that need to be removed before
attaching the plastic cable retainers.
11 Reinstall the small PCB that you had to remove in
The mezzanine installation is now complete. Reseat the KXO-Dual3 card in the frame.
Replacing the KXO-HDM on a KXO-Dual3
This replacement procedure applies to the KXO-Dual3 boards only, which have assembly
numbers
0792-0100-600 and above. See
on page 1, for information on
locating the assembly number.
Before you start, make sure that you have a Phillips #1 screwdriver at hand, and that you are
wearing a static control wrist strap. Allow approximately 15 minutes to complete the
installation.
To replace the KXO-HDM on a KXO-Dual3 card
1 Lay your KXO-Dual3 card on a work surface.
2 Remove the small PCB (KX-JTAG PULLUP, part no. 1770-5500-100), next to the battery, in
the area near the bottom ejector, by gently pulling it away from the card.
Connector J3001
Screws B
Lock washers C
Washers E
Cable retainers F
Screws D
Washers E
Cable retainers F
Cable retainers G Connector J3000