Grass Valley SSP-3801 Installation v.1.2 User Manual
Page 31
27
SSP-3801
Installation and Configuration Guide
To configure the system’s identity:
1 Open and log into the SSP-3801 card’s web interface (see
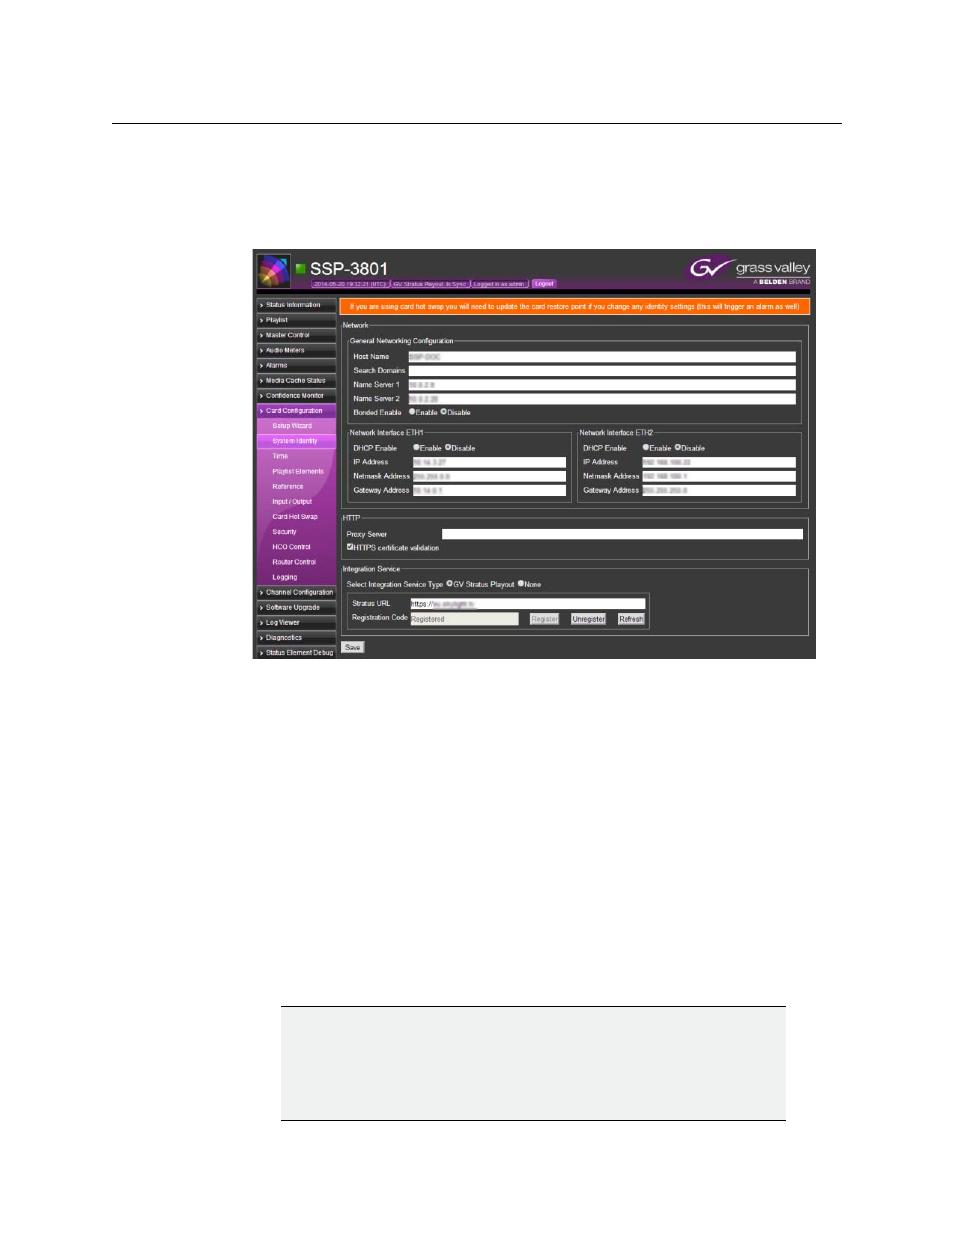
2 From the menu, select Card Configuration > System Identity.
Figure 4-2. SSP-3801 web interface’s System Identity page
3 In the General Networking Configuration section, complete the following settings:
• Host Name: Specify the network host name.
• Search Domains: Specify space-separated list of domains to search.
• Name Server 1 and Name Server 2: Specify the IP address or hostname of the
Domain Name System Server for each.
• Bonded Enable: If you connected two Ethernet cables with the intention to have
them bonded, select Enable. To disable Ethernet bonding, select Disable.
4 In the Network Interface ETH sections, disable DHCP and assign static IP addresses:
• DHCP Enable: Select Disable.
• Specify the static IP Address, Netmask Address, and Gateway Address.
5 In the Proxy Server field, type the HTTP Proxy server to use. If there is no proxy server
used, leave this field empty.
6 Enable HTTPS certificate validation as required.
IMPORTANT
If you have made any changes to the network settings, the system will
prompt you to restart the card. If you changed the IP address, you may
need to update the SSP-3801 web interface’s URL address before
proceeding with registering with the GV STRATUS Playout service.