Starting the vertigo xg, Starting the vertigo xg -14 – Grass Valley XG Vertigo Quick Start v.5.0 User Manual
Page 39
2-14
Vertigo XG Installation & Quick Start Guide
Installation and quick start instructions
Starting the Vertigo XG
Once the Vertigo XG is properly racked and cabled, you can make the power connections
and you can perform the first-time start up of the Vertigo XG unit.
1.
Plug the monitor’s power cable into a power socket and power it on.
2.
Plug the Vertigo XG’s power supply cables into a power socket.
3.
Power on the Vertigo XG unit by pressing the P
OWER
button on the unit’s front panel.
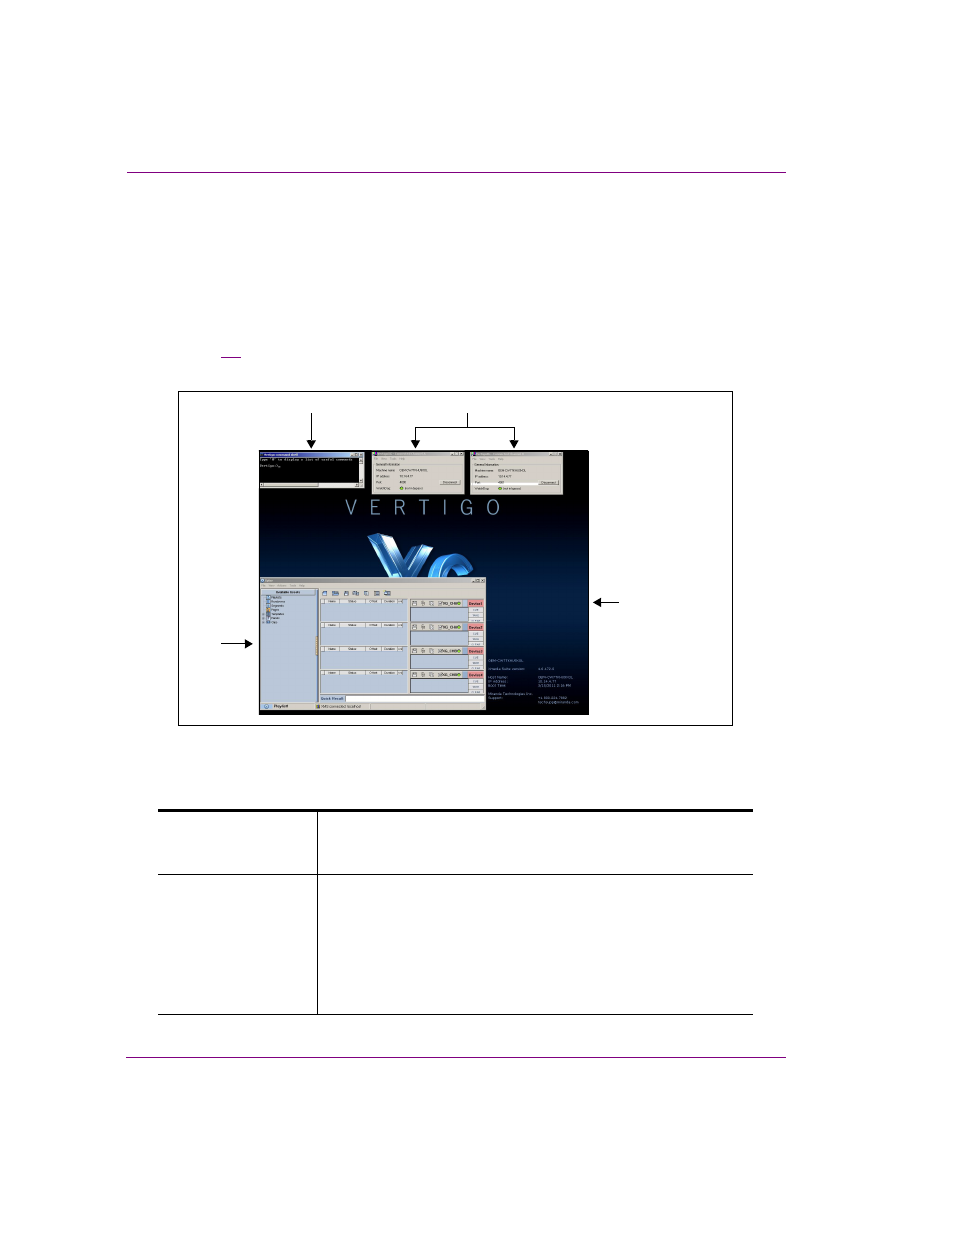
Figure
demonstrates that upon startup, the Vertigo XG automatically displays the
desktop applications on the monitor.
Figure 2-4. The Vertigo XG’s desktop applications
The following table provides briefly introduces each of the Vertigo XG’s desktop applications.
The Vertigo XG Configuration Guide provides further details regarding these applications.
Vertigo XG desktop
wallpaper
The Vertigo XG desktop wallpaper features the Vertigo XG logo, as
well as identification information related to the specific Vertigo XG
device.
Vertigo XG Control
Panel(s)
Dual channel Vertigo XG units (XG22-e) will display two (2) Control
Panels (Channel A & Channel B), while on single channel Vertigo
XG units (XG21-e) will display only one.
The Control Panel is a simple user interface that allows you to
quickly reference general information about the Vertigo XG device,
as well as perform basic tasks for operating the Vertigo XG like,
loading a scene and launching the XG Dashboard application.
Vertigo XG
Desktop Wallpaper
Xplay
Vertigo XG Control Panels
Vertigo Command Shell