Spring pre-loaded adjustment, Trouble shooting, Ordering spare parts – Jordan Valve Mark 79/79MX Series – 3 Way Mixing/Diverting Valve User Manual
Page 4: Torque values
-4-
Adjust spring preload. See “SPRING PRELOAD AD-
9.
JUSTMENT” section.
Spring Pre-Loaded Adjustment
The signal range (3 to 15 psi, or other) is preset by
Jordan; however, when the valve is installed this range
may shift slightly due to pressure drops across the valve.
Additionally, preload adjustment may be required after
one of the previous maintenance procedures.
Remove the air signal line from the actuator and
1.
replace with a pressure gauge and an air regulator.
Loosen, but do not remove, the stem connector
2.
bolt and nut (19, 20).
Adjust the actuator air pressure to just below the
3.
starting point of the range and rotate the actuator
stem (27) until the stem just starts to move. Con-
tinue to rotate the actuator stem about one-half
turn. Remove the air pressure. Increase the air pres-
sure and check the pressure at which the valve just
starts to move. Repeat actuator stem adjustment if
necessary and again check pressure at which the
stem starts to move.
After the preload has been properly adjusted, tight-
4.
en the stem connector bolt and nut, and reattach
the control air line.
Trouble Shooting
If You Experience Erratic Control:
Oversizing causes cycling and hunting and reduces
the rangeability of the valve. Make certain that your
sizing is correct.
Steam traps downstream may need attention.
Safety valve may be jammed open. Repair as nec-
essary.
Excessive foreign matter on seats. Clean them.
Valve stroke out of adjustment. Check and readjust
if necessary.
Valve disc may not be moving freely.
If Valve Will Not Operate:
Diaphragm may be ruptured. Replace as needed.
Adjusting spring broken. Replace as needed.
Improper spring setting. Reset as needed.
Ordering Spare Parts
Use only genuine Jordan Valve parts to keep your valve
in good working order. So that we can supply the parts,
which were designed for your valve, we must know ex-
actly which product you are using. The only guarantee to
getting the correct replacement parts is to provide your
Jordan Representative with the valve serial number. This
number is located on the valve identification tag. If the
serial number is not available, the parts needed for your
valve might be determined using the following informa-
tion: Model Number, Valve Body Size, Seat Material and
Cv Rating, Spring Range and Set Point, Trim Material, Part
Name - Number and Quantity.
NOTE: Any parts ordered without a valve serial number
that are found to be incorrect are subject to up to a mini-
mum 25% restock charge when returned.
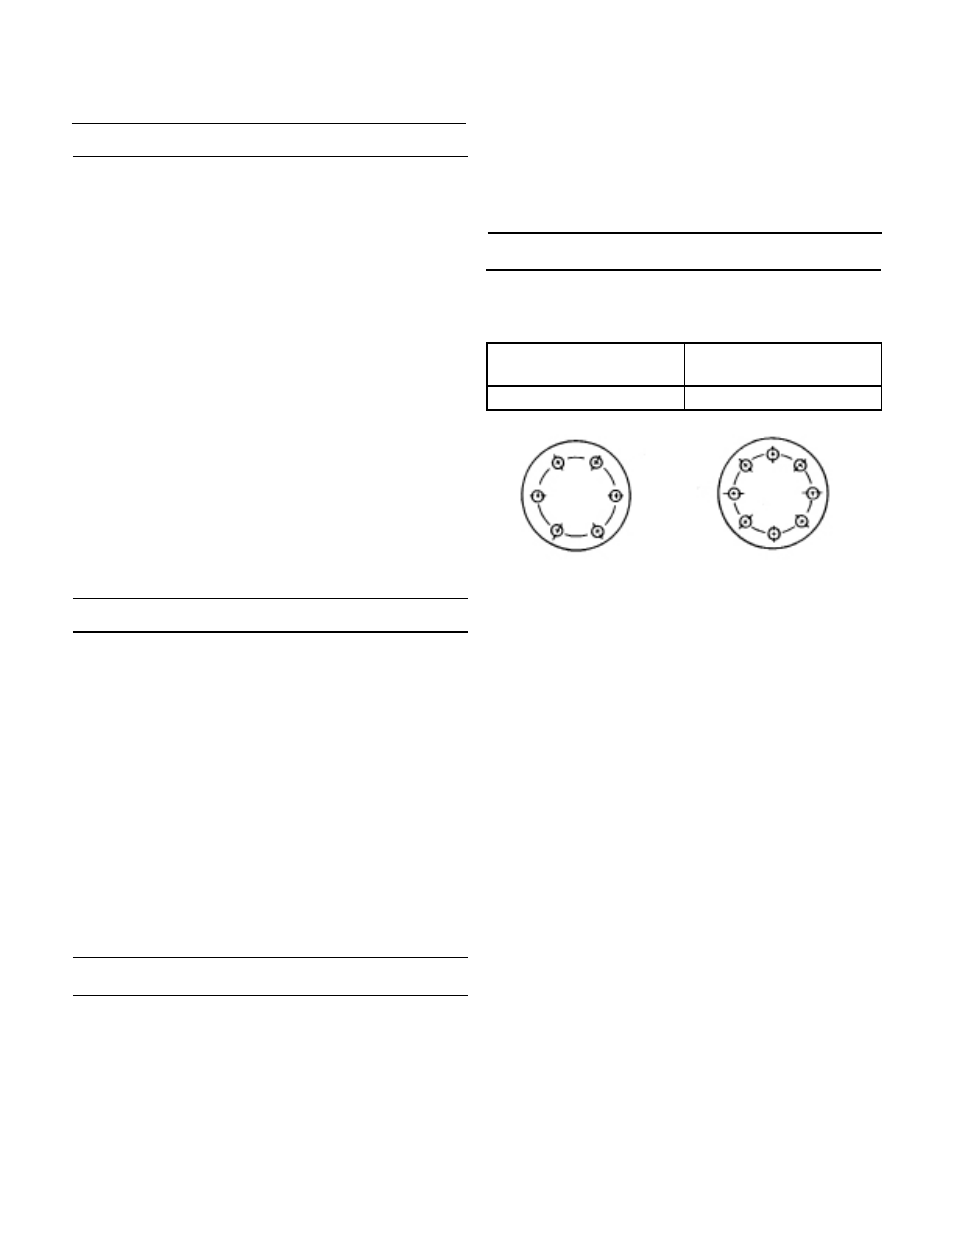
Torque Values
Torque for bolts connecting valve cap to valve body;
torque in sequence shown to the following values:
Cast Iron, Ductile Iron or
Bronze Valves
Carbon Steel or Stainless
Steel Valves
140 in. - lbs.
150 in. - lbs.
5
3
1
6
4
2
5
3
1
6 4
2
7
8
6 bolts
(or multiples)
8 bolts
(or multiples)