Installation, use and maintenance guide – Larco Safety Mat Systems User Manual
Page 7
7
Installation, Use and
Maintenance Guide
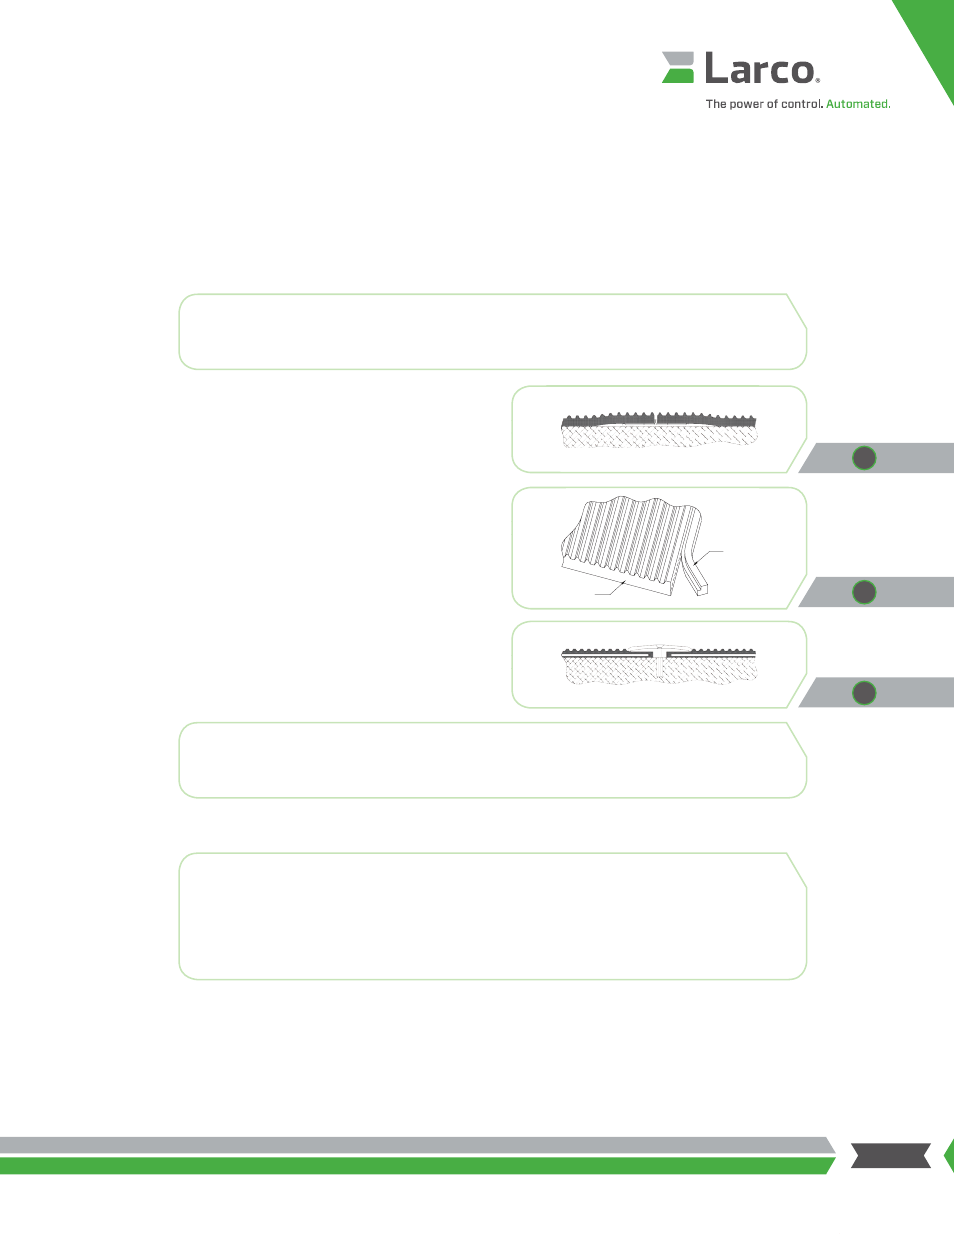
a. Joining Trim and Cord Routing
There are two types of joining trim. The first is the Active Joiner shown in Figure 3, which fits under adjacent mats when wire
clearance is not necessary. The Active Joiner requires removal of the lock lip on the edge of the mat where the Active Joiner is
used. The Active Joiner is held in place by the weight of the mats and any perimeter trim used on the outside edges.
Using a sharp razor knife and straight edge, carefully remove the
lock lip only on the mat edges that will be joined together using the
active joiner. (Refer to Figures 3 and 4).
The second type of joining trim is Active Threshold (shown in
Figure 5) which bridges adjacent mats and provides a gap
between the mats for wiring.
Route the cords for each mat to the mat control device. Typically,
cords are routed around the edges of the mat(s) and under the
perimeter trim until they reach the desired exit point, or they exit
the trim immediately and are routed through a wire raceway to
protect the cords from damage.
b. Perimeter Trim and Cord Clearance
If your installation was ordered without mounting trim, or with a different mounting method, refer to the specific installation
instructions enclosed with the product and then skip to
Electrical Connections
on page 10.
Note: To aid with wire management, small drops of instant adhesive may be used to secure the cord to the
edge of the mat at appropriate intervals.
CAUTION: Be sure of your mat placement before removing the lock lip on the edges of the mats to be joined.
The lock lip cannot be replaced once removed.
Note: The following instructions apply to those installations using the traditional method of physically
anchoring the mat(s) in place with screws and anchors through extruded aluminum mounting trim. Some
applications do not require the trim, such as those where the mat is mechanically “trapped” in place. Another
example would be installations using the Larco Labor Saver Self-Adhesive system. For more information on
this visit
www.larco.com/resources
Figure
3
Active Joiner
joining 2
mats
MAT
LOCKLIP
REMOVAL
Figure
4
Removal of
lock lip prior to
Active Joiner
application
Figure
5
Active
Threshold
joining 2 mats