Reading the barometric pressure, Setting the channel, Displaying the outdoor temperature – Auriol Z31092 User Manual
Page 39
39
GB/MT
Press the HISTORY / WEATHER button
27
for about 3 seconds. The weather symbol
1
flashes.
Set the current weather by pressing
the “+“ / °C / °F button
28
or the
“–“ / MAX / MIN button
29
.
You can choose between the following
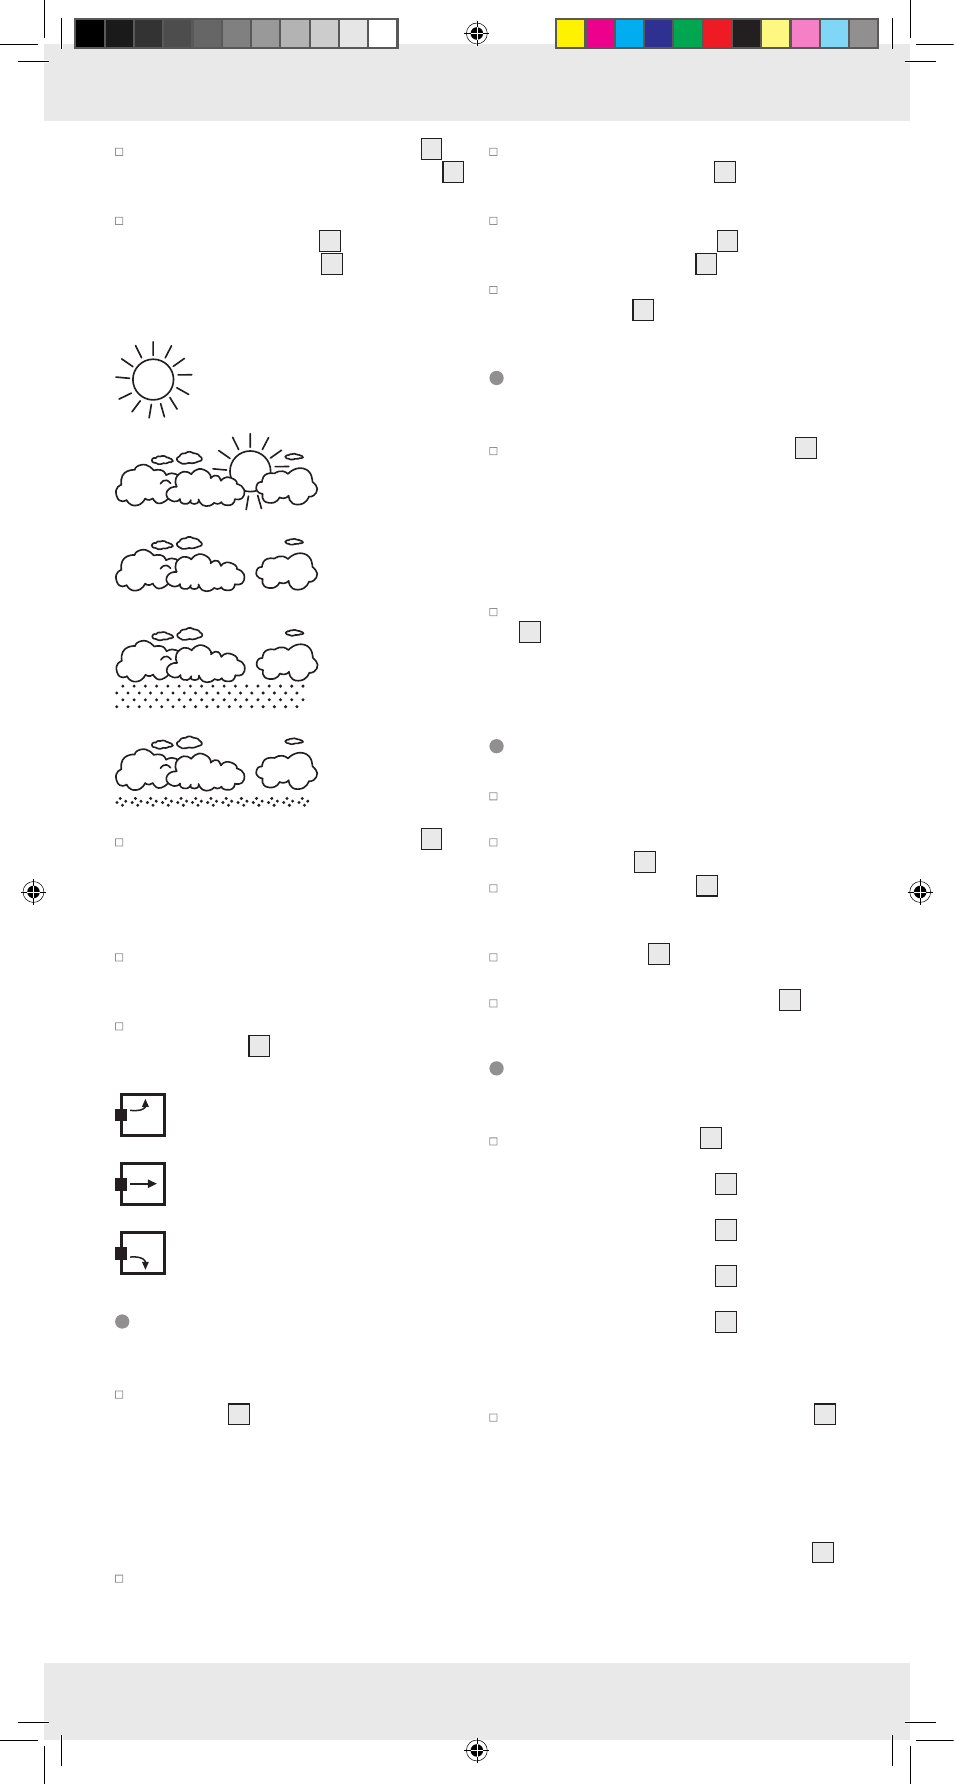
weather symbols:
= sunny
= light clouds
= cloudy
= cloudburst /
storm
= rainy
Press the HISTORY / WEATHER button
27
to
confirm your settings.
Note: Ensure that you have set the current
weather correctly, otherwise the weather
forecast will not be correctly displayed.
The weather station starts with the weather
forecast approximately 6 hours after you
enter the current weather.
The weather station can display the barometric
pressure trend
25
. You may see the following
displays:
= the barometric pressure will rise.
= the barometric pressure will remain
constant.
= the barometric pressure will fall.
Reading the barometric
pressure
Press the Relative / absolute barometric pres-
sure button
30
to switch between the relative
and absolute barometric pressure display.
Note: The display shows “Abs” if you have
selected absolute pressure. The display shows
“Rel” if you have selected relative pressure.
Note: The absolute barometric pressure is
measured by the weather station.
Set the relative barometric pressure to the
barometric pressure relative to that at sea
level. Ask your local weather forecast service
for the barometric pressure at sea level.
Press and hold down the Relative / absolute
barometric pressure button
30
for about
3 seconds.
Set the current barometric pressure by press-
ing the “+“ / °C / °F button
28
or the
“–“ / MAX / MIN button
29
.
Press the Relative / absolute barometric
pressure button
30
to confirm your settings.
Reading the barometric
pressure for the last 12 hours
Press the HISTORY / WEATHER button
27
to read the barometric pressure values for
the last 12 hours.
0HR = present barometric pressure
– 1HR = barometric pressure an hour earlier
– 2HR = barometric pressure two hours
earlier, etc.
Press and hold down the “+“ / °C / °F button
28
for about 3 seconds to switch between
displaying the barometric pressure units in
inHg or mb / hPa.
Setting the channel
To do this open the battery compartment on
the back of the outdoor sensor and take it off.
Set the channel by means of the Channel
selection switch
39
.
Press the channel button
26
for approx. 3
seconds until a signal is sounded. The wea-
ther station has now received one signal.
Press the TX button
42
to transmit the measured
temperature to the weather station manually.
Then close the battery compartment
40
.
Displaying the outdoor
temperature
Press the Channel button
26
to display the
outdoor temperature of each outdoor sensor.
– Press the Channel button
26
1 x to display
channel 1.
– Press the Channel button
26
2 x to display
channel 2.
– Press the Channel button
26
3 x to display
channel 3.
– Press the Channel button
26
4 x to display
all the channels one after the other in a loop.
Only the outdoor sensors which can be
addressed are displayed.
Press and hold down the Channel button
26
to remove unused channels. If a further out-
door sensor and channel are added later,
the weather station will receive the signal
automatically. Alternatively, you can also
transmit the initial signal from the outdoor
sensor manually by pressing the TX button
42
.