Installation and removal of belt, Belt adjustment path, Connect the dust bag – Powerplus POWX139 FILE / BELT SANDER 400W EN User Manual
Page 7
POWX139
EN
Copyright © 2014 VARO
P a g e
| 7
www.varo.com
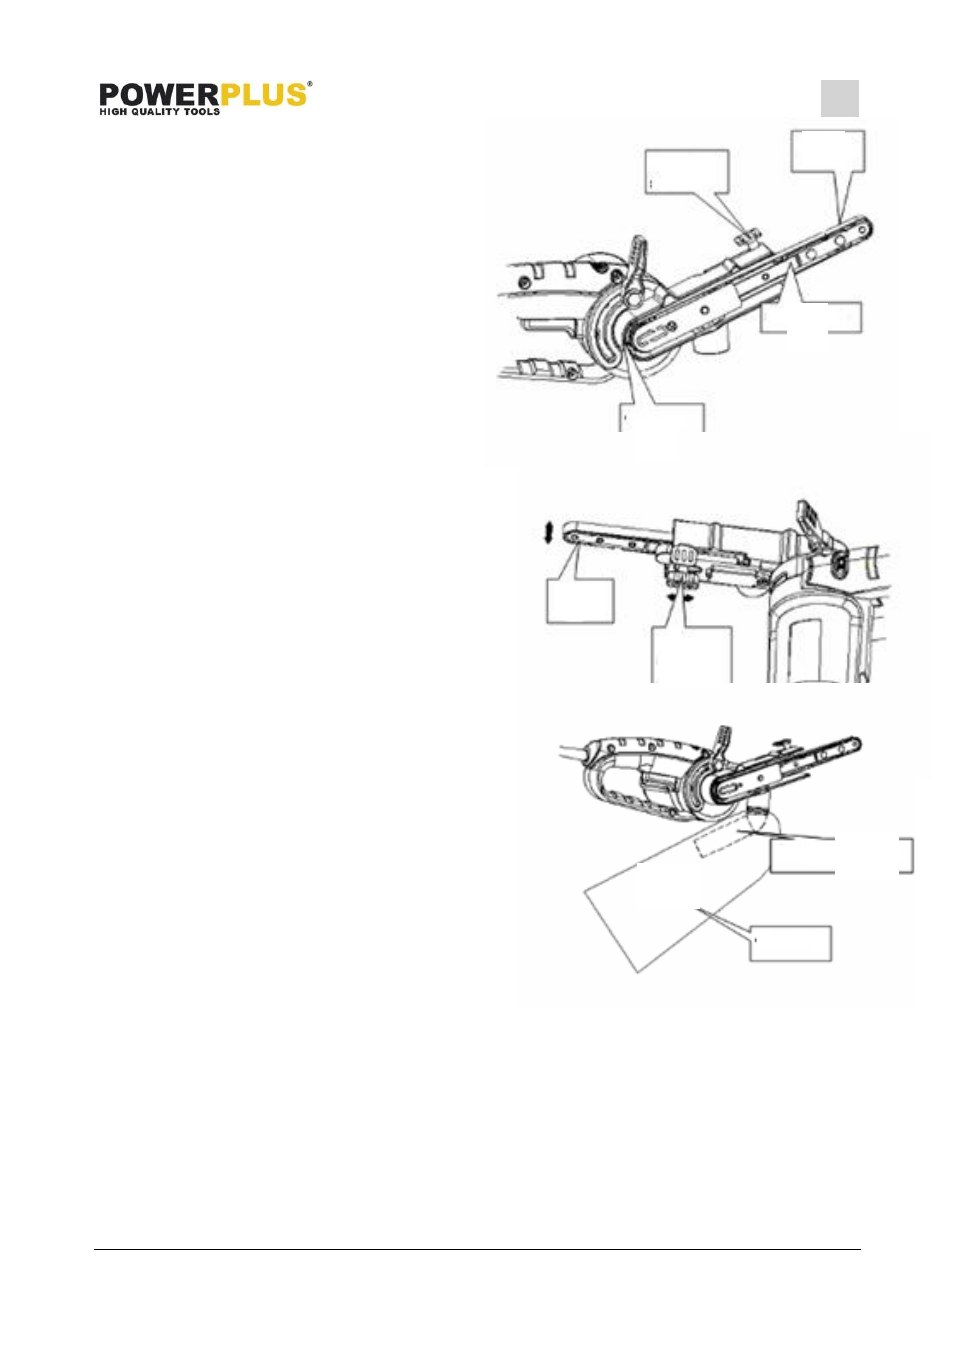
7.2
Installation and removal of belt
Make sure the machine is turned off and
unplugged before installing or removing
the belt.
Pull the tension spanner to the back. Put
the belt on the driving wheel and pull the
belt to the front of the arm, and then
make the belt slip to the belt wheel
before pulling the tension spanner back
to the forward position.
7.3
Belt adjustment path
Check if the sanding belt is running centrally
before starting the work.
Run the file at no load speed and turn the
centralizing knob either clockwise or anti-
clockwise to adjust the belt tracking until the
sanding belt is running smooth.
7.4
Connect the dust bag
This machine is fitted with a dust extraction
outlet and a collection bag.
We recommend using this facility is at all
times, as well as using an approved face
mask. It will make you work cleaner.
First place the extraction outlet, and then fit
the dust collection bag onto the outlet.
2
k
n
o
b
3
9
A
d
j
u
s
t
a
b
l
e
k
n
o
b
3
k
n
o
b
1
10
11
5
k
n
o
b