18 attaching the bicycle, Tool tray – Crivit FM-1401 User Manual
Page 18
18
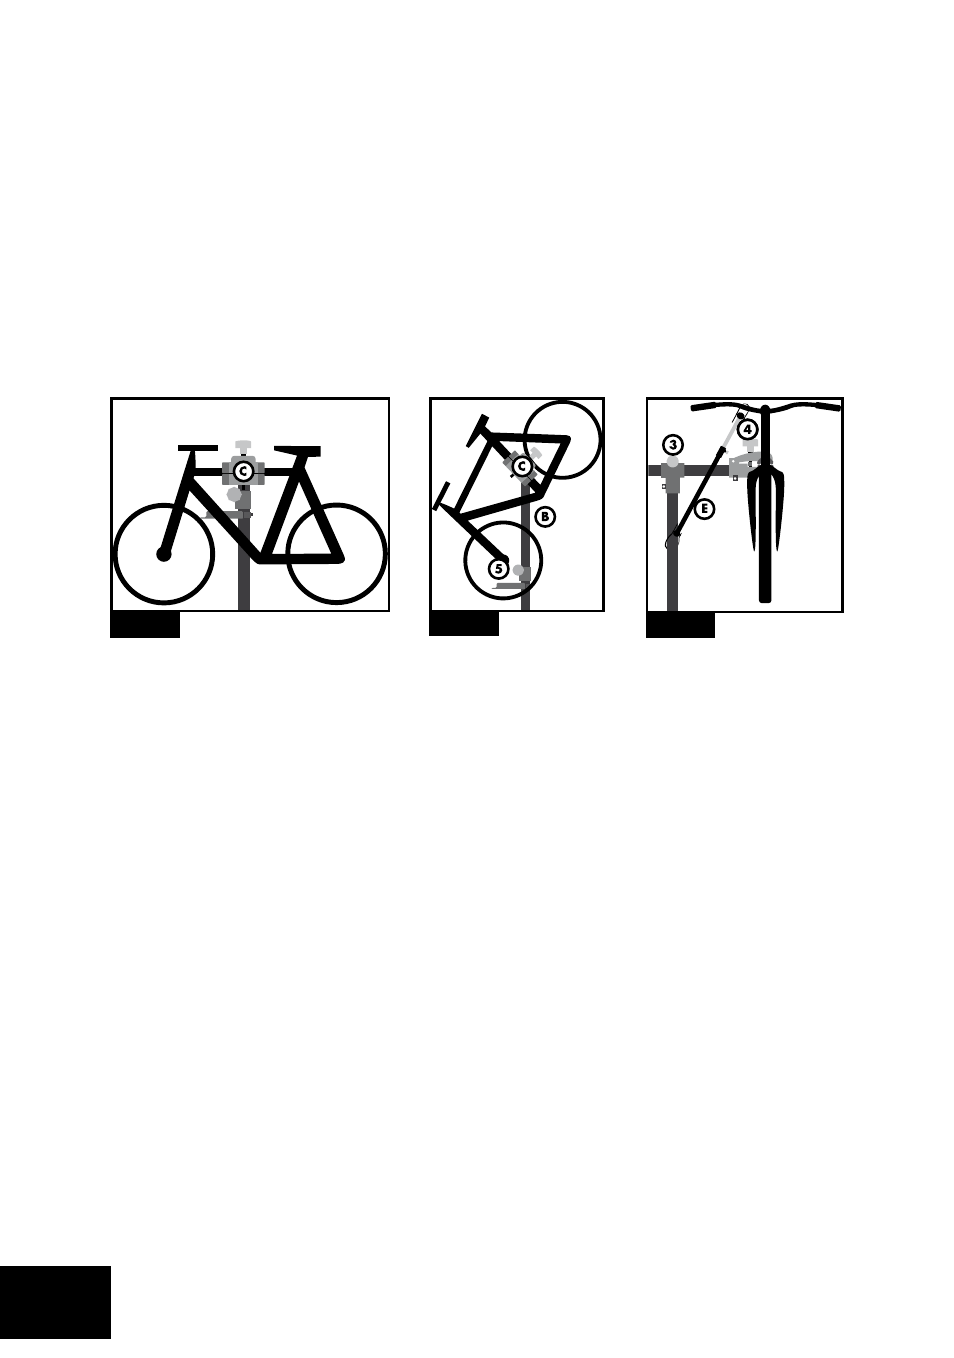
Attaching the bicycle
Attention:
• After inserting the bicycle verify it is securely positioned and the bicycle
assembly stand is stable.
• Please observe the maximum extension lengths of the telescopic
rod (B) and the bicycle bracket (c). do not exceed the marking on the
telescopic pole (B)! never extend the cross-bar on the bicycle bracket
(c) farther than shown in fig. 1.
Select a section of the bicycle frame to be clamped into the bicycle assembly stand.
This frame section must be at the bicycle’s centre of gravity.
Adjust the angle of the bicycle bracket (C) to fit the selected frame position of the bicycle
(see examples in fig. 2 and fig. 3) and tighten the screw (3) (fig. 4). Now place the
bicycle in the bicycle bracket and firmly secure frame. Firmly tighten the screw (4) (fig. 4).
• We recommend performing the next step (height adjustment)
with 2 persons.
You may then extend the telescopic rod (B) to the desired height.
Twisting the telescopic rod allows you to also change the position of the attached bicycle.
Once you have reached the desired height and position firmly tighten the screw (5)
(fig. 3).
To secure the front wheel clamp the included front wheel stabiliser (E) between the front
handlebar and the telescopic pole (fig. 4).
tool tray
A magnet is located inside the large compartment of the tool tray for securing small parts.
Fig. 3
Fig. 4
Fig. 2