Fig.8, Troubleshooting, Fig.9 fig.10 – Sealey SAC65010B User Manual
Page 4
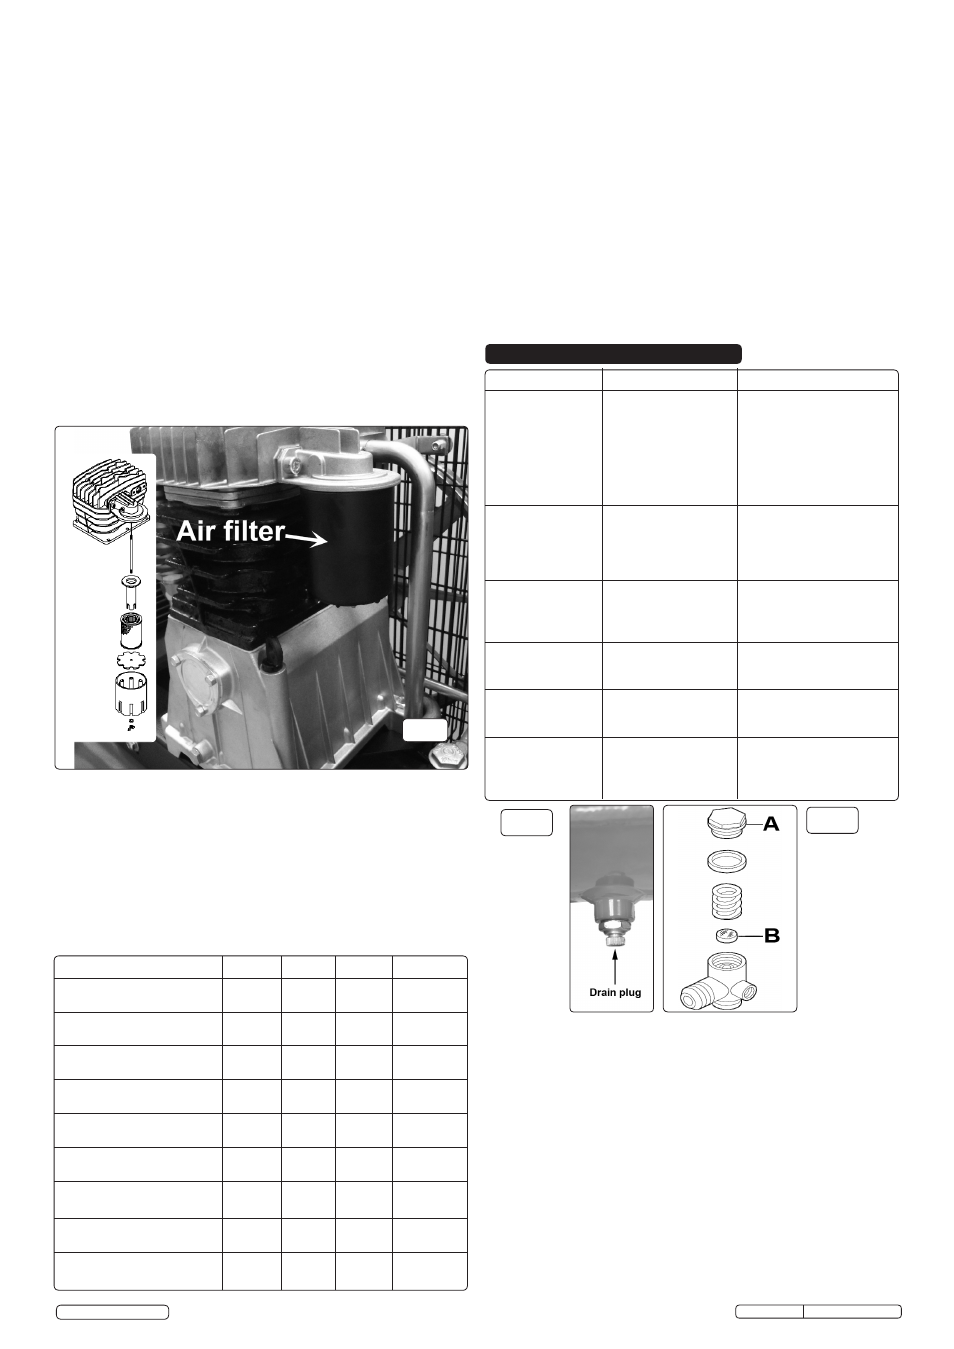
fig.8
Original Language Version
© Jack Sealey Limited
SAC65010B Issue: 1 - 24/12/14
WARNING! Never mix different oils and DO NOT use
non-detergent/low quality oils as the compressor may be
damaged.
WARNING! Dispose of waste oil only in accordance with
local authority requirements.
b) Replace air filter. (See fig.8)
c) Check all tube fittings and electrical connections.
d)
Inspect pressure tank inside and out for damage or corrosion.
5.6. Maintenance Schedule
Maintenance Operations
Weekly 50hrs
100hrs
400 hrs
Drain condensation
•
Check oil level
•
Clean intake filter
•
Check for oil leaks
•
Replace oil
•
Check cut-out
•
General cleaning of
compressor
•
Replace air filter
•
Check tube fittings and
electrical connections
•
Inspection of pressure tank both inside and out.
Under the PRESSURE SYSTEMS SAFETY REGULATIONS 2000 it is
the responsibility of the owner of the compressor to initiate a system of
inspection that both defines the frequency of the inspection and appoints
a person who has specific responsibility for carrying out the inspection.
5.7. Recommended oils
Synthetic oil suitable for temperatures ranging from -5°C to 45°C:
viscosity 5W50. We do not recommend using mineral oil in these
compressors.
Part No. Qty. Description
FSO1
1ltr x 12 Compressor oil fully synthetic
FSO1S 1ltr x 1 Compressor oil fully synthetic
FSO5
5ltr x 1 Compressor oil fully synthetic
5.8. IMPORTANT WARNING - Air contaminants taken into the
compressor will affect optimum performance. Example: Body filler
dust or paint overspray will clog the pump intake filter and may
cause internal damage to pump/motor components. Please note
that any parts damaged by any type of contamination will not be
covered by warranty.
6. TROUBLESHOOTING
Fault
Cause
Remedy
Pressure drop in the
tank.
Air leaks at
connections.
Run compressor to max.
pressure, switch off.
Brush soap solution over
connections and look for
bubbles. Tighten connections
showing leaks. If problem
persists contact Authorised
Service Agent.
Pressure switch
valve leaks when
compressor is idle.
Non-return valve seal
defective.
Discharge all tank pressure.
Referring to fig.10, unscrew
valve cap 'A'. Clean rubber
disc 'B' and its seat. Refit all
parts accurately.
Compressor stops
and does not restart.
Power failure.
Motor failure.
Check electricity supply and
fuse.
Contact Authorised Service
Agent.
Compressor does
not stop at max
pressure.
Pressure switch fault.
Contact Authorised Service
Agent.
Compressor does
not reach max
pressure.
Filter clogged.
Head gasket or valve
fault.
Replace filter element.
Contact Authorised Service
Agent.
Compressor noisy
with metallic knock.
Low oil level.
Bearing or piston
damage.
Turn off and top up oil
immediately.
Contact Authorised Service
Agent.
fig.9
fig.10
5.3. Operations to be carried out every 50 hours
(or more frequently, if the compressor operates in a dusty
atmosphere):
a)
Remove the air filter element (fig.8). Using stored air from
the compressor's tank, clean the filter with compressed air.
(Wear eye protection and
DO NOT direct
air towards the body or hands).
DO NOT operate the
compressor without the filter as foreign bodies or dust could
seriously damage the pump. Replace the filter element and
air filter housing.
b) Check for oil leaks.
5.4. Operations to be carried out every 100 hours:
a) Check the automatic cut-out at max. pressure and the
automatic cut-in at 2bar below.
5.5. Operations to be carried out every 400 hours:
a) Replace the lubricating oil. For oil specifications see 5.7.
Remove the dipstick, then remove the oil drainer plug
(fig.4), draining the oil into a container. Drain when the
compressor is hot so that the oil drains rapidly and completely.
Replace oil drain plug and refill through the dipstick.
DO NOT overfill. Replace dipstick.