Fig.1 fig.2, Fig.4 fig.5, Fig.3 – Sealey PW1712 User Manual
Page 2: Operation
3. OPERATION
PW1712 Issue: 2 - 10/10/13
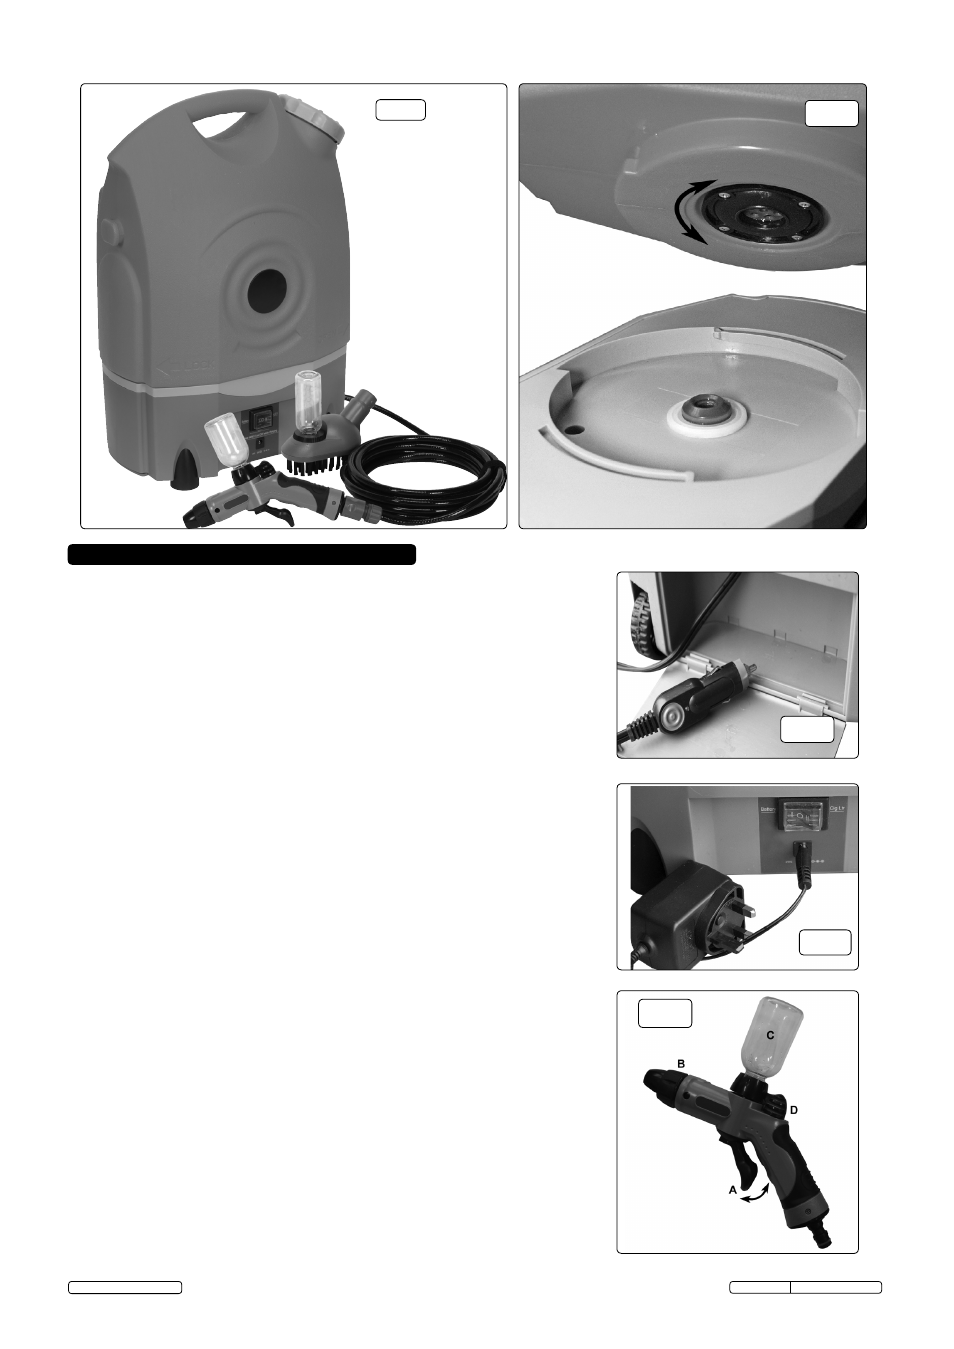
fig.1
fig.2
3.1. Filling
3.1.1. To detach the tank from base, turn tank by ¼ turn anti-clockwise (fig.2) and lift off.
3.1.2. Unscrew tank cap and fill from tap; replace cap.
3.1.3. Re-attach tank to base by pushing down and turning clockwise to lock.
3.1.4. Do not fill tank with detergent. Use detergent bottles supplied with the machine.
Failure to do so may invalidate the warranty.
3.2. Power Supply
3.2.1.
The washer can be powered either directly from the vehicle's 12V accessory socket
or from the internal 12V battery.
3.2.2. To select which power source to use, move the rocker switch (fig.4) to the
appropriate setting. The centre ("O") setting is the "OFF" position.
3.2.3. If using the12V accessory socket, plug the adaptor (fig.3) into the vehicle.
It is advisable to leave the vehicle engine running whilst using the
washer in this mode. Switch off and disconnect from the vehicle when not in use.
3.2.4. For battery charging details, see section 4.
3.3. Pressure Washing
3.3.1. Connect hose and gun (fig.5) to the machine by pulling the connector on the hose
back and pushing the hose onto the gun.
3.3.2. When connected, the pump will build up initial pressure and stop until the
trigger (fig5.A) is pulled to release the pressurised water. The trigger can be locked
on by pushing forward fully as in fig.6.
3.3.3. The spray pattern may be adjusted by rotating the collar (fig 5.B) as in fig.6.
3.3.4. The unit is fitted with an automatic stop switch that will turn the pump off when the
trigger is released.
3.3.5. Always discharge the pressure in the hose before removing tools.
3.4. Detergent Dispenser
3.4.1. The detergent bottle (fig.5.C) can be removed by unscrewing from the nozzle body.
3.4.2. When filled with appropriate detergent, invert the body and screw the bottle in place.
3.4.3. The detergent flow is started by moving the control lever (fig.5.D) fully clockwise and
vice-versa.
3.4.4. The detergent is dispensed by being displaced by water from the nozzle: the level
of the detergent does not go down, but the strength is diluted by the incoming water.
When the detergent has been exhausted, remove the bottle, empty and refill with
neat detergent.
3.5. Brush Attachment
3.5.1. To attach the brush to the nozzle: unscrew collar (fig.5.B) as far as possible and then
pull to remove. Replace with the brush attachment, locking in by locating the lugs
on the brush in the holes in the nozzle body (fig.7.A)
3.5.2. The detergent dispenser is similar to that described in section 3.4. When using the
detergent system with the brush, keep the empty bottle on the nozzle (fig.5.C) in
place and turn the control lever (fig.5.D) to the 'off' position.
3.5.3. Fill the brush bottle and fit as in 3.4.2., turn the control wheel (fig.7.B) to release
the detergent.
fig.4
fig.5
© Jack Sealey Limited
Original Language Version
fig.3