Fig.4 fig.3 – Sealey GSC110385SP User Manual
Page 3
NOTE: It is our policy to continually improve products and as such we reserve the right to alter data, specifications and component parts without prior notice.
IMPORTANT: no liability is accepted for incorrect use of this product.
wARRANTY: Guarantee is 12 months from purchase date, proof of which will be required for any claim.
INFORMATION: For a copy of our latest catalogue and promotions call us on 01284 757525 and leave your full name and address, including postcode.
01284 757500
01284 703534
Sole UK Distributor, Sealey Group,
Kempson Way, suffolk Business
Park
, Bury st. Edmunds, suffolk,
IP32 7AR
www.sealey.co.uk
Web
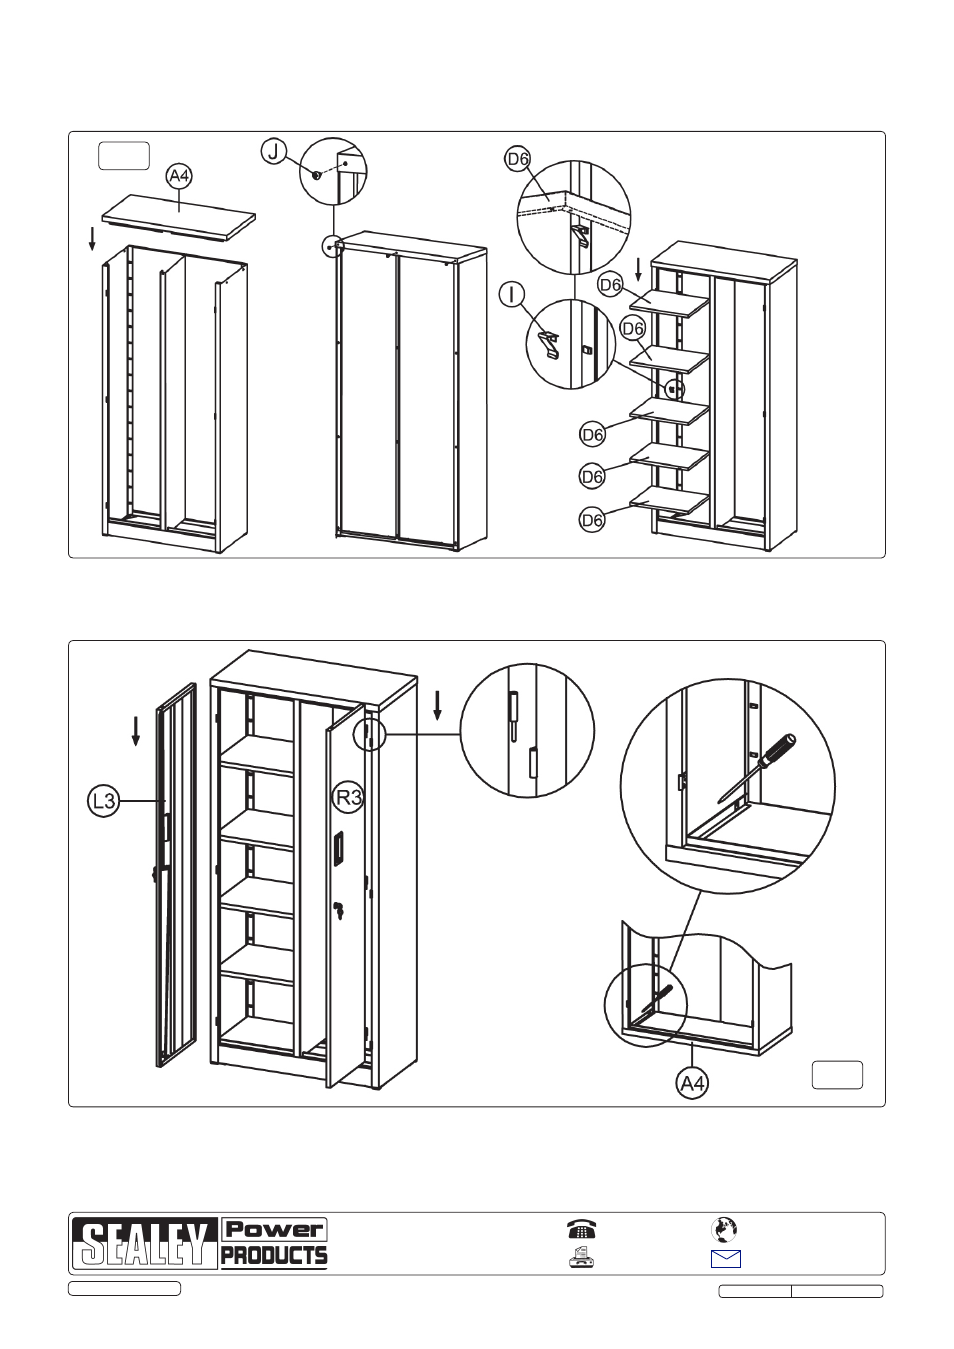
4.5. Install R3 right door and L3 left door by positioning the lift-off hinges over their locators and dropping into position (fig.4).
If any dismantling is required, use a flat headed screwdriver to release the clip on the top panel as shown in fig.4.
4.4. Install A4 top panel and fix in place using J self tapping screws. Place I shelf supports in the four corners for each
required shelf location. Locate shelves on the shelf supports (fig.3).
Fig.4
Fig.3
Original Language Version
GSC110385SP Issue: 1 - 16/07/12
© Jack Sealey Limited