Sealey AP3020 User Manual
Ap3020, Models, Steel workbench 2mtr
INSTRUCTIONS FOR:
STEEL WORKBENCH 2mtr
Models:
AP3020
Thank you for purchasing a Sealey product. Manufactured to a high standard this product will, if used according to these instructions and
properly maintained, give you years of trouble free performance.
1.
SAFETY INSTRUCTIONS
IMPORTANT: PLEASE READ THESE INSTRUCTIONS CAREFULLY. NOTE THE SAFE OPERATIONAL REQUIREMENTS, WARNINGS & CAUTIONS.
USE THE PRODUCT CORRECTLY AND WITH CARE FOR THE PURPOSE FOR WHICH IT IS INTENDED. FAILURE TO DO SO MAY CAUSE
DAMAGE AND/OR PERSONAL INJURY AND WILL INVALIDATE THE WARRANTY. PLEASE KEEP INSTRUCTIONS SAFE FOR FUTURE USE.
2.
CONTENTS
1.1
GENERAL SAFETY
!
WARNING! Ensure Health & Safety, local authority, and general workshop practice regulations are adhered to when using this
bench.
"
Locate bench in a suitable working area.
"
Keep the work area clean, uncluttered and ensure there is adequate lighting.
!
WARNING! Use bench on level and solid ground, preferably concrete. Avoid tarmacadam since the bench may sink into the surface.
"
Keep the bench clean and tidy in accordance with good workshop practice.
"
Keep children and unauthorised persons away from the working area.
!
WARNING! This bench is not electrically insulated and is therefore not suitable for electrical repairs of any sort.
#
DO NOT use the bench for any purpose other than that for which it is designed.
#
DO NOT undertake work on the bench without the workpiece being adequately secured. Use clamps or a vice (not included) to
secure the workpiece, both available from your Sealey dealer.
#
DO NOT use the bench out of doors.
#
DO NOT get the bench wet or use in damp or wet locations or areas where there is condensation.
#
DO NOT clean the bench with any solvents which may damage the paint surface.
AP3020 - 1 - 300507
CONTENTS
ITEM QUANTITY
STEEL WORKTOP
(1)
SHELF
(1)
LOCK AND KEYS
(1)
DRAW (1)
DRAW RETAINING
(1)
PLATE
LEGS & FIXINGS
(4)
PACK OF FIXINGS
M17 BOLTS
(14)
M17 NUTS
(14)
SERRATED WASHERS (14)
SELF TAPPING
(2)
SCREWS
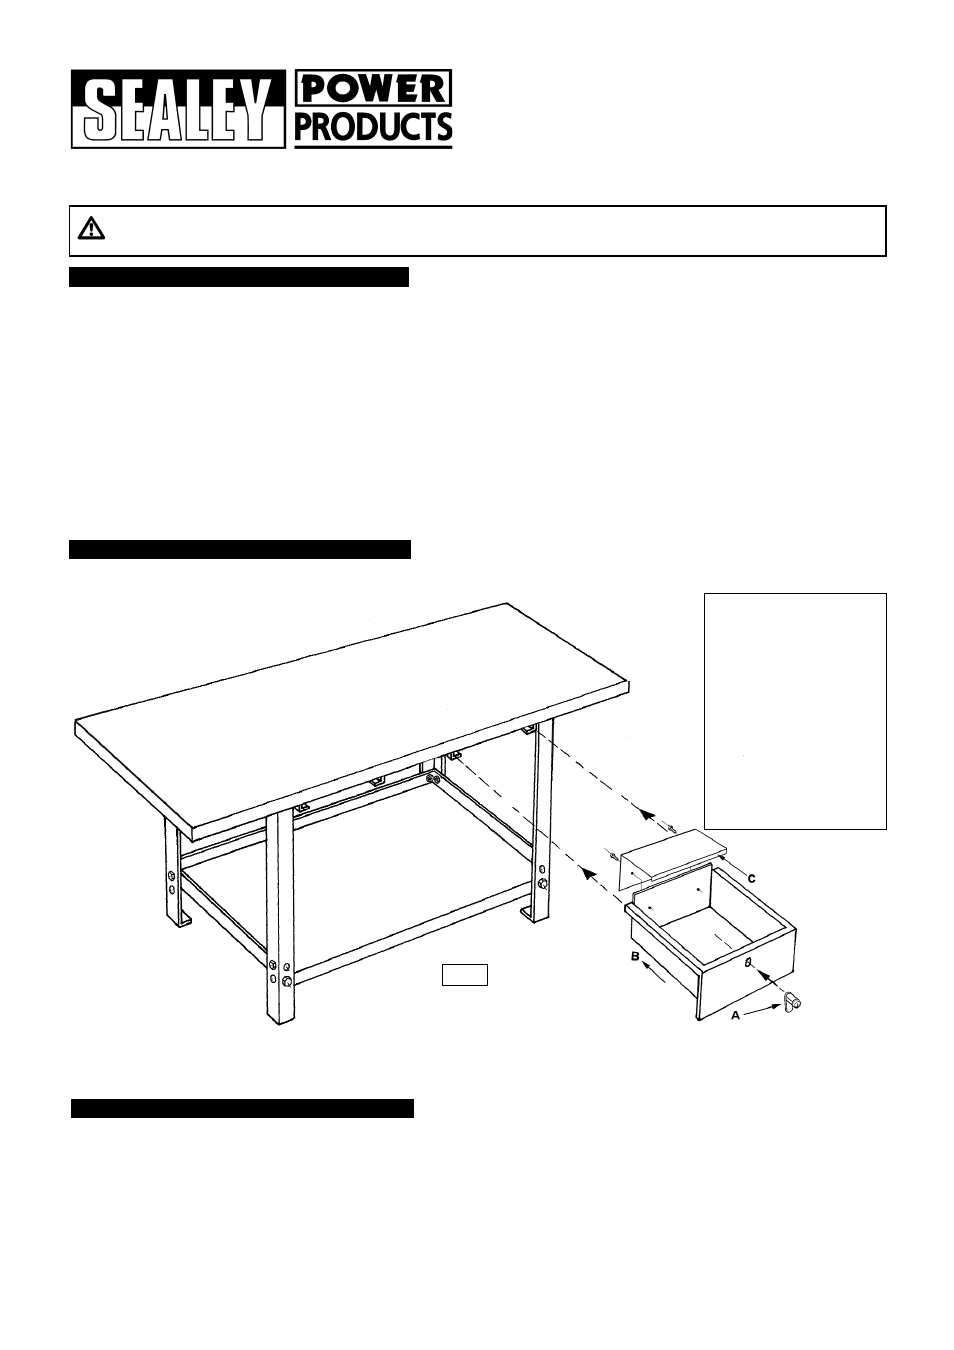
fig. 1
2.1
Remove all parts and fixings from the box. Ensure that you have adequate help to remove the bench top from the box ( It is too heavy
for one person to safely lift).
2.2
Check the contents against the parts listed above. Should there be any damaged
or missing parts contact your supplier immediately.
3.
ASSEMBLY
3.1
The bench should be built upside down. Do not turn the right way up until all bolts have been fully tightened.
3.2
Lay one of the legs on the floor and place the shelf onto it as shown in fig. 2.A . The shelf must be supported until both bolts are in place. The
turned down lip at the front of the shelf should be nearest to the foot. Place a bolt into the hole nearest to the foot and hand tighten the nut down
onto a washer. Continue to support the shelf. Turn it through 90 degrees so that you can bolt the same leg to the other side of the shelf. Only
hand tighten at this stage.
3.3
Now attach a second leg to the shelf using two sets of fixings as shown fig. 2.B.
3.4
Put some protective material onto the floor and place the bench top face down on top of it. Refer to fig. 3. Attach the remaining two legs to the
back edge of the upturned bench using the nuts, bolts and washers provided, as shown in fig. 3.A.