Assembly – Sealey AP2010 User Manual
Page 2
3. ASSEMBLY
AP2010 - 1 - 180102
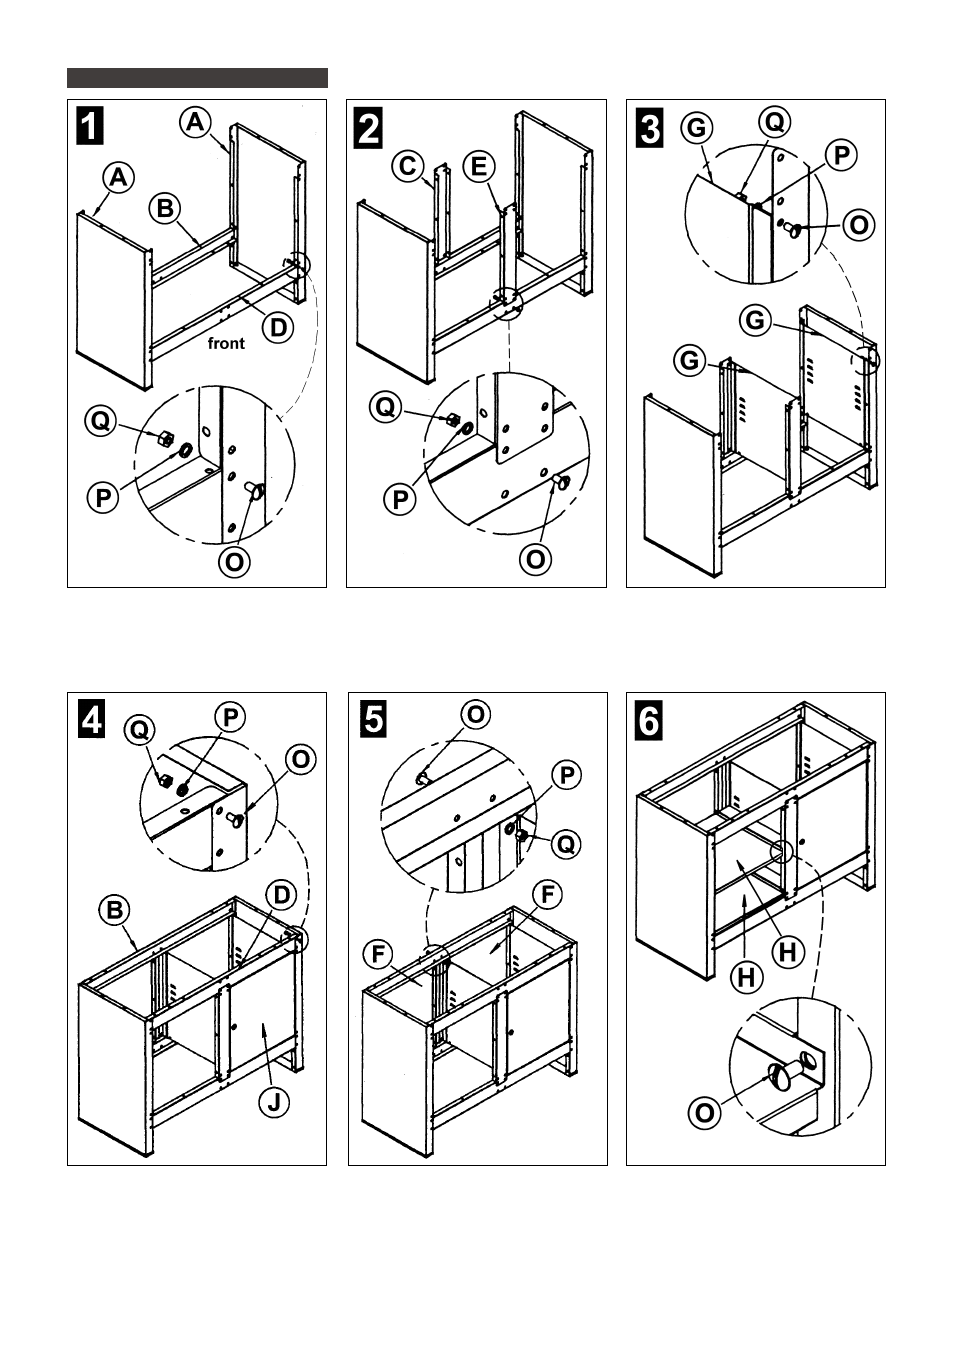
STEP 1. Take one crossrail (B) and one
crossrail (D) and bolt them to the cabinet sides
(A) using 8 bolts (O), 8 lock washers(P), and 8
nuts (Q). Ensure that the pairs of holes that
accept the corner braces are facing
downwards. ( Refer to STEP 8.)
STEP 4. Bolt into position rear crossrail (B).
Take door (J) and drop lower hinge pin into the
hole in lower cross rail. Hold door in position
and bolt in place front crossrail (D) ensuring
that the upper hinge pin has entered the hinge
hole in underside of crossrail. You will need 12
bolts (O), 12 lock washers (P), and 12 nuts (Q).
STEP 5. Bolt the two back wall panels (F) to
the rear of the cabinet using 8 bolts (O), 8 lock
washers (P), and 8 nuts (Q).
STEP 6. Bolt the two shelf parts (H) into the left
hand compartment of the cabinet using 8 bolts
(O), 8 lock washers (P), and 8 nuts (Q).
STEP 2. Bolt centre support (C) to the rear
lower crossrail (B) and front centre support (E)
to the front lower crossrail (D) using 4 bolts (O),
4 lock washers(P), and 4 nuts (Q).
STEP 3. Bolt inner shelf supports (G) to the
centre supports and right hand side panel
using 4 bolts (O), 4 lock washers (P), and 4
nuts (Q). Leave out top bolt on rear centre
support until back panel is required in STEP 5.