Sealey GSS150819SL User Manual
Page 7
7. ASSEMbLY
GSS150819SL Issue: 1 - 30/08/12
7.1 ASSEMbLE THE REAR WALL PANELS
7.1.1 You will find it easier to assemble the shed using trestles, with timber studding of equal or greater panel
length. Trestles are available separately from your Jack Sealey Dealership. Attach the studding to trestles
with equal overhang using nylon cable ties or similar “safe” method.
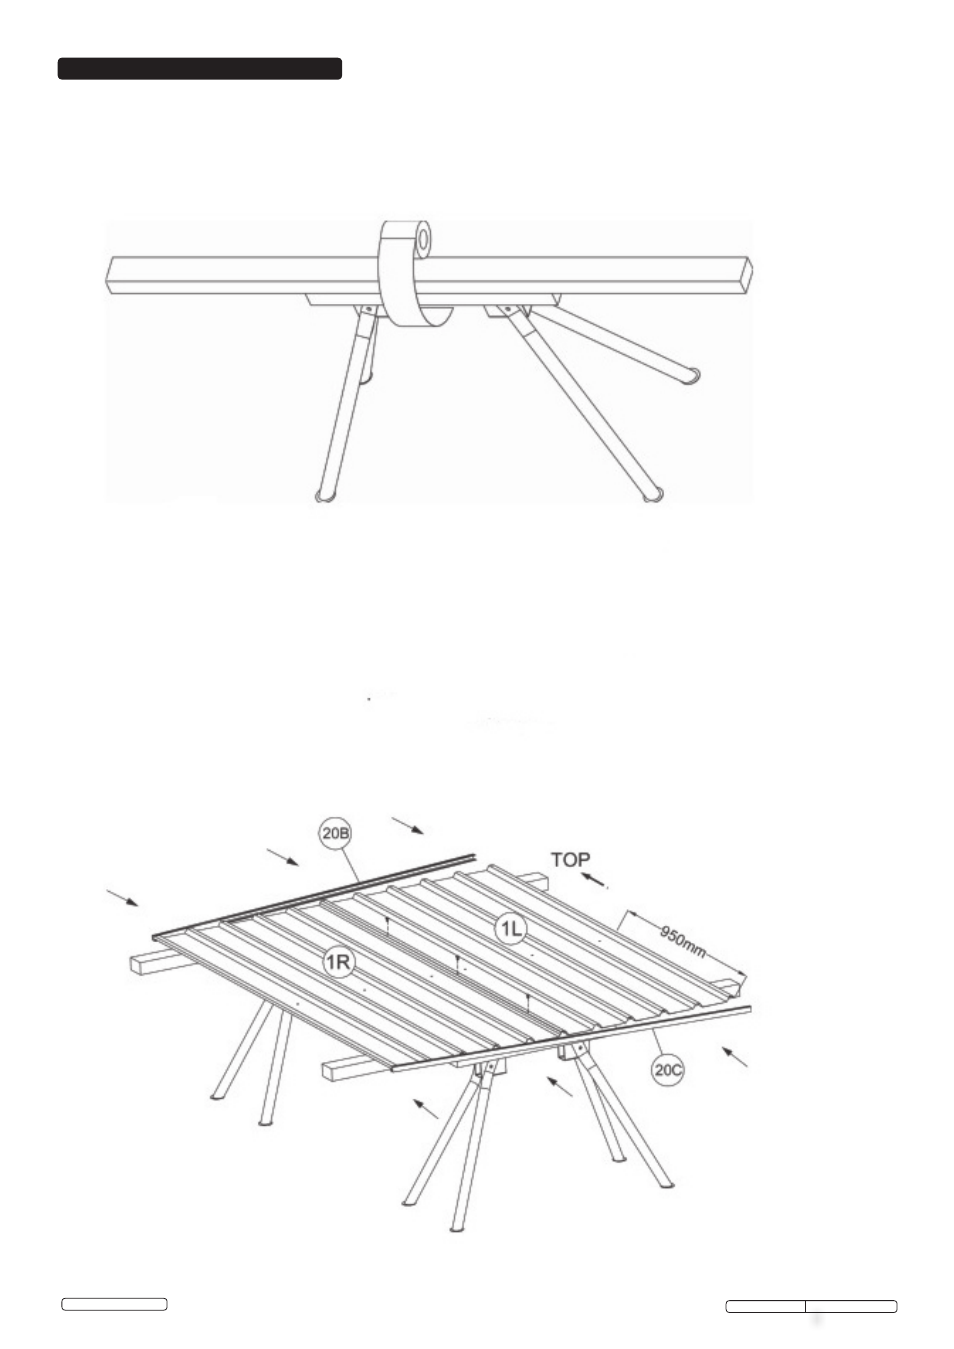
7.1.2 Place panel 1R and 1L on your work table and join them together with the 10mm long self tapping screws.
See the pre-punched holes and diagram below.
7.1.3 Fit top and bottom channels 20B and 20C to panels by firstly sliding and finally tapping into place as indicated
by arrows in the diagrams Note that the smaller flange on the channels should always be adjacent to the out
side face of the panel; this prevents rainwater entering the compartment of the shed. The outside face is the
top face in the diagram below.
© Jack Sealey Limited
Original Language Version