Fig. 6, Maintenance, Spot welding procedure – Sealey SR122 User Manual
Page 4
WARNING: unplug from the mains power supply before performing maintenance or service.
7.1
Ensure the welder and cable are in sound condition and good working order.
7.2
We recommend that you have your welder serviced on a regular basis by an authorised service agent.
During any inspection of the inside of the machine for repairs or cleaning the following checks should be made.
7.2.1 Remove dust and metallic particles deposited on the transformer and on internal walls etc, using a jet of dry compressed air
(max 10bar). Do not direct the jet of compressed air onto the electronic circuit boards; clean them with a very soft brush if necessary.
7.2.2 Check the wiring for insulation damage or loosened/oxidised connections.
7.2.3 Check that the screws, connecting the flexible element to the transformer and to the upper arm supports, are tightened up and there
are no signs of oxidation or overheating.
7.2.4 Replace or repair damaged parts. Use recommended parts only, unauthorised parts may be dangerous and will invalidate the
warranty.
7.3
Keep the welder clean for best and safest performance. Do not clean with water, strong solvents, paint thinners or gasoline.
7.4
If welding performance is poor make the following preliminary checks.
7.4.1 When the welding/clamp lever is depressed make sure that the spigot at the end of the handle on the underside, actually touches and
presses the microswitch thus turning on the welding current.
7.4.2 Check the security and condition of the arm holder clamps and screws and the electrode clamps and screws. If these are loose or
oxidized it will effect the efficiency of the welder.
7.4.3 Check that the welding parameters are correct in terms of welding time, electrode pressure and diameter.
7.4.4 If these checks do not reveal the source of the problem take the welder to an authorised service agent
7. MAINteNANCe
fig. 6
6.2
thermostatic protection led indicator.
When all the LEDs on the control panel go off and the two welding mode LEDs (
see fig.5-4 ) begin to flash
alternately this indicates that the transformer is beginning to overheat and the thermal cut out has operated.
Allow the welder to cool for at least 5 minutes before attempting to weld again.
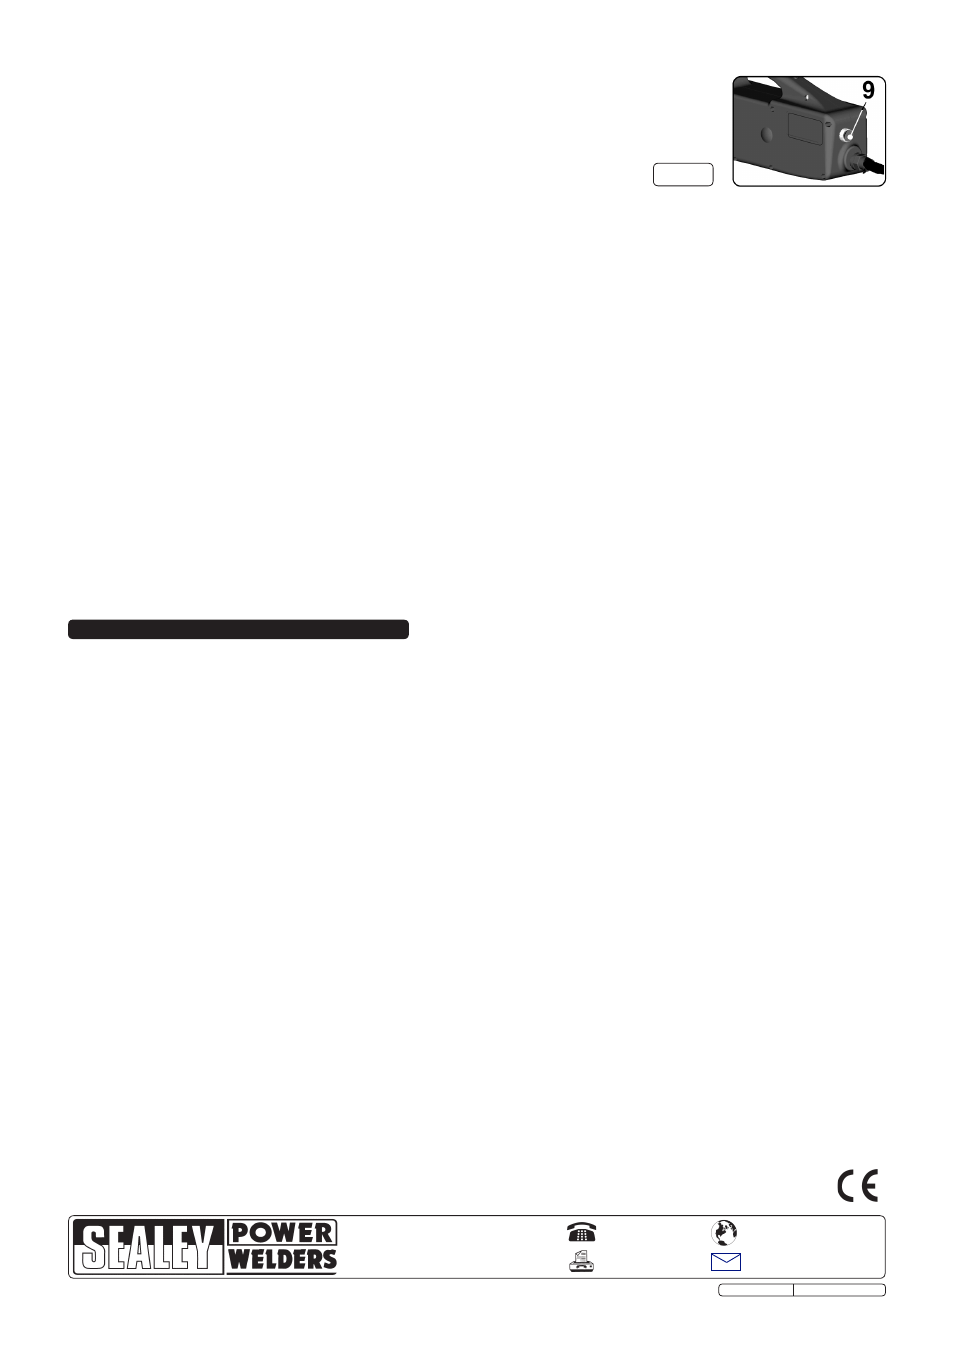
6.3
spot welding with sr122 ( electronic timer ).
Adjust the welding time by using the control mounted on the rear of the unit.
(
see fig.6-9 )
6.4
spot weldING proCedUre.
wArNING! ensure that you read and understand the safety instructions in section 1.
Use welder in a suitable working area. Keep area clean and tidy, free from unrelated materials and ensure there is adequate lighting.
DO NOT allow untrained persons to operate the welder.
6.4.1 Ensure that you are fully prepared with all workpieces securely held and presented ready for spot welding.
6.4.2 Ensure that the welding arms and electrodes are correctly set up for the thickness you intend to weld. (
see sections 5.1 & 5.2 )
6.4.3 Ensure that you have correctly set the clamping pressure for the thickness you intend to weld. (
see section 5.3 )
6.4.4
turn on the mains power supply.
6.4.5 On Model SR122 set the appropriate welding time using the knob on the back face of the unit. (
see section 6.3 )
6.4.6 On Model SR123 set the welding time, welding thickness, and welding mode as required using the control panel on the
side of the unit. (
see section 6.1 )
6.4.7 Manoeuvre the unit so that the workpiece is between the arms. Allow the lower electrode to bear on the underside of the sheets to be welded.
Depress the welding lever until the upper electrode makes contact with the metal. Pause and check that the electrodes are positioned where
the weld is required. When satisfied continue to depress the lever to clamp the sheets together until the lever reaches the end of its travel and
operates the microswitch which turns on the current.
6.4.8 Do not release the clamp lever immediately but pause for a few moments first. This will give the weld improved mechanical
characteristics.
6.4.9 When all welds are completed turn off the mains power supply. Disconnect the unit and clean it . Store in a dry and safe environment
until next required.
(The effectiveness of spot welds should occassionally be tested to ensure you are using the right settings. When two spot welded sheets are
separated the area of the spot weld itself should not tear apart but remain attached to one of the sheets indicating that the weld is stronger than
the surrounding sheet.)
NOTE: It is our policy to continually improve products and as such we reserve the right to alter data, specifications and component parts without prior notice.
IMportANt: No liability is accepted for incorrect use of this product.
wArrANtY: Guarantee is 12 months from purchase date, proof of which will be required for any claim.
INForMAtIoN: For a copy of our latest catalogue and promotions call us on 01284 757525 and leave your full name and address, including postcode.
01284 757500
01284 703534
sole UK distributor, sealey Group,
Kempson Way, Suffolk Business Park
,
Bury St. Edmunds, Suffolk,
IP32 7AR
www.sealey.co.uk
Web
Original Language Version
SR122, SR123 Issue: 3 - 09/03/10