Defrosting and cleaning, Reversing the door fittings – Silvercrest STG 70 B2 User Manual
Page 8
6
GB
•
The shelf life of frozen foods varies. The following table
gives you some initial guidelines:
8.
Defrosting and cleaning
DANGER! Remove the power plug from the wall
socket before cleaning the device.
Risk of fire!
•
Do not use any pointed or sharp objects to clean, defrost
or remove deep-frozen goods and ice. This may damage
the refrigerant circuit.
•
Please use only the supplied ice spatula 12 to remove
partially thawed, loose ice. Do not touch the refrigerant
circuit 4 in the process.
•
Never use any electrical devices in the interior of the ap-
pliance.
•
Never handle sources of ignition or naked flames in the
interior of the appliance.
WARNING! Do not use any astringent or abrasive cleaning
agents.
Care and cleaning from the outside
•
If necessary, wipe the appliance from the outside with a
slightly moistened cloth (if required, with a little washing-
up liquid).
•
Make sure that the door seal 5 does not come into con-
tact with any oil or grease. This would accelerate the age-
ing process and the door would no longer close air-tight.
Defrosting and cleaning the interior
TIP: Defrost your freezer regularly, as a layer of ice increases
the energy consumption.
1. 24 hours before defrosting, turn the temperature control-
ler 1 to SUPER, to create a cold reserve for the frozen
goods.
2. Turn the temperature controller 1 beyond the slight resist-
ance to OFF.
3. Unplug the appliance.
4. Remove the frozen goods from the appliance, pack them
tightly in newspaper and store them in as cold a location
as possible.
5. Leave the door open and collect the melted water with a
sponge or cloth.
Do not attempt under any circumstances to
accelerate the defrosting process with objects,
naked flames or electrical appliances.
6. After defrosting, wipe out the interior with water contain-
ing a little added vinegar.
7. Dry the interior extremely carefully.
8. Close the door and turn the temperature controller 1
clockwise to SUPER.
9. Put the frozen goods back in place.
10. Use a freezing thermometer to check the temperature.
After several hours, turn the temperature controller 1
back to your normal temperature setting.
Relatively long periods without use
If you intend not to use your appliance for a relatively long pe-
riod of time, please proceed as follows:
1. Turn the temperature controller 1 beyond the slight resist-
ance to OFF.
2. Unplug the appliance.
3. Defrost the appliance and clean it.
4. Dry the interior thoroughly.
5. Leave the door open to prevent the formation of any
smells in the interior.
9.
Reversing the door fittings
In delivery condition, your freezer has the door fittings on the
right. To switch the door fittings to the left-hand side, please
proceed as follows:
You will require:
-
a second person to help you moving and tilting the
freezer;
-
a cross-head screwdriver, size PH1, PH2.
This is how it’s done
DANGER! Disconnect the power plug before revers-
ing the door fittings.
WARNING!
•
Do not tilt the freezer more than a maximum of 45 °.
•
Move the appliance only when it is empty.
TIP: Place all individual parts that you remove safely to one
side and note the locations where you removed them from.
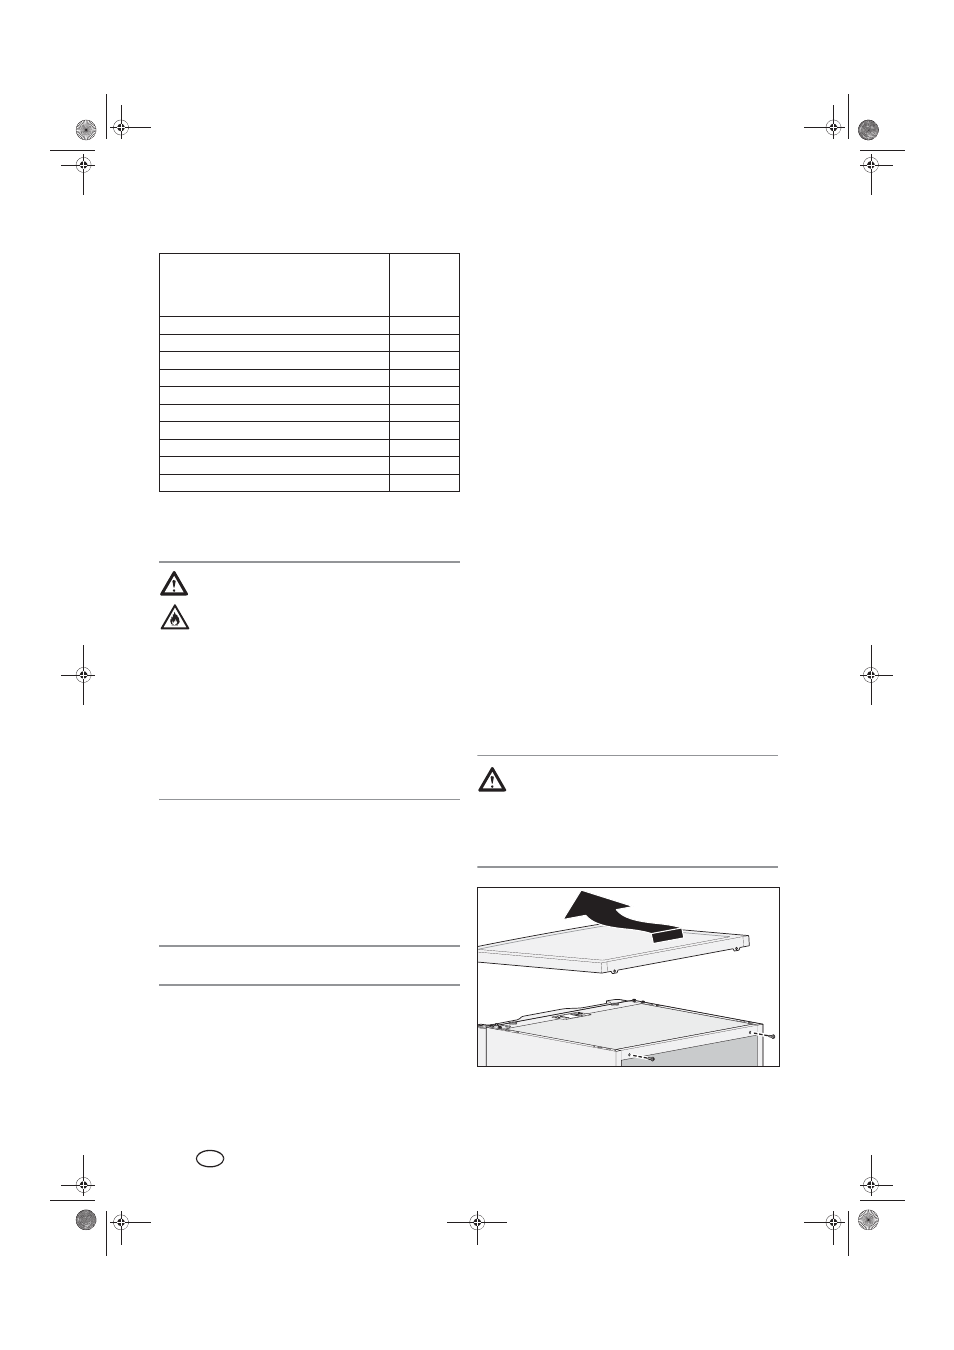
1. Unscrew the two screws on the rear panel that fasten the
upper cover plate.
2. Lift the cover plate slightly at the rear, push it forwards a
short distance and then remove it.
Foods
Maximum
storage
time in
months
Fully prepared foods
3
Beef
10 - 12
Pork
4 - 7
Poultry
8 - 10
Game
6 - 8
Mince
1 - 3
Fish
1 - 4
Bread, rolls, pastry
1 - 3
Fruit
8 - 12
Vegetables
6 - 12
__RP62026_B6.book Seite 6 Sonntag, 6. Februar 2011 9:01 21