Setting up and connecting, Device description, Electrical connection – Silvercrest SLS 1000 A1 User Manual
Page 50: Gb mt
48
Setting up and connecting
SLS 1000 A1
GB
MT
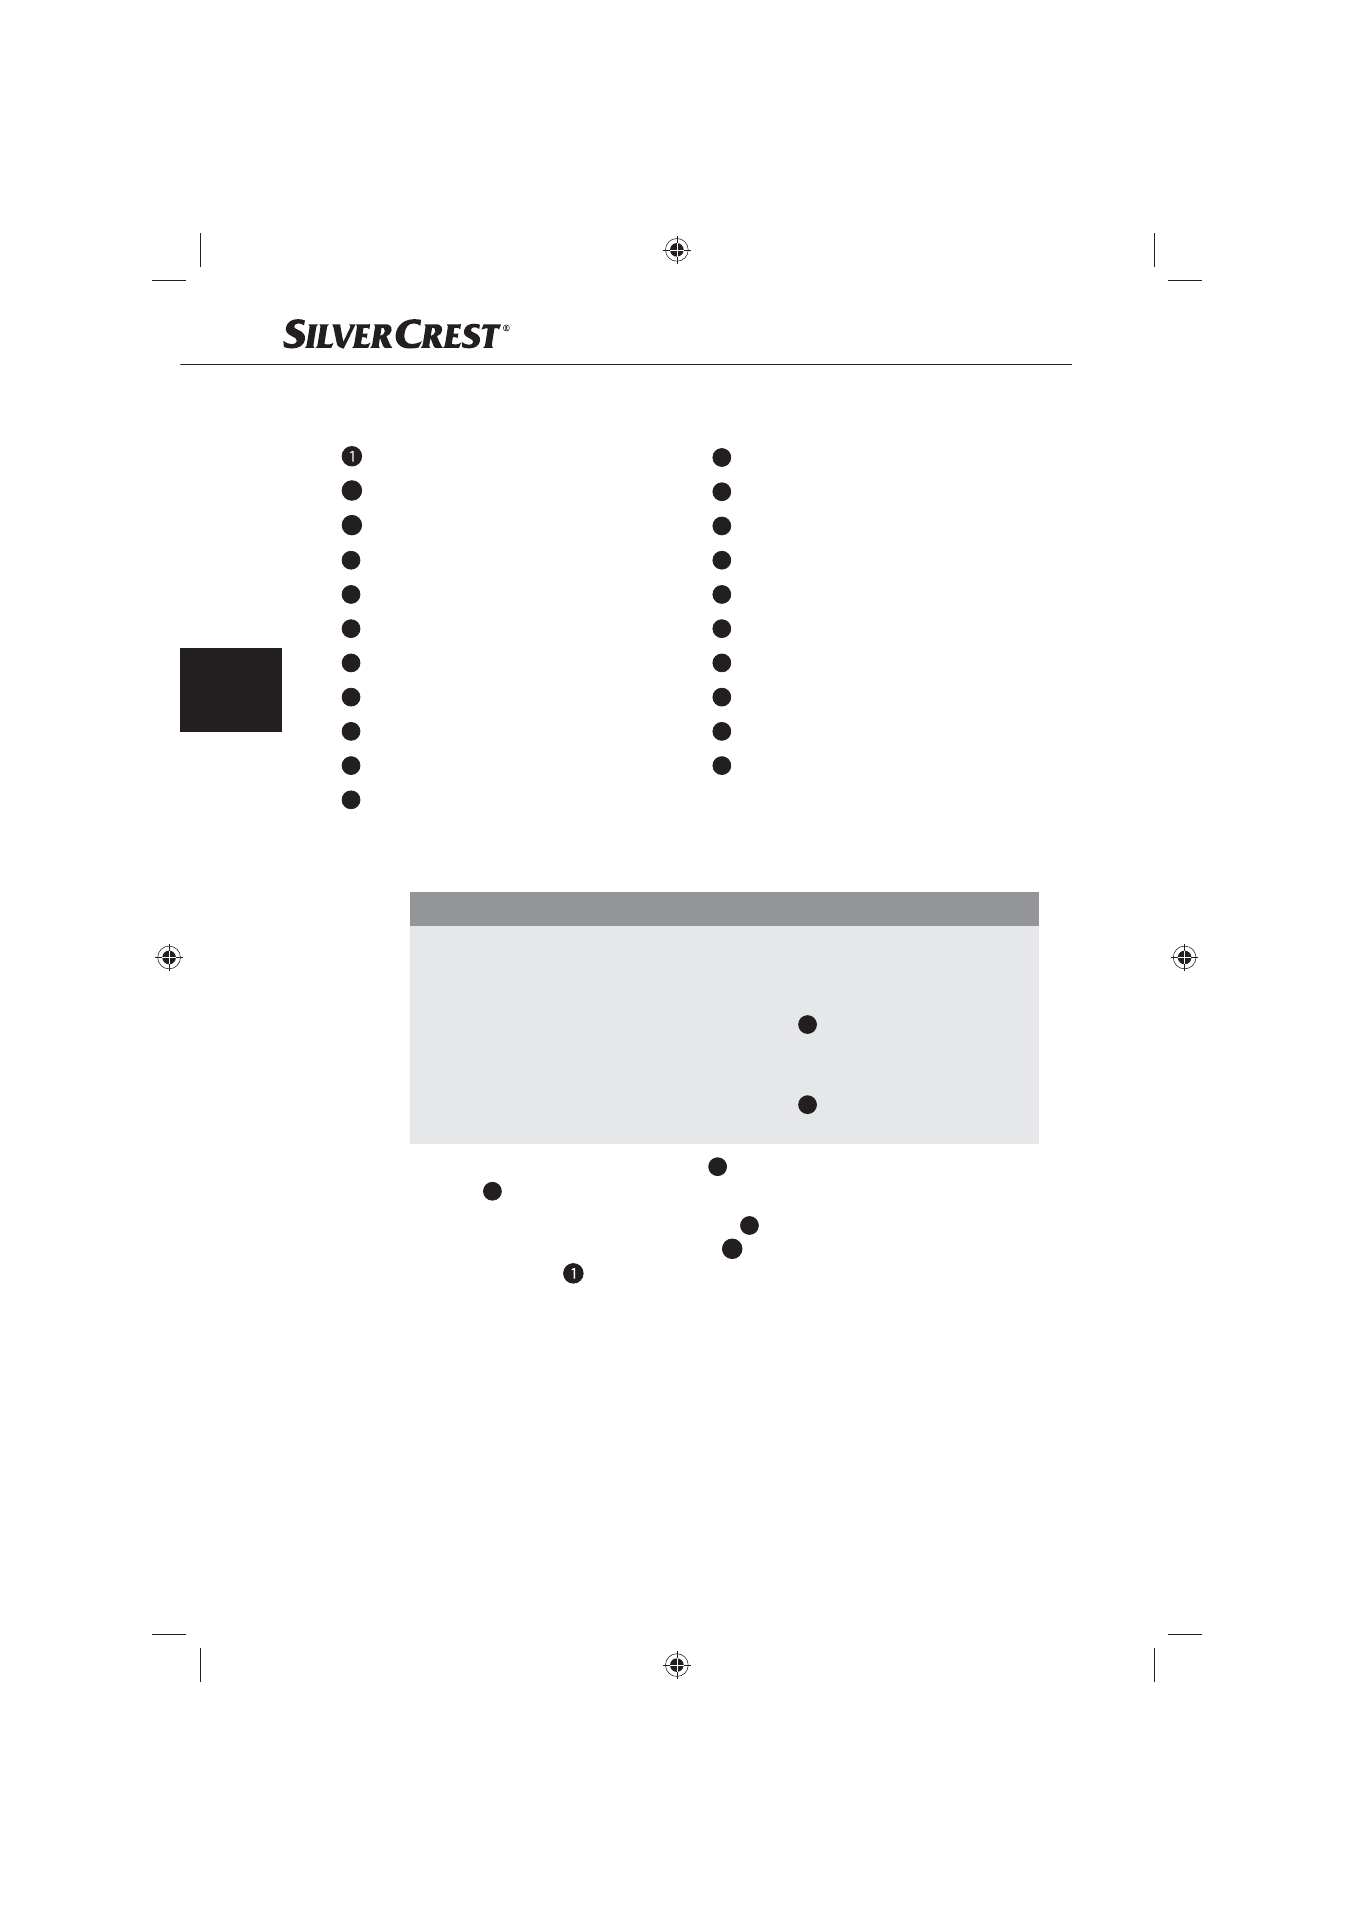
Device description
Charging station operation LED
2
Connection socket for power supply unit
3
Connection socket for the adapter cable
4
Connection socket for the adapter cable
5
Connection socket for the adapter cable
6
Connection socket for the adapter cable
7
USB port
8
Mains power supply unit
9
Mains power supply unit operation LED
10
Adapter cable Nokia large (MC01)
11
Adapter cable Nokia small (MC28)
12
Adapter cable Sony Ericsson (MC11)
13
Adapter cable Playstation Portable (MC20)
14
Adapter cable Motorola (MC07)
15
Adapter cable Siemens (MC02)
16
Adapter cable Nintendo DS Lite (MC22)
17
Adapter cable Samsung (MC25)
18
Adapter cable Mini USB (MC17)
19
Adapter cable Micro USB (MC19)
20
Adapter cable LG (MC12)
21
iPod/iPhone cable
Electrical connection
IMPORTANT
Before connection of the device compare the specifi cations for the required
►
input voltage on the rating plate with the intended voltage source for opera-
tion. This data must be compatible to avoid possible damage to the device.
Make sure that the mains power supply unit's
►
8
cable is not damaged
and does not run across hot surfaces and/or sharp edges, otherwise it will
become damaged.
Make sure that the mains power supply unit's
►
8
cable is not stretched or
knoted.
Plug the mains power supply unit
♦
8
into a mains wall socket. The operation
LED
9
lights up.
Connect the mains power supply unit
♦
8
to the charging station by inserting
the plug into the connection socket
2
on the rear panel of the device. The
operation LED lights up.