Multi-Contact MA260 User Manual
Page 5
Advanced Contact Technology
www.multi-contact.com
5 / 8
16
14
15
17
13
(ill. 13)
4 . Verifi que la crimpadora en forma
visual.
(ill. 13)
4. Visually check the crimp.
Nota:
Instrucciones de montaje de las
herramientas de engarce, mirar
MA251, www.multi-contact.com
Note:
to the operation of the crimping
pliers, see MA251, www.multi-
contact.com
Comprobación del montaje
Assembly control
(ill. 14)
Inserte el contacto engarzado en el
aislador del pin macho o hembra
hasta que se encaje haciendo un
clic. Tire suavemente del cable para
comprobar que la parte metálica esté
correctamente acoplada.
(ill. 14)
Insert the crimped-on contact into the
insulator of the male or female coupler
until it clicks into place. Pull gently on
the lead to check that the metal part is
correctly engaged.
(ill. 15)
Introduzca la clavija de ensayo por su
cara apropiada en la conexión hembra
hasta llegar a fondo. Si el contacto
está correctamente montado, la
marca blanca estará permanente-
mente visible.
(ill. 15)
Insert the appropriate end of the test
pin into the male or female coupler as
far as it will go. If the contact is cor-
rectly located, the white mark on the
test pin must still be visible.
(ill. 16)
Apriete el pasacables con la herrami-
entas PV-MS
o
(ill. 16)
Screw up the cable gland hand-tight
with the tools PV-MS
or
(ill. 17)
Apretar el prensa-estopas con las
herramientas PV-WZ-AD/GWD y PV-
SSE-AD4.
(ill. 17)
Tighten the cable gland with the tools
PVWZ-AD/GWD and PVSSE-AD4.
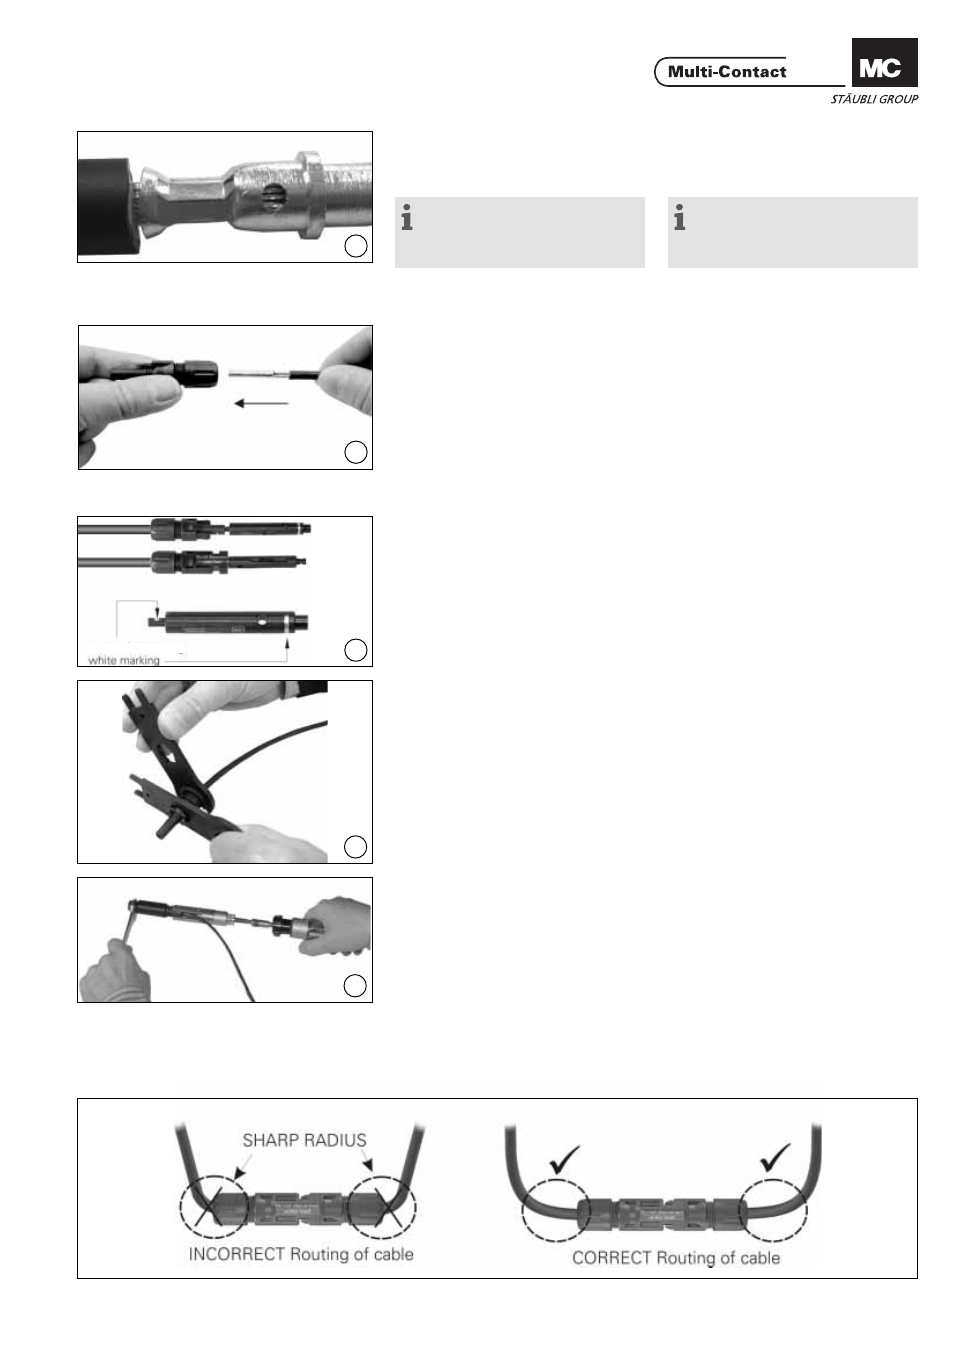
Disposición del cable
Cable routing
Referir a la especifi cación del fabrican-
te del cable para el radio de curvatura.
Refer to cable manufactures specifi ca-
ton for minimum bending radius.
marco blanca