Mounting the sounder – RISCO Group WL S50 User Manual
Page 5
Wireless Sounder Instructions
5
Mounting the Sounder
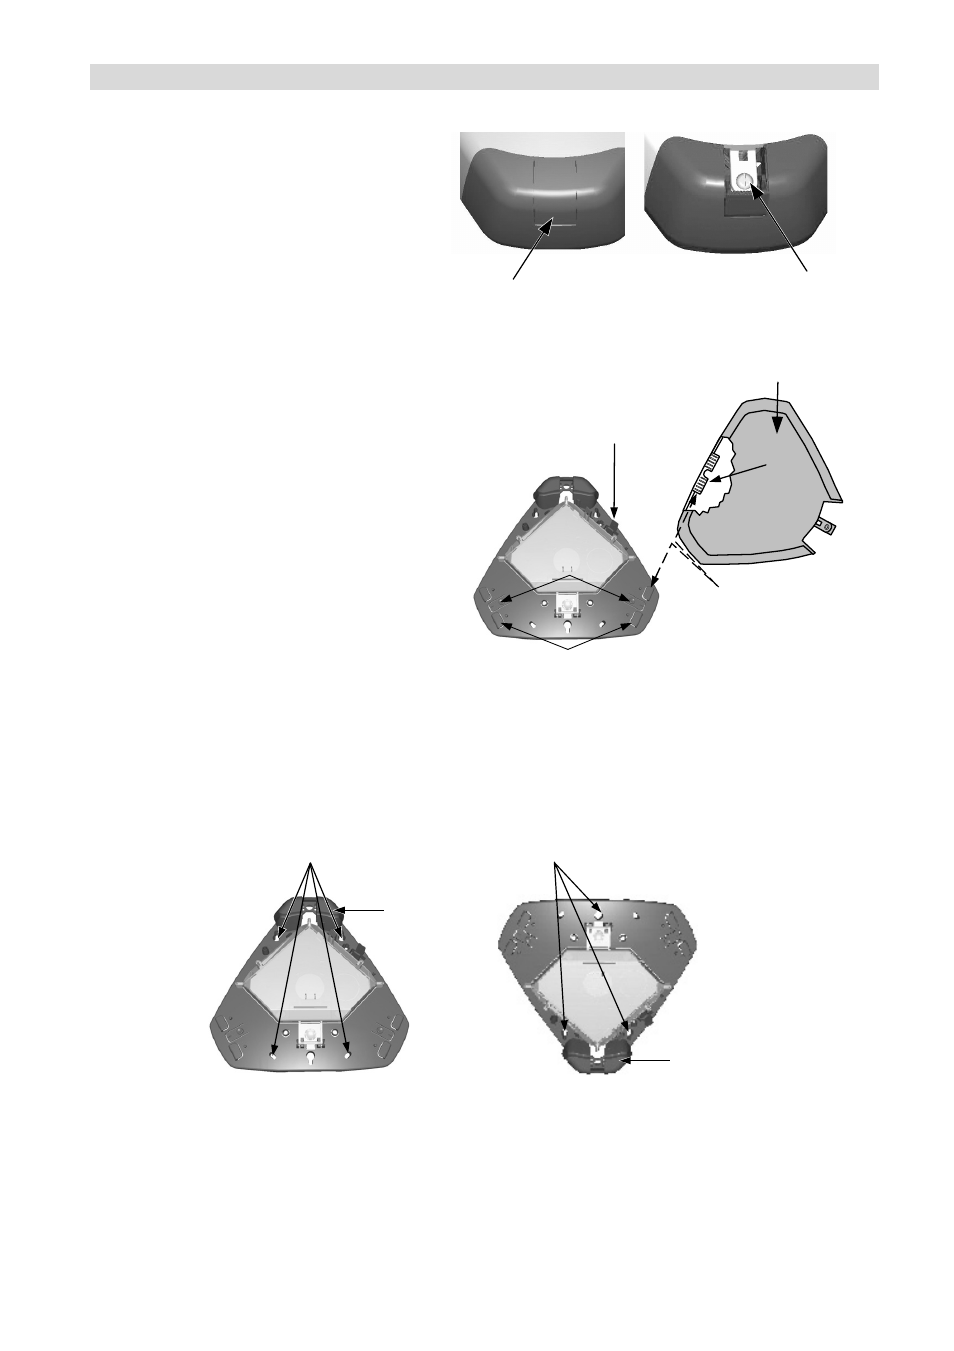
1) Open the screw cover by
applying thumb pressure on
the screw cover lower part.
When raised, push outwards.
Once you have gained
access to the cover screw,
open screw and lift the cover
away until cleared from the
back plate.
Siren cover
screw
Screw cover -
Lower section
2) Once the cover has been removed it
may be slid into one of the Cover
Holder Clips. This is done by
placing the cover next to the cover
holding clips and then sliding it into
place. To release cover, press the
release tab and slide cover out.
3) To reach the PCB release the inner
cover and lift the cover until it locks
in the raised position.
Release Tabs
Cover Holder
Clips
Sliding pattern of Tab
into the Cover holder clips
Cover - Exploded View
Tab
Retaining Clip -
Inner Cover
4) Position the sounder base plate against the wall and mark the securing holes
according to the strobe required position. The unit should be mounted to the wall
using at least three 2" No 10 screws and suitable wall anchors.
Fixing points with
strobe at the bottom
Strobe
Fixing points with
strobe at the top
Strobe
5) Insert the supplied batteries in the metal clips according to the polarity.
6) The sounder is ready for communication set up with the system.
7) Once the communication set up is completed, close the inner cover and reattach the
outer cover.