Programming the sounder, External sounder - pcb diagram – RISCO Group WL S50 User Manual
Page 6
6
Wireless Sounder Instructions
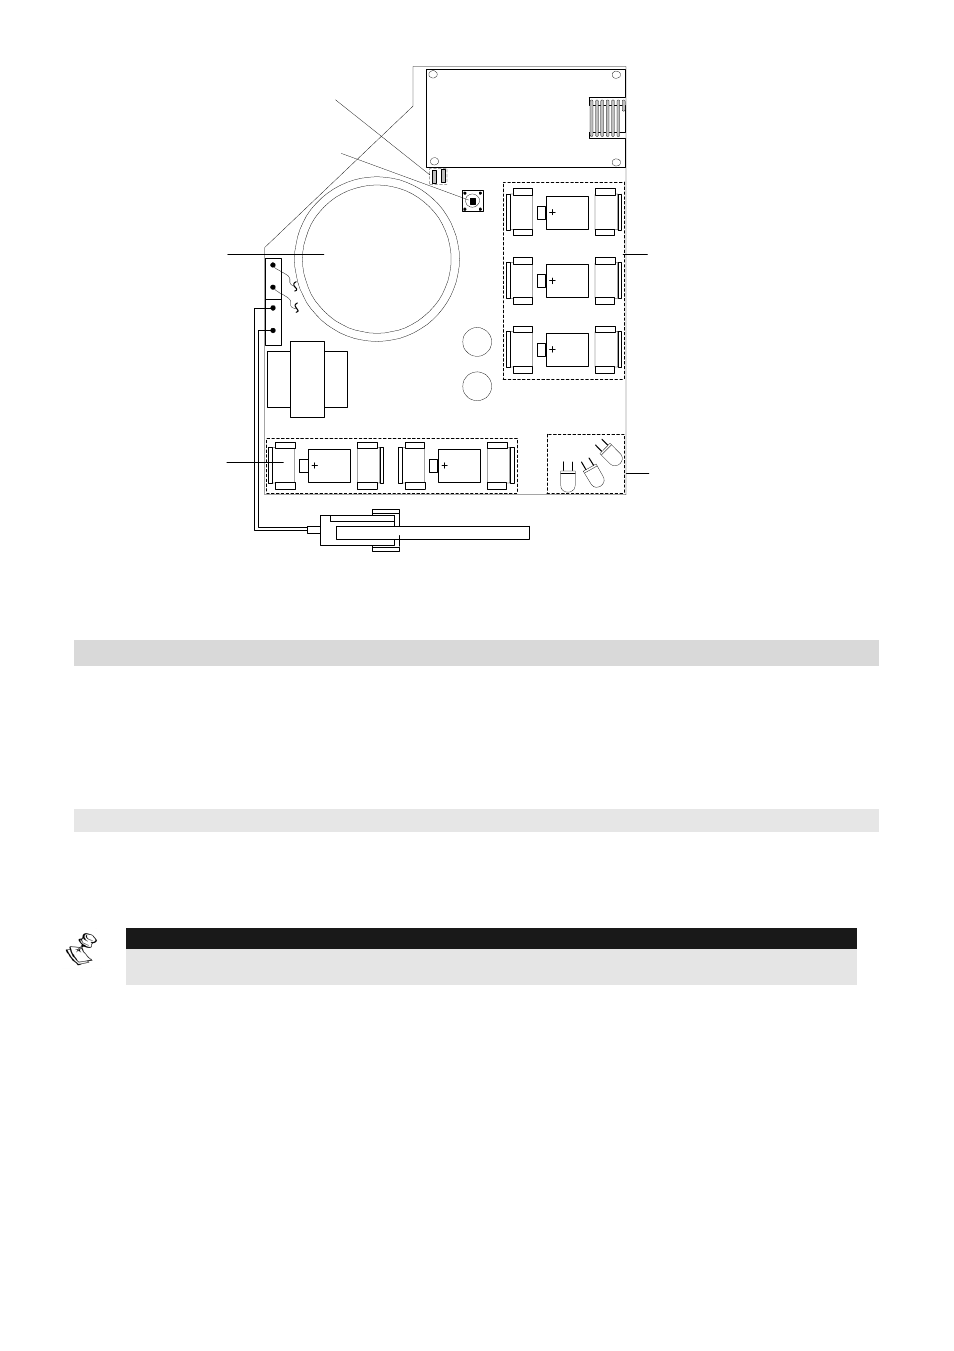
Speaker & Strobe
Batteries
(6V, Serial
Connection)
Speaker
Strobe
LEDS
Two Indication
LEDs
Reset Switch
S
P
E
A
K
E
R
T
A
M
P
E
R
Radio Batteries
(3V, Parallel
Connection)
External Sounder - PCB Diagram
Programming the sounder
Programming the wireless sounder consists of the following 3 steps:
1. Setting communication between the receiver and the sounder
2. Setting sounder parameters
3. Testing the sounder
Step 1: Sounder/Receiver Communication Set up
The sounder must identify itself to the system's receiver by writing its ID into the
system. Perform the following steps:
1. Set the receiver to the Write mode.
NOTE:
In the WisDom , as a first step, you need to allocate the sounder in the following programming location:
Main engineer menu> 9) Devices > 2)Sounder > 1) Allocation > Select sounder> Choose ODWS1
2. Select the sounder's ID.
3. Unpack the supplied batteries
4. Insert two speaker batteries and three Radio batteries into the batteries' holders.
5. After a squawk is heard
and the sounder's strobe flashes
you have 10 seconds to
press on the tamper switch for at least 3 seconds. If the sounder is successfully
recognized, the system will sound a confirmation beep and the sounder will initiate
a second squawk sound
and the 2 LEDs on the sounder will flash for 3 seconds
.
6. Repeat the process for other sounders in the system.