Retrotec House and Duct Simulator User Manual
Page 3
Page 2 of 4
Page 3 of 4
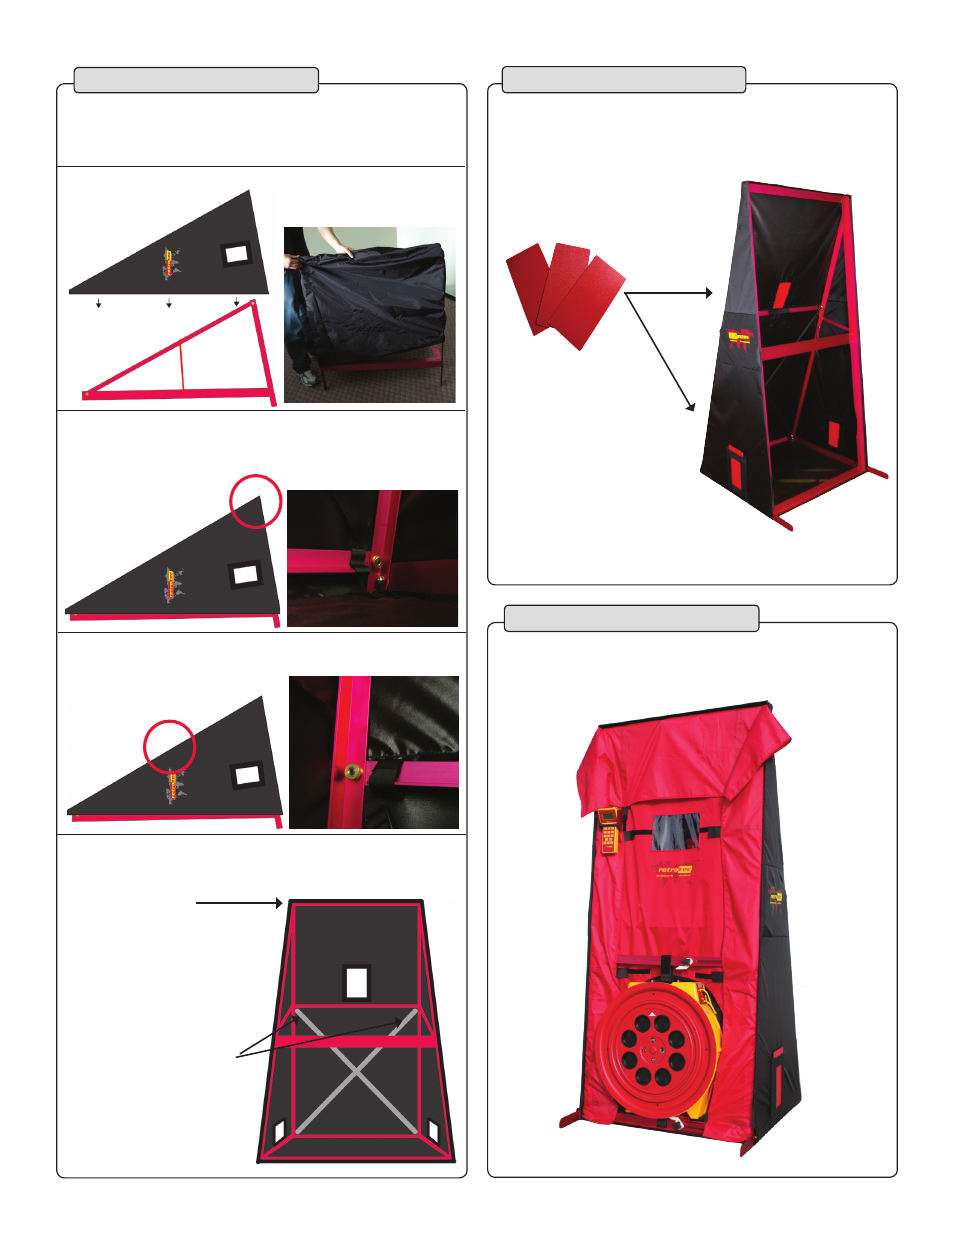
When installing the cloth tent, make sure that the logos
on the silk screening and vent on the back side of the
tent are on the upper portion of the frame.
Move down the frame and fold out and attach the
second cloth tent crossbar to the back side of the frame.
Once the two crossbars are installed, stand tent up.
Secure the Velcro strip along the front of the frame
until cloth is tight and a tent is formed.
The bottom crossbar will be found attached to the frame
inside of the cloth tent. Fold out and attach the bottom
cross-brace to the base of the frame.
Drape the cloth tent over the frame. Do not pull it snug.
Attach Cloth Tent:
Step 1
Attach Cloth Tent:
Step 2
Install Door Panel and Fan
The installation process
is now complete. The
simulator is ready to have
the door panel and fan
installed per the relevant QuickGuide.
Affix the velcro slides to the test tent. Press firmly
to ensure a tight fit without leaks. Use the slides to
increase or decrease the amount of air leakage to be
simulated.
Install the Door Panel and fan as you would for a
doorway to prepare the simulator for testing.
1. Secure Velcro
side view
top o
f frame
2. Pull cross-straps here
Next, reach inside the
tent to pull the cross-
straps tight, ensuring
support of test tent.